Italian Rainbow Cookies
This post may contain affiliate links. For more information, please see our disclosure policy.
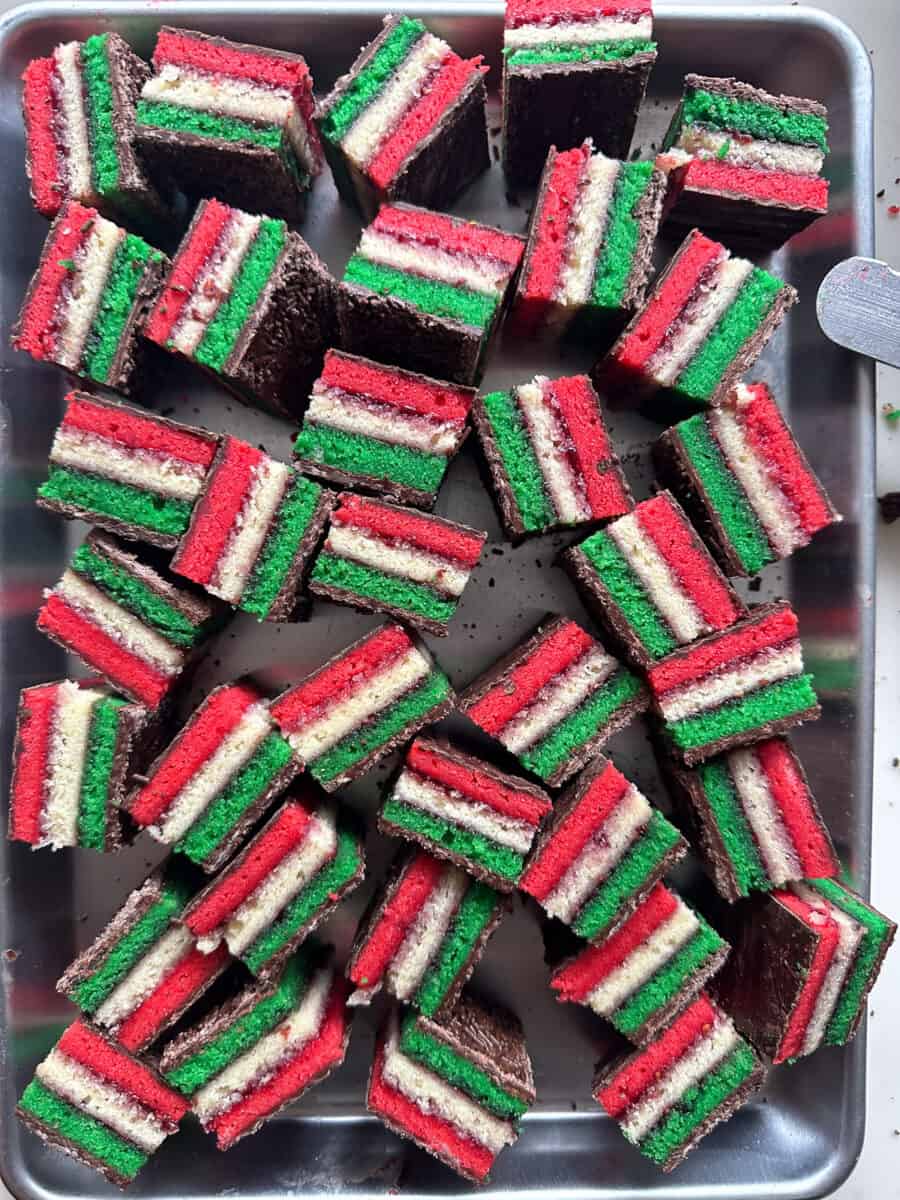

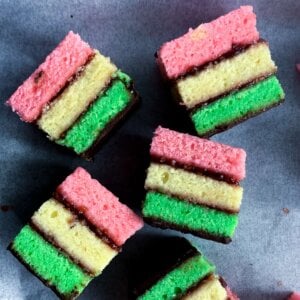
Revel in the charm of Italian Rainbow Cookies, also known as Tricolore or Venetian cookies, a beloved Italian-American bakery classic.
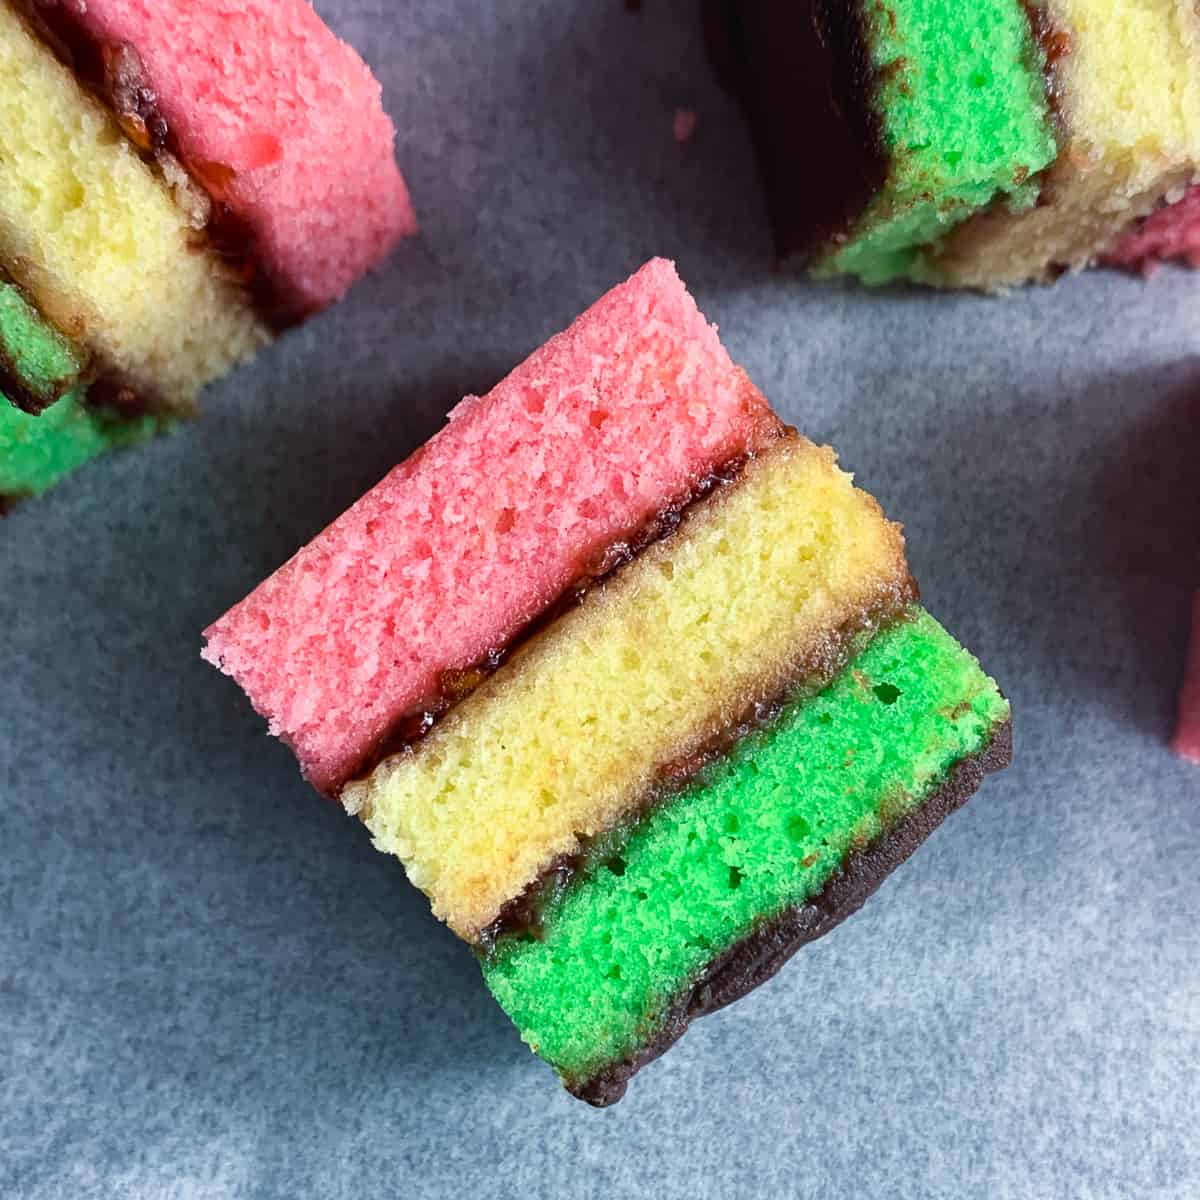
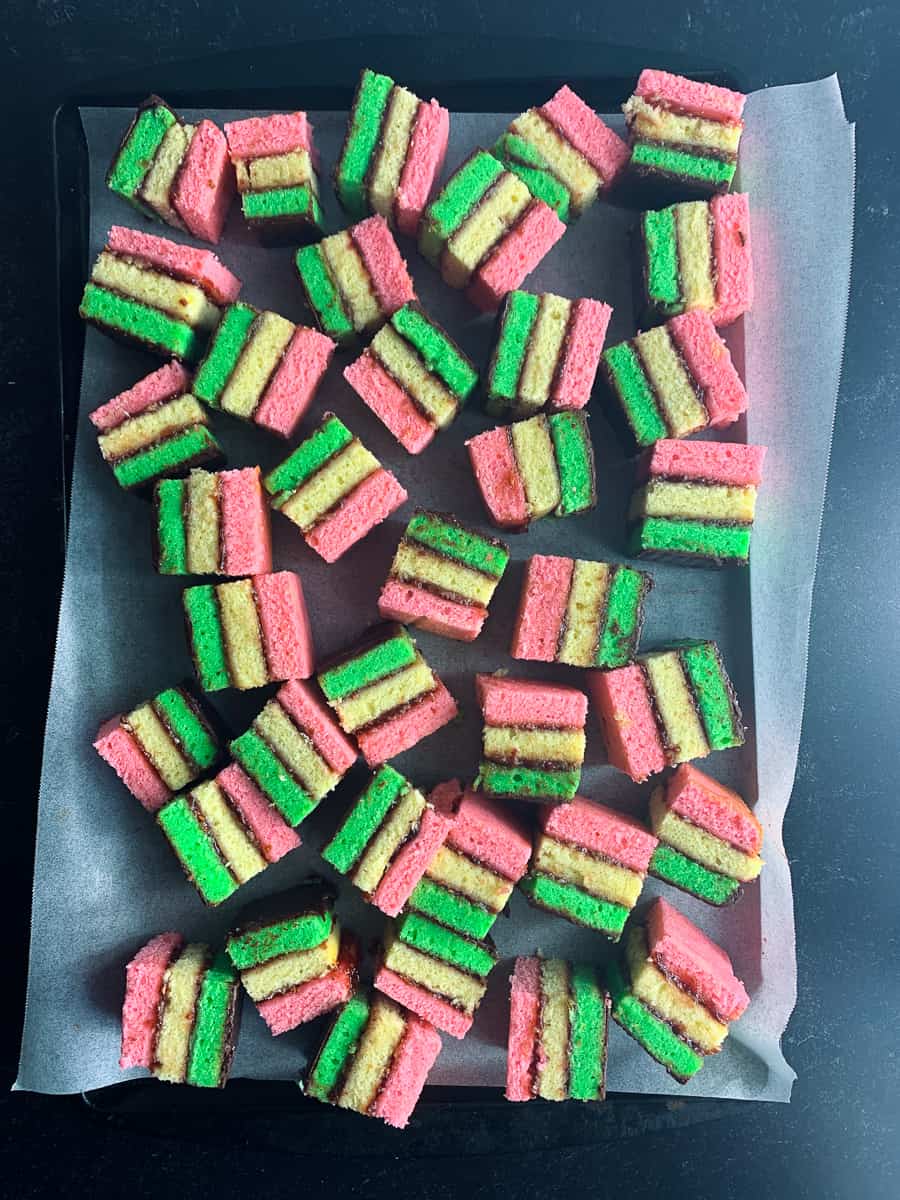
These cookies captivate with their three colorful layers in the hues of Italy’s flag, sandwiched with luscious apricot or raspberry jam and encased in a silky chocolate glaze.
These almond- and chocolate-flavored beauties are visually stunning and will surely be a hit at any gathering or as a delightful afternoon treat. And if you like Italian cookies made from almond flour/paste, make sure to check out my pignoli cookies.
Jump to:
History and Other Names
While the inspiration for rainbow cookies can be traced back to Italy, the modern version of these cookies, as we know them today, is widely believed to have originated in New York City. Italian immigrants in New York City played a significant role in popularizing these cookies and making them a staple in Italian-American bakeries and households.
Rainbow cookies are known by various names, and their popularity has led to different regional and cultural variations. Some of the other names for rainbow cookies include Italian Flag Cookies, Tricolor Cookies, Seven-Layer Cookies, and Venetian Cookies.
Ingredients
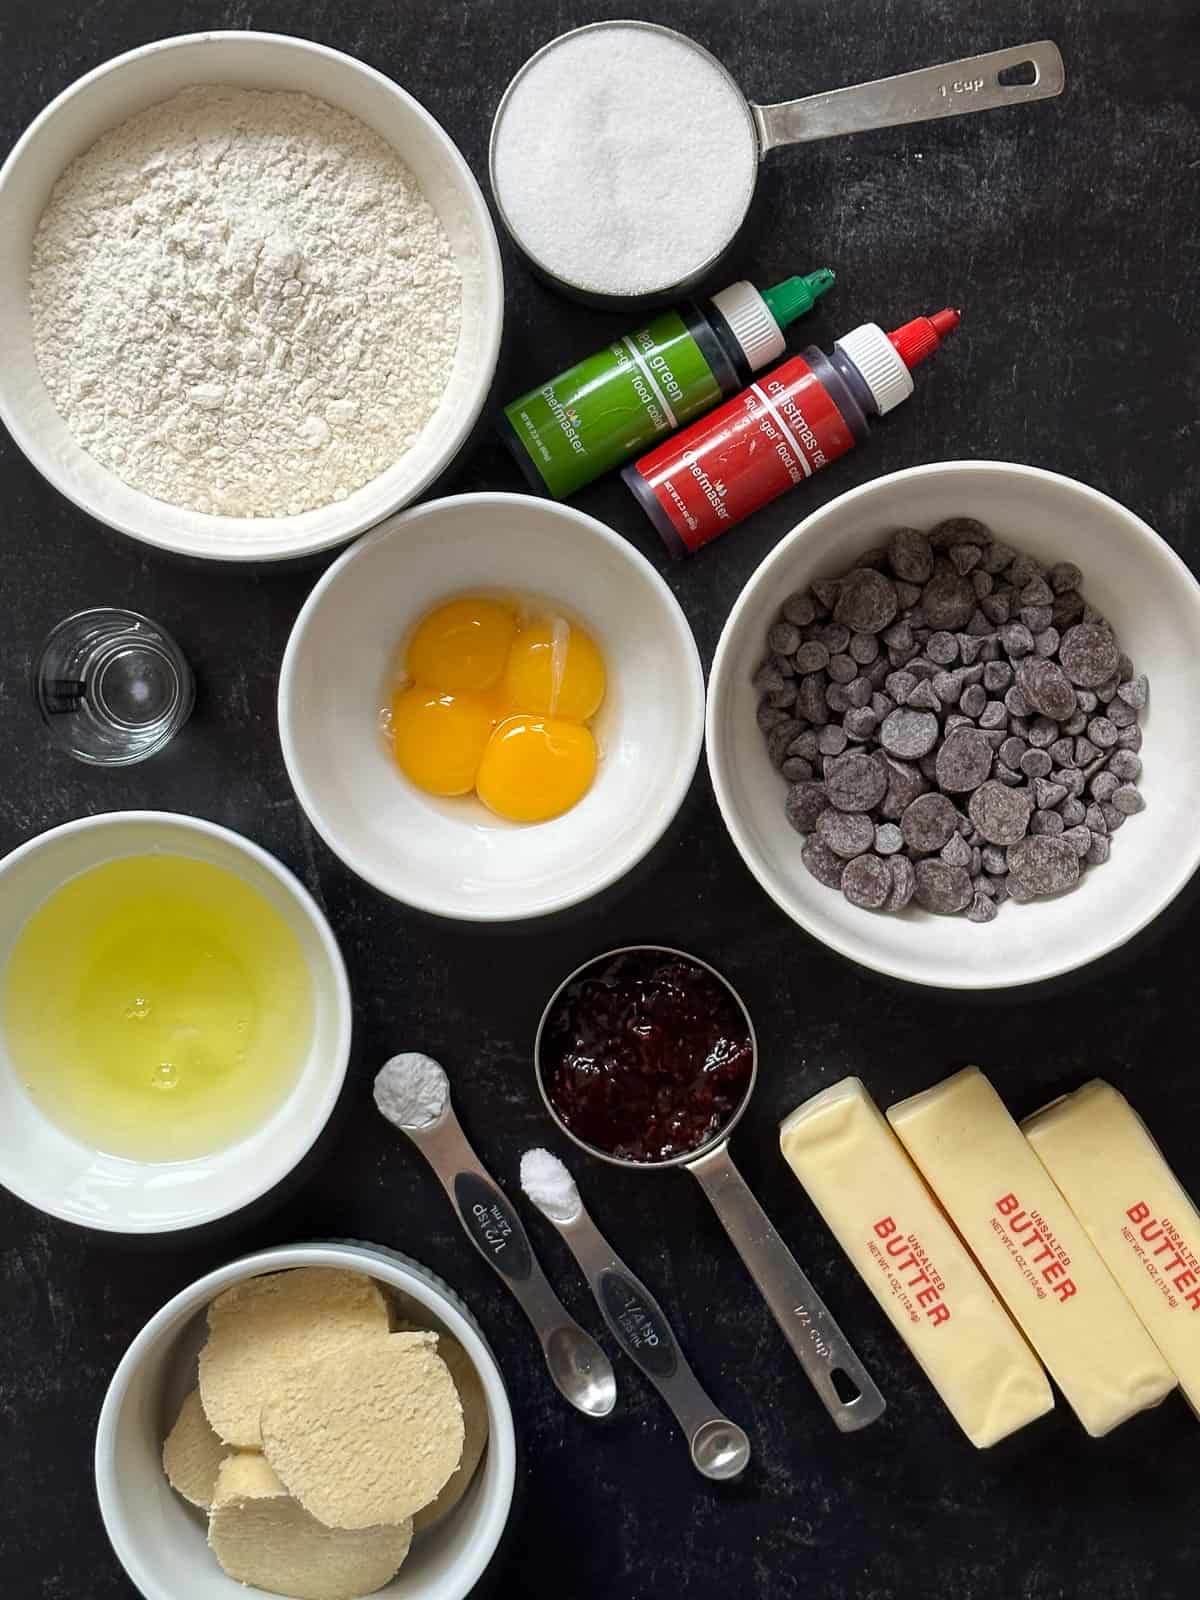
Ingredients: (top) Flour, sugar, food colorings; (middle): egg whites, egg yolks, chocolate chips, (bottom), almond paste (mine is homemade), baking powder, cream of tartar, jam, butter. The recipe for easy homemade almond paste is below.
Overview of How to Make
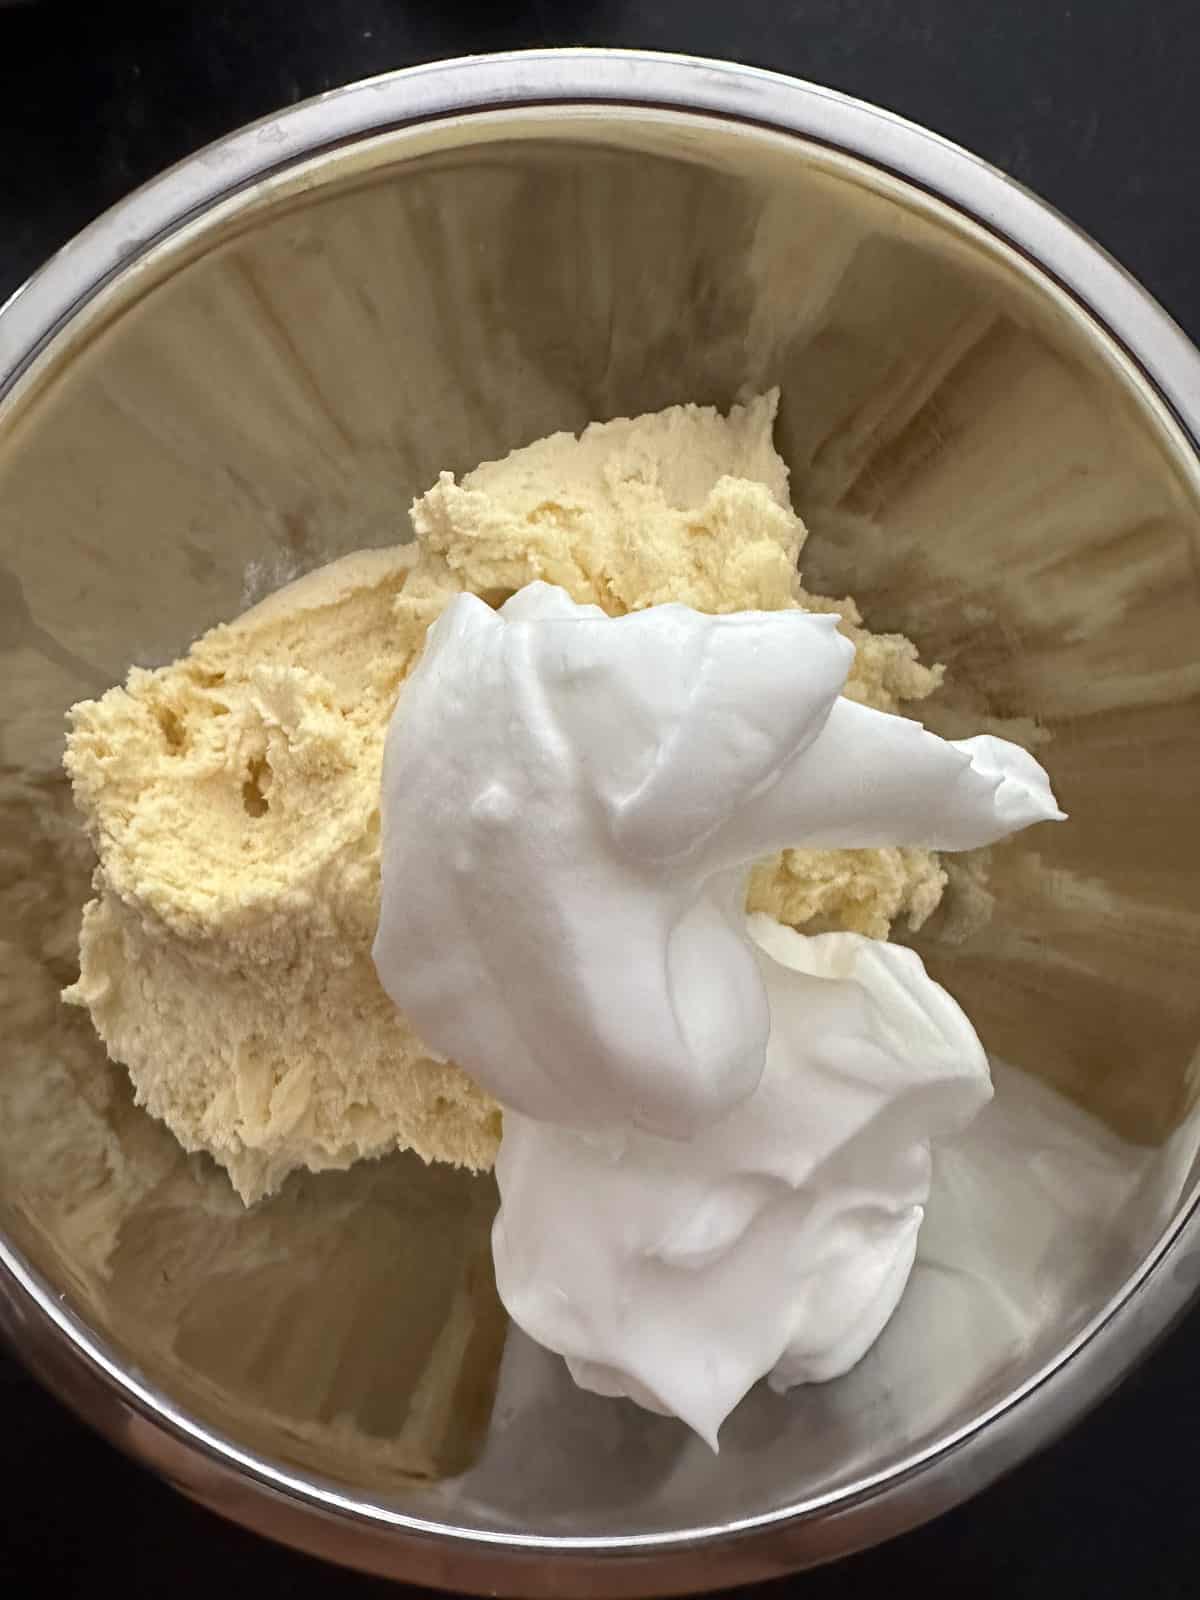
Mix the batter, whip the egg whites, and then combine.
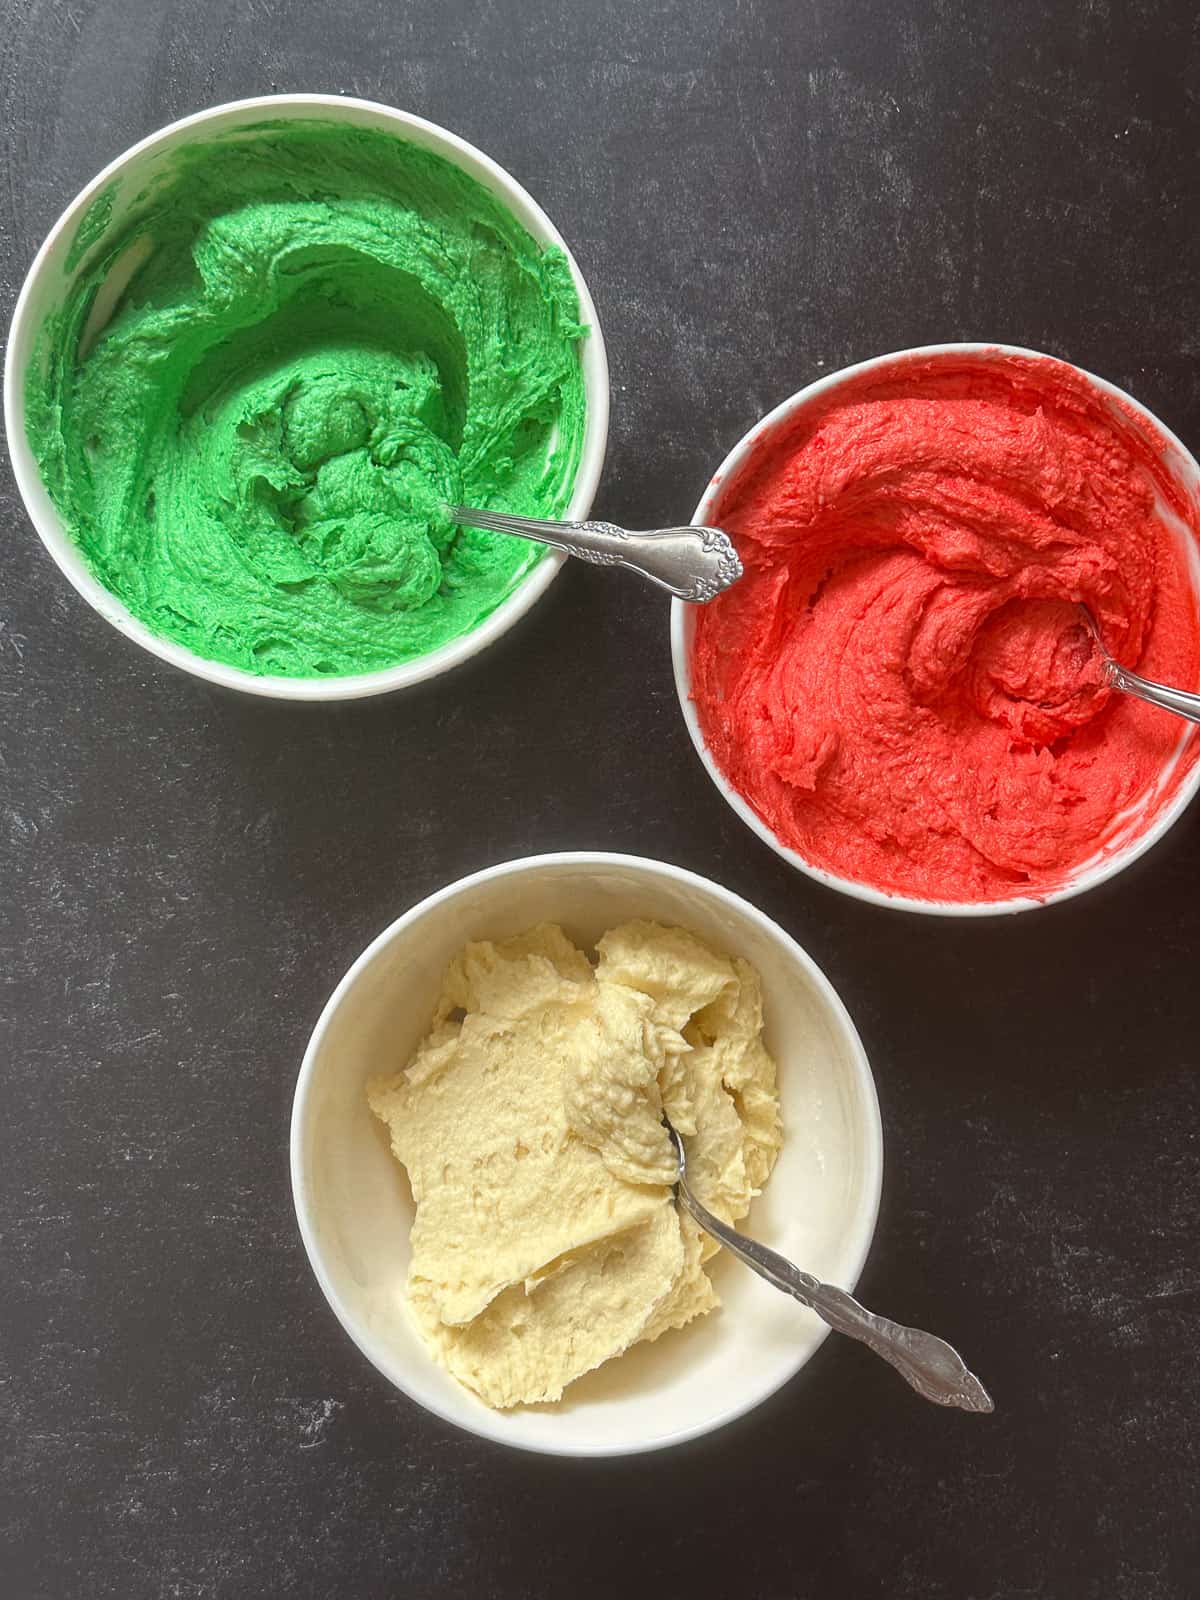
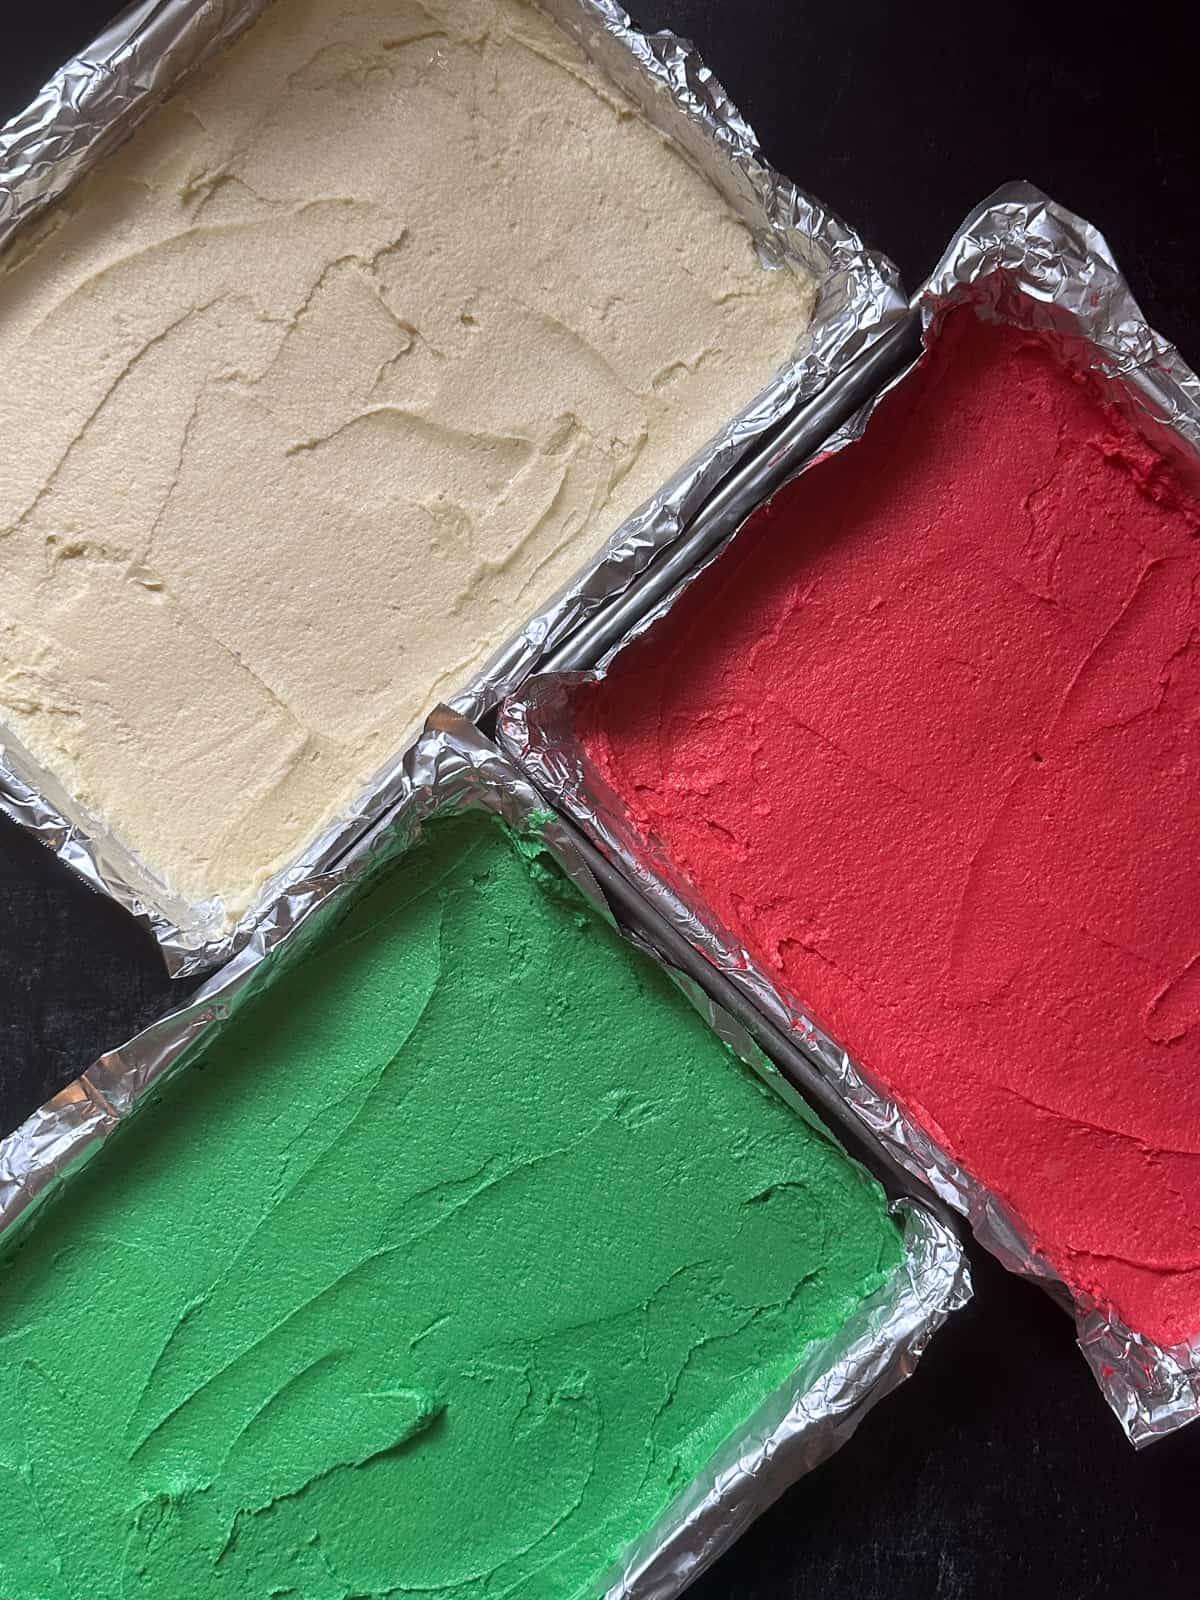
Divide the batter into three parts, coloring one red and another green, then spread each into lined baking pans and bake for 10-12 minutes at 350 F (180C).
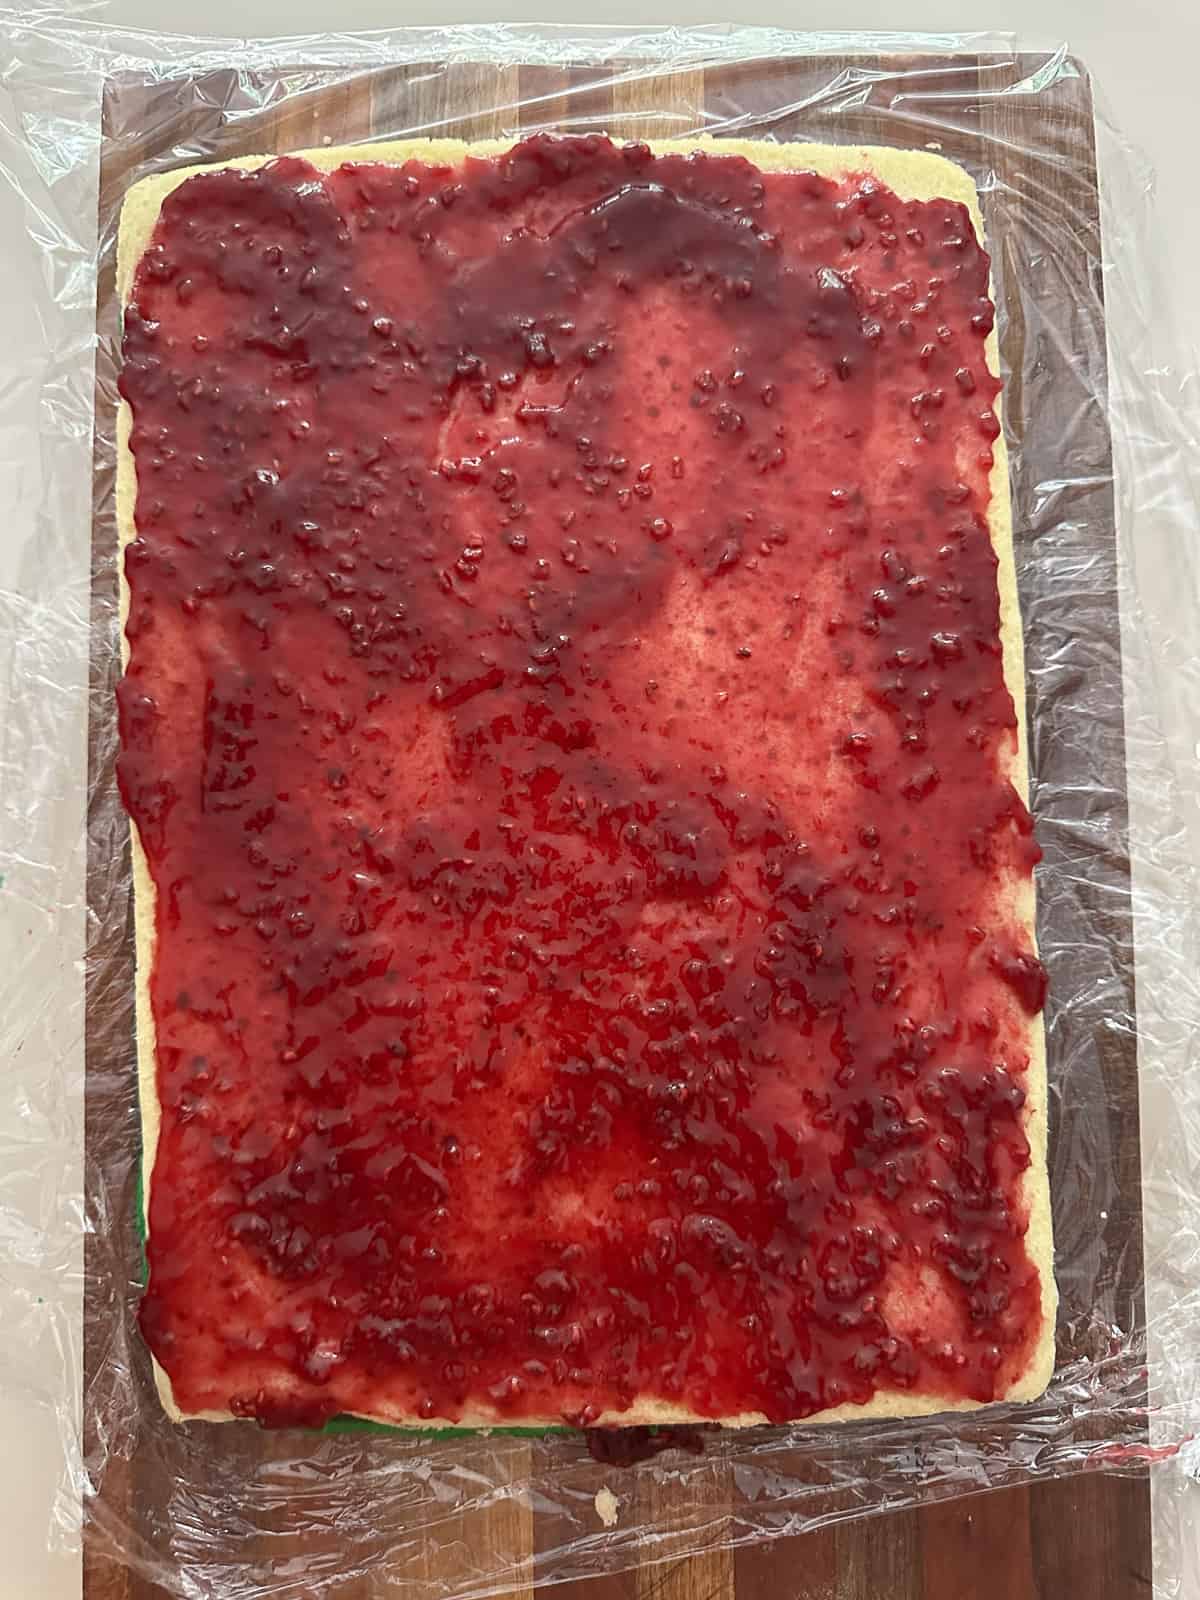
To assemble the cookie, the three cooled layers are layered on top of each other, usually with a thin spread of raspberry or apricot jam in between to add a hint of sweetness and tang. The layers are then pressed firmly together and wrapped tightly to stabilize the layers.
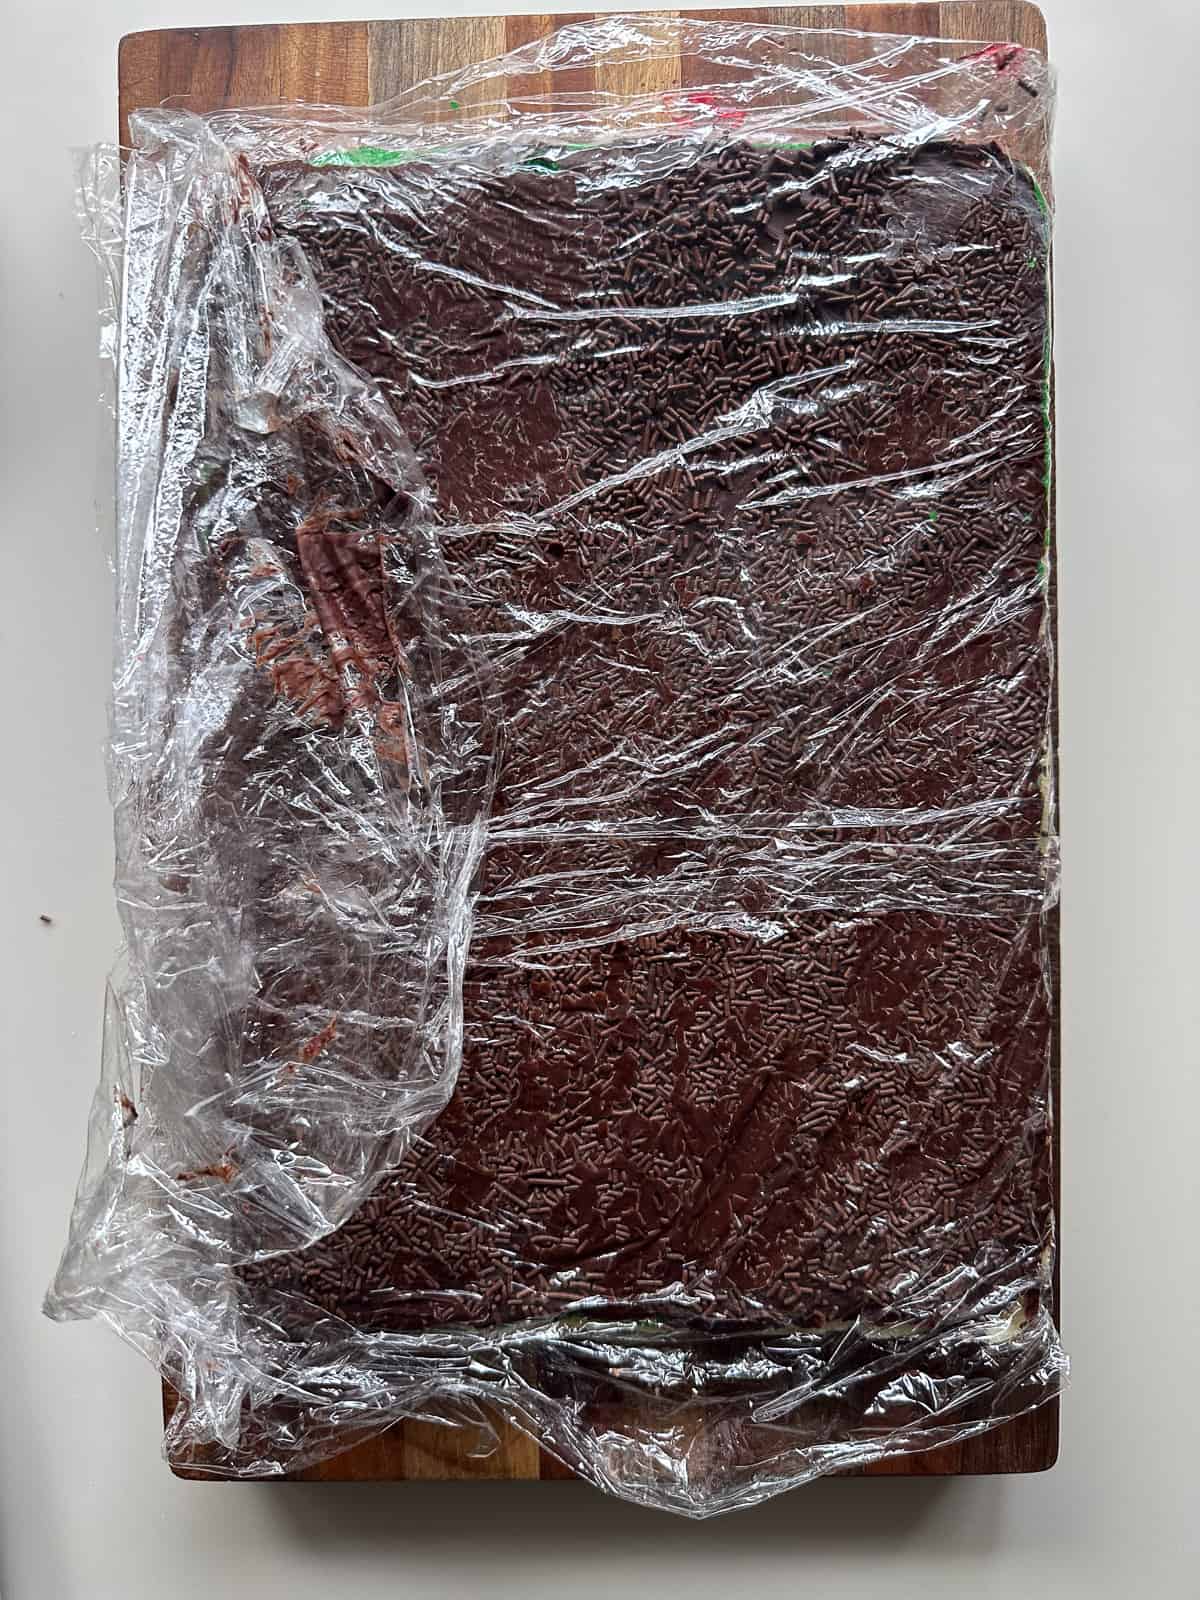
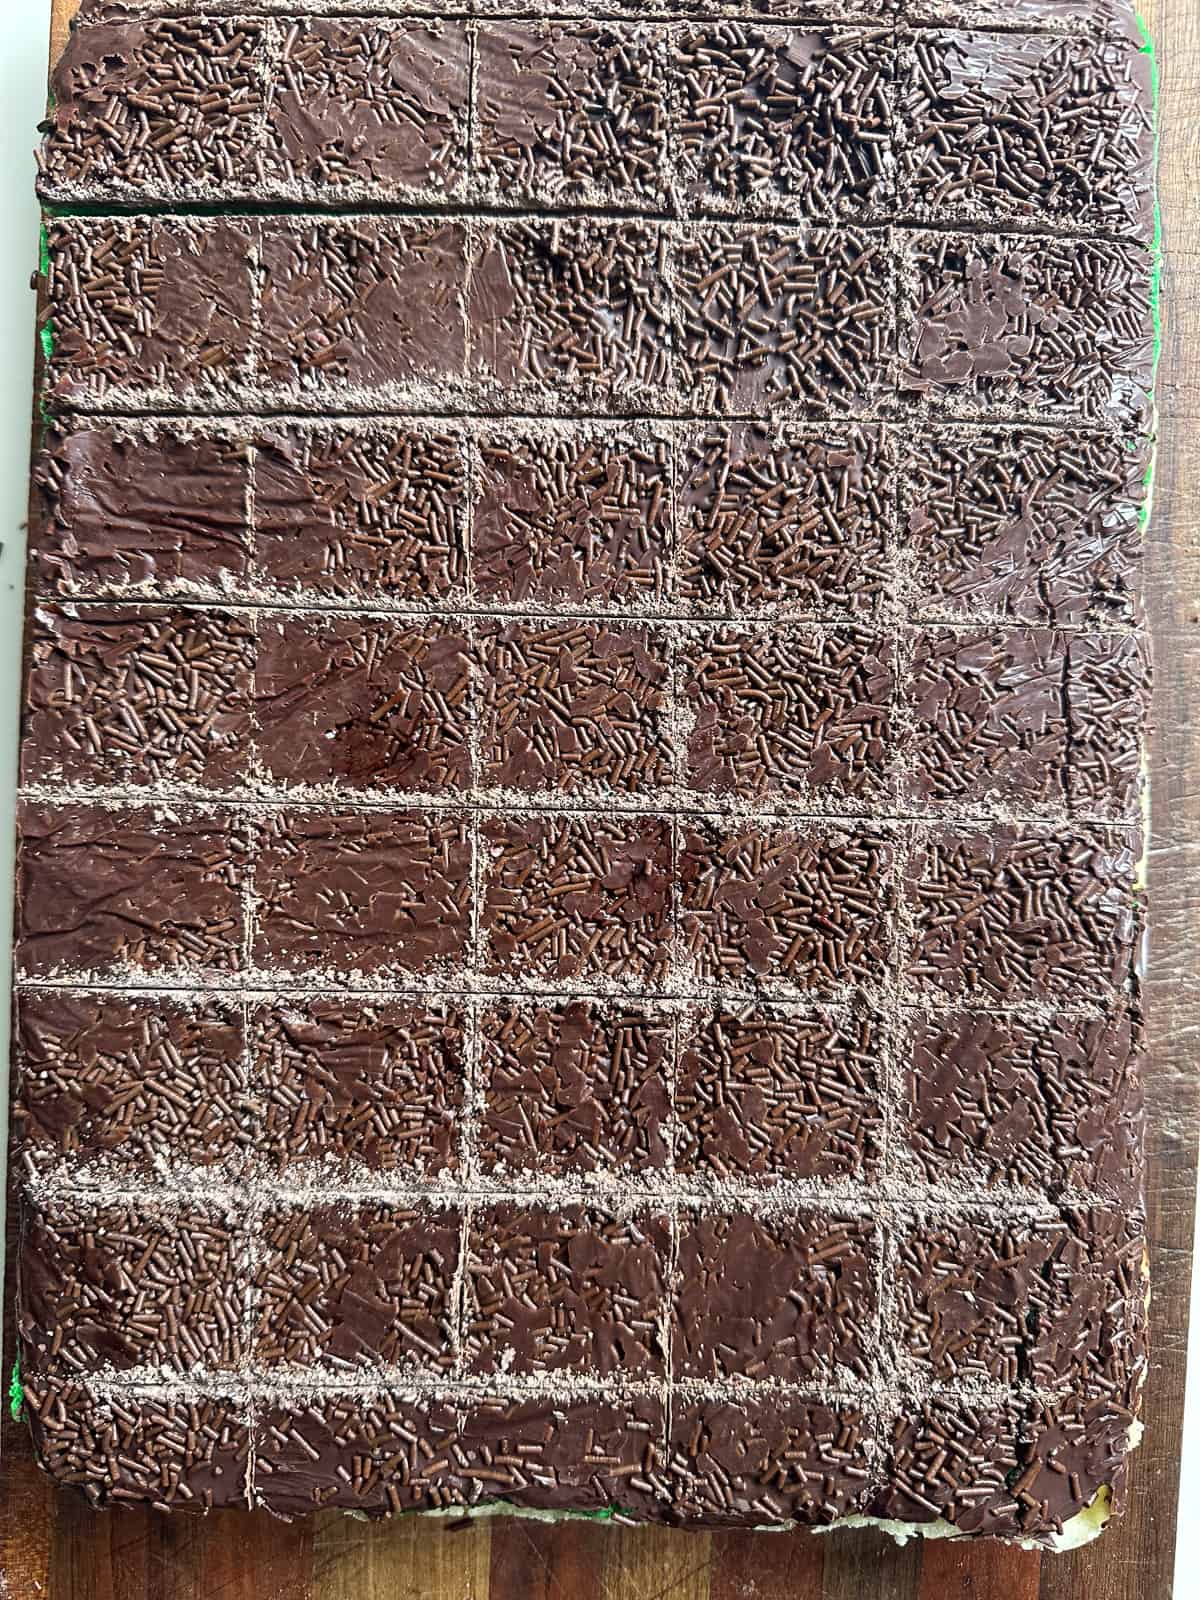
Once assembled, the rectangular cake is often coated with a smooth, rich layer of dark chocolate on the top and bottom. The chocolate coating not only adds a delightful flavor but also gives the cookie a glossy finish that enhances its overall presentation.
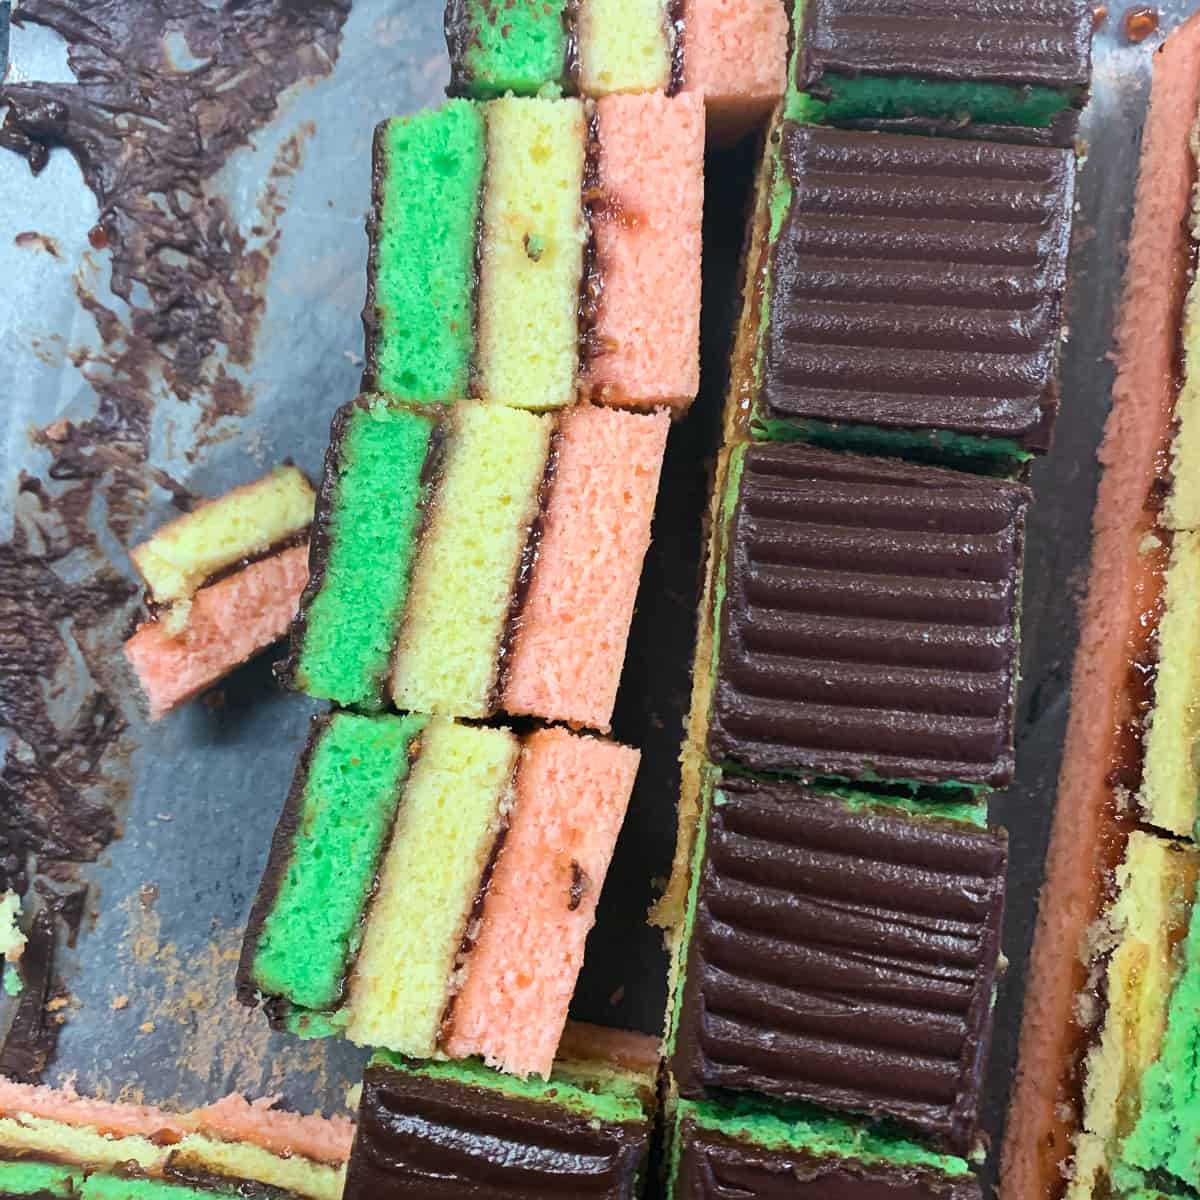
When you slice into a rainbow cookie, you’ll see the vibrant layers in all their glory, forming a beautiful pattern of colors. The texture is soft and slightly chewy, with the almond flavor being the predominant taste.
See the recipe card below for complete instructions.
Tips for Cutting
Plan Cuts: Lightly score the top of the chocolate where you intend to cut for even squares or rectangles.
Use Serrated Knife: Employ a gentle back-and-forth sawing motion to cut through the layers using a serrated knife.
Dip in Hot Water: Warm the knife in hot water before each cut for smoother slicing, and wipe the knife dry.
Wipe Blade Clean: After each cut, clean the blade to ensure neat, residue-free slices.
Chocolate Temperature: If the chocolate is too cold, it may be prone to breaking. Allow it to warm slightly to room temperature for easier handling.
More Expert Tips
Even Layers: Divide the batter evenly into three parts (a food scale helps a lot here) and add food coloring to each portion separately. Ensure the layers are spread evenly in the baking pan to create uniform thickness.
Parchment Paper: Line your baking pan with parchment paper or aluminum foil, leaving some excess on the sides. This will make removing the cooled cookie slab from the pan easier.
Chill Between Layers: After baking each layer, let it cool completely before spreading the jam and adding the next layer. Chilling the layers helps set the jam and prevents it from oozing out when slicing.
Press Firmly: After assembling all the layers, press down firmly on the top to ensure the layers adhere together. I like to place a small cookie on top and weigh it down with some books.
Use of Plastic Wrap: Using plenty of plastic wrap on the bottom layer will facilitate wrapping the layers and moving the cake when needed.
Stacking the Layers: Align the layers side-by-side like an open book, then gently flip the top layer onto the other. This technique aids in aligning the layers accurately.
More Italian Cookies


♥️ Loved this recipe? I’d be thrilled if you’d rate it ⭐️ and share your experience in the comments below! Your ratings and comments help other readers discover this recipe and keep this blog going. Did you add any special tweaks? Our community of home cooks would love to hear about it! ♥️
📖 Recipe
Rainbow Cookies (7-Layer Cookies)
Click the heart icon ♡ above to save a recipe. To find your saved recipes later, click the heart icon on the right side of the screen near the search icon and select My Favorites.
Equipment
- 3 quarter sheet pans (13 x 9) can find disposable trays of similar size (and can reuse)
Ingredients
For the Cakes
- 8 ounces (226.8 g) almond paste homemade (recipe follows below) or store-bought
- 1.5 cups (340.5 g) unsalted butter 3 sticks = 1.5 cups
- 1 cup (200 g) sugar
- 4 large (68 g) egg yolks
- 1 teaspoon almond extract
- 1/4 teaspoon salt
- 2 cups (250 g) flour
- 4 large (132 g) egg whites
- ½ teaspoon cream of tartar
- red food coloring
- green food coloring
For the Filling and Topping
- 2 cups (680 g) raspberry jam divided (can also use apricot on one layer and raspberry on another layer)
- 16 ounces (453.59 g) semi-sweet chocolate chips divided
To Make Homemade Almond Paste (optional can also use store bought – you will need a little more than half for this recipe)
- 1 3/4 cups (196 g) almond Flour
- 1 1/2 cups (180 g) confectioners' sugar
- 1 (33 g) large egg white
- 1/8 teaspoon salt
- 1 teaspoon almond extract or to taste
Instructions
To Bake the Layers
- LIne three 13×9 pans with parchment or aluminum foil. I like to grease the undersides to they stick in the pan better.
- Preheat oven to 350F (180C).
- Put almond paste, butter, and sugar in stand mixer. cream together for 3-4 minutes. Add egg yolks, one at a time mixing well after each egg yolk.
- Add in the almond extract and salt.
- Mix again, add in the flour slowly and combine.
- In a separate bowl, beat egg whites with cream of tartar to soft peaks and then fold the whipped whites into the egg yolk mixture.
To Prepare for Baking
- Divide batter into three equal portions – place each portion into a separate bowl. A kitchen scale helps to divide the batter evenly (I weigh it and then divide it by three).
- Add red food coloring to one portion and green to another, leaving 3rd portion uncolored, and combine well so that the color is evenly distributed.
- Spread each color into a 9×13 parchment-lined pan (can also use aluminum foil) and spread with a spatula. The batter will be thick.
To Bake the Layers
- Bake 10-12 minutes. The toothpick inserted into the batter should come out clean—cool cakes on wire racks.
To Assemble the Layers
- Carefully invert the green layer onto a large sheet of wax paper or parchment (I like to place a large sheet of plastic wrap under also so that it can all be easily wrapped up later), peel off the parchment or aluminum foil that was used during baking, and cover with 1 cup jam.
- Align the plain layer (parchment on the bottom) next to the green layer so it looks like an open book, and carefully flip it over the green layer. Cover with 1 cup jam after removing the parchment used during baking.
- Repeat the above process with the red layer, and then wrap the three layers with jam in plastic wrap, carefully place it on a tray, and weigh it down with another tray topped with a book or a few cans.
- Refrigerate at least 4 hours or more to set the layers and filling.
To Add the Chocolate
- Remove from fridge and then melt half the chocolate (see notes) and spread quickly on top of the cake.
- Wait until the chocolate hardens, then carefully the cake over and repeat this step to spread the remaining chocolate on the other side. It helps to create a "sling" with plastic wrap to place on the underside of the cake to flip the cake over.
- After the chocolate has hardened, score the top of the cake lightly/gently with a sharp knife to plan the cutting.
To Cut into the Cookies
- Trim the sides all around with a very clean, sharp, serrated knife (I like to dip the knife in hot water and then wipe it off), often wiping the knife between cuttings to make straight, clean edges.
- Ensure the chocolate is not too cold (if it's been in the refrigerator), as it will break in spots where you don't want it to).
- Cut the cake into equal pieces following the scored lines with a very clean, hot, sharp, serrated knife, using a gentle sawing motion, making sure to wipe the knife often between cuttings.
To Make Homemade Almond Paste (optional or use store-bought)
- Combine flour and sugar; add rest of ingredients and combine well.
- Mixture will have large crumbles and you will have to squeeze and press it into a log shape.
- Double wrap in plastic until ready to use and refrigerate.
Comment Policy
I’d love to hear from you! Questions, tips, and respectful feedback are always welcome! Comments that are abusive, disrespectful, or intended to provoke may not be approved. (Updated 6/25/2026)