tartine bread
This post may contain affiliate links. For more information, please see our disclosure policy.
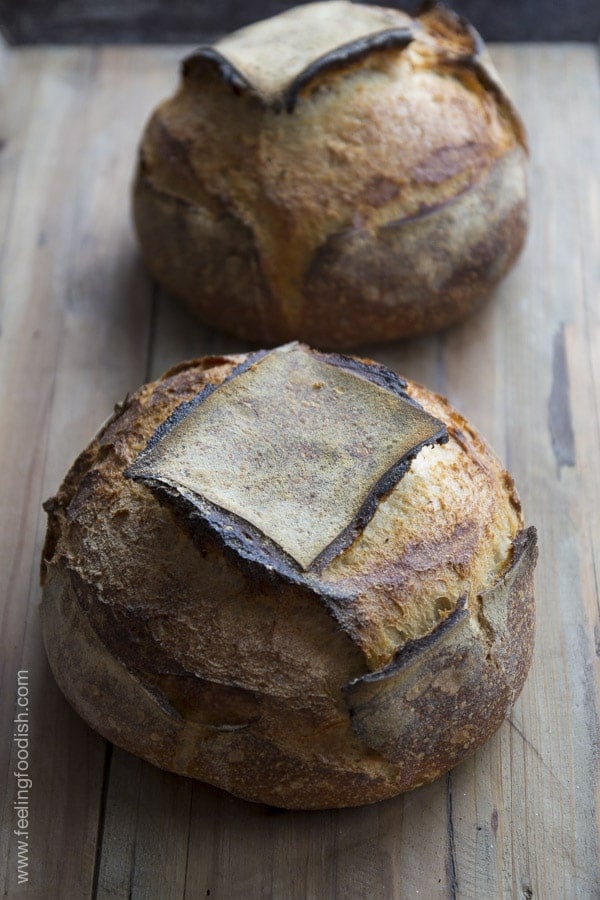
You should have been in my kitchen when I pulled this bread out of the oven – let’s just say happy is an understatement.
I know, I know – it’s kind of strange getting THAT excited over food, but I guess that it really should be no surprise coming from someone whose food blog was born after finding the perfect NY pizza dough.
It’s also become very apparent that yeast doughs are among my favorite things to make in the kitchen.
A few weeks ago, I baked bread that I named “Philadelphia Country bread” since it is a “natural starter” yeast bread (ie, meaning there was no commercial yeast used) made in the Philadelphia suburbs (I learned that everyone’s starter, also called sourdough or leavin, will be different based on the geographic area that you are based in). That bread was fabulous but the oven spring didn’t compare to that of this bread.
Now, surprisingly, the Tartine bread shown in this post uses the same basic formula that I used for the Philadelphia Country bread: that is, 750 g water, 200 g levain/starter, 2 g salt, and 1000 grams of flour (a 90/10 mixture of all purpose flour/whole wheat flours [King Arthur brand]).
What was different? Well, the technique I used was a little different for bulk rising the dough (I bulk proofed the dough next to a pot of simmering water to try and elevate the ambient temperature in my cool winter kitchen) and also for shaping the dough (I preshaped, let rest for 20 to 30 mins, and then did a final shape), and the starter I used was a little more mature, which from what I understand, can make the yeast more potent. I also used about 1 tablespoon of this mature starter to make a younger levain, which resulted in a much less sour bread. Finally, I’m unsure if I preheated both the top and bottom of my dutch oven last time but was sure to do so this time (I use a Lodge Logic Pre-Seasoned Combo Cooker “>Combo Cooker by Lodge)
I also scored the bread a little differently, but I don’t believe that caused any major differences. I knew right away when I scored the dough, that this bread was different. You see, until now, scoring has always been difficult for me. The blade never really went through the dough very easily – it would tear the dough. I recall reading somewhere that could be because the dough was either underproofed or because it wasn’t shaped correctly.
There is a lot of great information on scoring here.
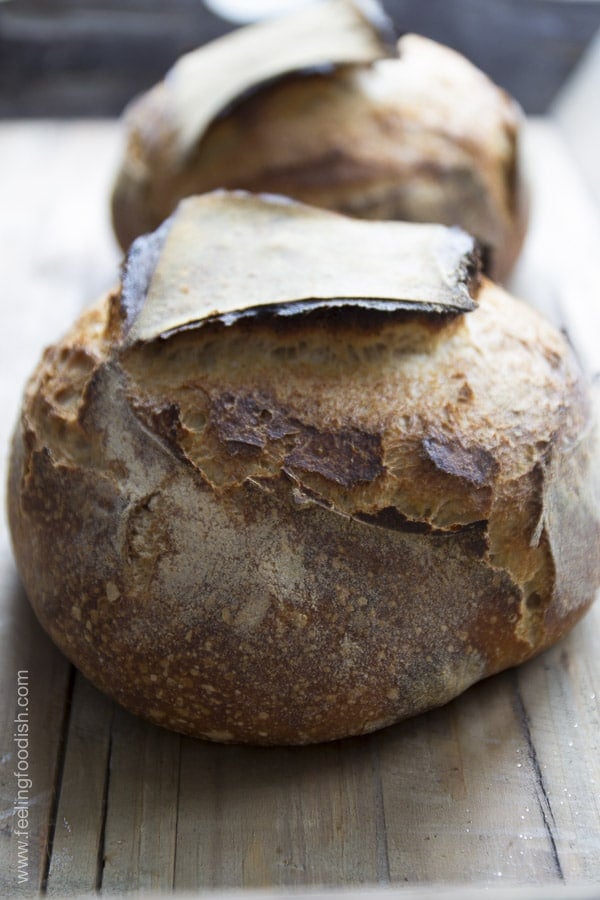
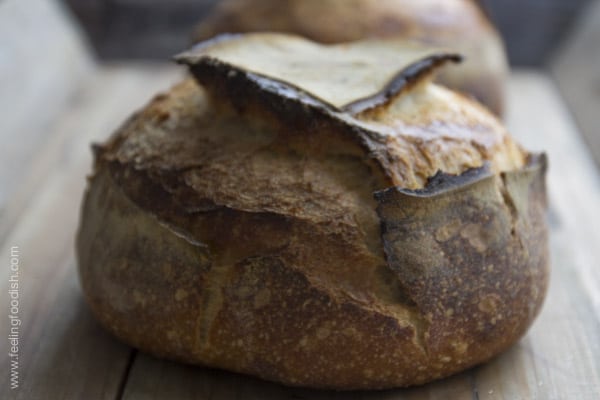
I scored this bread in a square pattern on top, and from what I recall, my cuts were almost at 90 degrees. It’s amazing that even the scoring on bread affect the final product, in this case, the shape.
In this video, at time 3:07, Chad Robertson demonstrates his shaping
technique. I used a similar folding technique that was shown in his book Tartine Bread, which is a little simpler.
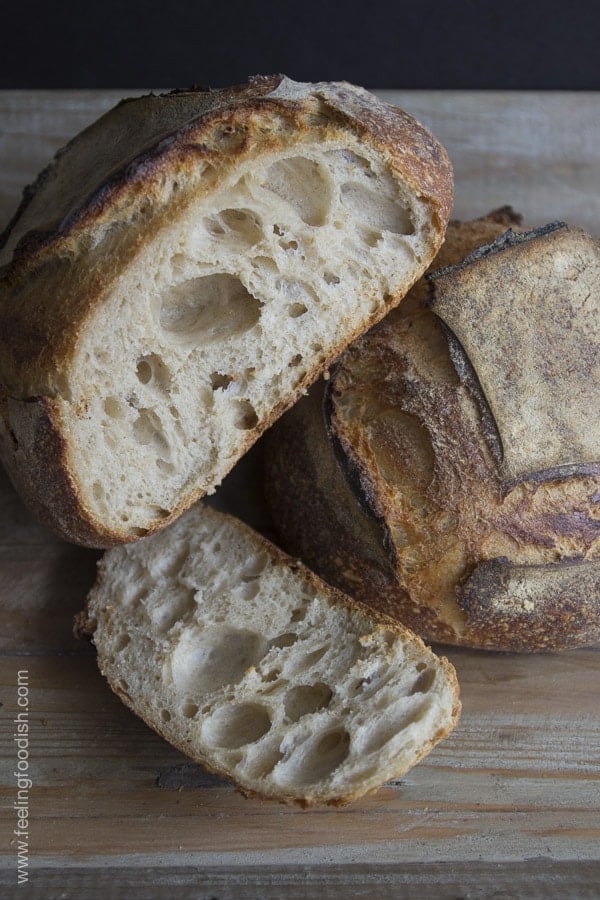
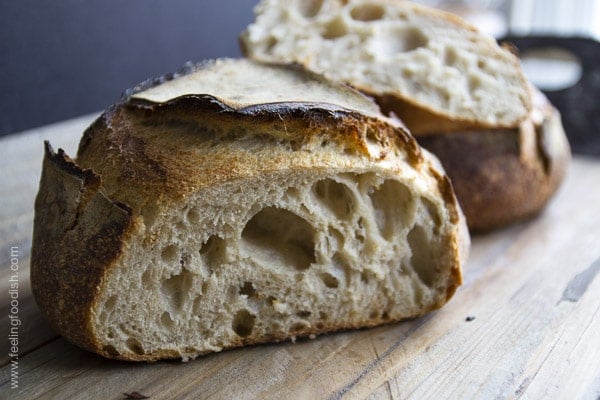
At 75% hydration, this dough is fairly wet and so the crumb (ie, the inside of the bread) is nice and open with largish holes. In addition, this dough is stretched and folded, not machine mixed and so the danger of oxidizing or overmixing the dough is eliminated.
If you are a fan of Tartine bread, I encourage you to purchase Chad Robertson’s beautiful bread book called Tartine Bread. It was a wonderful addition to my library of bread books!!
If you are a Tartine bread fan, be sure to check out the fabulous blog called Tartine Bread Experiment!
Please note that this recipe requires a dutch oven or combo cooker, a kitchen scale, and an established sourdough starter.
Recipe from Tartine Bread
Here’s more on the Tartine story:
📖 Recipe

Tartine Sourdough Bread (In Your Own Kitchen!)
Click the heart icon ♡ above to save a recipe. To find your saved recipes later, click the heart icon on the right side of the screen near the search icon and select My Favorites.
Ingredients
Equipment needed
- Kitchen scale
- Dutch oven or combo cooker
To make the levain (you'll only need half of the prepared levain; reserve the other half to maintain your ongoing sourdough starter)
- 30 grams mature starter
- 200 grams all purpose flour
- 200 grams room temperature water (non-chlorinated)
To make the dough
- 200 grams levain from above step (keep the leftover for your next bake; see Notes)
- 750 grams lukewarm water (80 degrees), divided
- 100 grams whole wheat flour
- 900 grams all purpose flour plus more for dividing and shaping
- 20 grams salt preferably non-iodized
Instructions
To Make the Leavin:
- In a glass jar, combine 1 tablespoon of starter with 200 g all purpose flour and 200 g of room temperature water (non-chlorinated [can be tap water than has left on counter for 24 hour to allow chlorine to dissipate] or spring water) and set aside covered for 8 to 10 hours (reserve and feed the rest of your starter for future use)
To Make the Dough:
- Begin making the dough after the levain has risen (ie, it has doubled in height); for me, this is 8 to 10 hours after feeding (using a glass jar is helpful so you can mark the starting point and easily visualize the rise)
- In a large tub/bowl (I use a 6 gallon plastic food-grade tub), combine 700 g of 80 degree water and mix in 200 g levain; mix well (keep leftover levain for your next bake).
- Add the whole wheat and all purpose flours and combine well into a shaggy mass with no bits of flour showing
- Cover and let rest for 40 minutes
- Add 50 g of water, and 20 g of salt, and squish to combine.
- Set the container in a warm area (78 to 82 degrees) (if wintertime, in oven with hot pan of water or next to stove near a pot of simmering water) for 3 to 4 hour bulk rise, and cover.
- During the bulk rise, perform of stretch and folds each 30 minutes. During the last hour, if needed, take care to fold more carefully so not to deflate the dough (I only perform 3 to 4 folds, during the first 2 hours and let the dough rise untouched during the last hour).
- After the dough has sufficiently proofed (20 to 30% rise), gently scoop the dough onto an un-floured countertop
- Divide the dough into 2 pieces, and lightly flour the top of each. Gently flip over and fold the dough (bottom up and top down) so that the floured surface is envelopes the loaf and then gently preshape into a round boule
- Let rest for 20 minutes. The edges should be round and thick (it’s ok if it flattens a bit) but they should not taper off. If they do taper or flatten off, preshape again and let sit for another 20 minutes (this is equal to doing another set of folds during bulk rise)
- Final shaping (fold the dough into boules [Fold bottom third up, right side third over, left side third over, top third over and then roll the entire loaf over and gently pull toward you letting tension form the loaf further) and then place seam side up into bannetons which have been floured with a 50/50 mix of all purpose and rice flour)
- Final rise for 3 to 4 hours at 75 to 80 degrees or place in refrigerator for up to 12 hours (I always do the final proof in refrigerator) (if you do the final rise on counter, do the finger dent test to test for readiness)
To Bake the Breads
- Preheat oven for 45 minutes at 500 degrees with a dutch oven or combo cooker inside the oven (ensure that plastic knob is removed if using dutch oven)
- Remove dough from banneton, and carefully place into bottom of dutch oven or combo cooker, score top in pattern of choice, and immediately reduce oven temperature to 450 degrees
- Place cover onto top of pot, and let steam for 20 minutes, then carefully remove lid with gloves and continue baking for another 20 to 30 minutes until chesnut colored
- Let cool on wire rack for at least 2 hours
Notes
Storing Leftover Levain
While traditional bakers insist on maintaining sourdough starter at room temperature with daily feedings, home bakers can use a more practical approach. Add enough flour to the starter to create a soft dough consistency, cover tightly, and refrigerate. Remember to revitalize your starter with several feeding cycles before using it in your next bake for optimal performance.Nutrition
Such a helpful and detailed guide! I’ve been wanting to try Tartine-style bread at home, and your step-by-step instructions make it feel doable. Thanks for sharing!”
This is the only bread I make with my starter. I love it. I also add Kalamata olive halves and sliced garlic to the dough before the last rise and it’s so yummy!! Scoring is my favorite. 😄
Oh yum! That sound really delish!
Yours is beautiful. No you don’t need a Dutch oven or such. I’ve used a cuisinart toaster oven, the bottom of a marble tile from habitat that cost 50 cents and my $1.50 Japanese dollar store aluminum pot inverted with the wooden handle removed. I tossed in a small chunk of ice before putting the lid down and got this incredible crumb from the Tartine recipe. >>https://pasteboard.co/JXoyI22.jpg
I had watch this German guy do a comparison with a Dutch oven, a tall pan lid and a Pyrex all inverted into a pizza stone and he got the exact same results from each one. That’s when I knew you don’t need fancy expensive equipment.
When you say you scored at 90 degrees do you mean from the counter top or from the loaf? Thanks.
Hi
I’m having difficulty understanding how to start the mature starter
You list ingredients for the starter but then in the instructions you say to add one tbsp of starter with flour and water
How do I get the mature starter?
This bread looks amazing, will have to purchase his book
Thank you
The recipe assumes you already have a starter and then you feed it to get to peak (mature starter). Please see the Tartine bakery site for more info
Hi, Trying to follow your recipe to a T the first time! For the Levain, do you mix 1T or 30 Gms of starter to the 100/100 mixture?
I always use one tablespoon – theoretically, they should be the same (1 tablespoon = 30 grams). I will update the recipe also because one tablespoon should be used for 200 grams of water and 200 grams of flour (this is so you have leftover levain for your next bake = you’ll only need 200 grams of levain as an ingredient to make the loaves). If you don’t need leftover levain I’d use 15 grams or 1/2 tablespoon with 100 grams of water and 100 grams of flour.
Looks marvelous. What size Lodge combo cooker? 3 &1/2 or 5 quart?
I believe the combo cooker only comes in 3.2 quart size. You might be referring to the dutch oven? The combo cooker has a shallow part that allows you to place your dough on the pan without having to worry about burning your hands on the deep sides of the pot as you lower the dough in.
This looks so delicious, I can almost taste it from here. I would love to bake this but I would probably eat it all myself right after it comes out of the oven and slathered with butter!
Hi Pat! I thought the same thing but everyone helped me and this bread went fast. The great thing about natural starter breads is that they stay fresher muchhhh longer. I can eat this for a few days without toasting and then a light toast afterwards if it lasts that long.