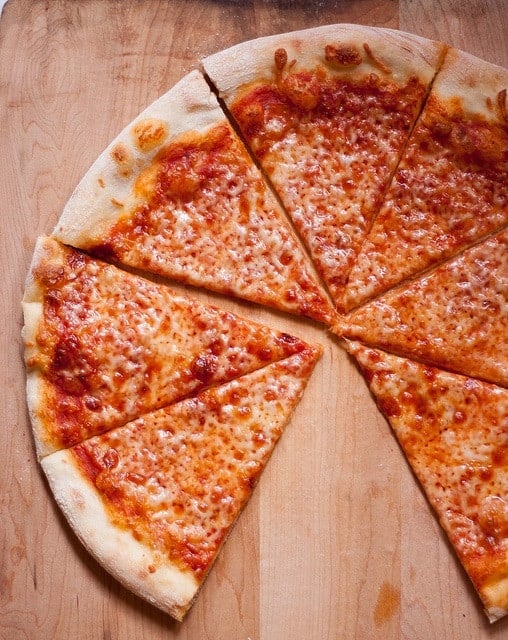
The Best New York Style Pizza Dough and 14 Tips for Success!!
This post may contain affiliate links. For more information, please see our disclosure policy.
This NY style pizza dough recipe has been winning over home pizza makers for nearly 15 years, earning rave reviews from professional pizzaiolos and native New Yorkers alike. Many years ago, my own quest for the perfect crust lead me to this tried-and-true formula based on wisdom from the pizza masters at www.pizzamaking.com and the late great Dough Doctor, Tom Lehmann. With thousands of successful bakes and countless testimonials from both pros and Big Apple natives who say “this is the real deal,” this recipe continues to help home bakers achieve that authentic New York pizzeria experience in their own kitchens.
Important Variables
Making NY style pizza dough is definitely somewhat of an art form. There are so many variables that can be changed aside from the ingredients alone. For example, these variables include:
- oven temperature
- temperature of the water used to make the dough
- proofing methods (room temp vs cold rise)
- order of adding the ingredients (yes, this makes a big difference!)
- mixing time
- use of autolyse
- use of poolish (I don’t do this or the one before, although I have in the past)
And then of course, the toppings which can be simple or as complex as you’d like. But don’t worry too much about all of this – my method is easy and straightforward. Plus, you will make better dough than 99% of the pizza chains out there. You will not want take out anymore!
The Big Secret (How You Proof the Dough)
My all-time favorite dough is NY style dough, which really is classic pizza dough that is stretched out into a thin crust pizza. This type of pizza dough contains water, flour, salt, instant yeast, and olive oil (and sugar especially when baking in a home oven, to help browning).
After it is mixed, it is proofed (left to rise/ferment) in the refrigerator for a minimum of 24 hours and up to 72 hours (it can also be frozen) – this is the big secret. I’ve used the dough up to 5 or 6 days afterwards, so you can essentially prepare dough for the week.
This recipe produces a crisp yet foldable crust that is tender, light, and flavorful and will make enough for four 14-inch pizzas. You can easily double or half the recipe to make 2 or 8 pizzas.

Fourteen Tips for Success
Tip 1: Choosing the flour
Use high-quality flour – I like to use King Arthur’s all purpose or bread flour; higher protein (ie, bread) flours work best. However, I prefer all-purpose flour because I like a lighter, airy crust.
Tip 2: Adding the yeast
Do not add instant dry yeast (IDY) directly to cold or cool water – you may shock the yeast (add the IDY to your flour instead) (please note that IDY differs from active dry yeast, which must be activated by adding it to water).
Tip 3: How much yeast?
Use only enough yeast to “get the job done” – yeast eats the sugar in your flour to produce its leavening effects – I find that if you use too much, your dough will be tasteless (this is just my opinion); however, it is a fact, that too much yeast can make your dough taste bad. Most recipes out there, some of them in well known, published books contain too much yeast!
Tip 4: Cold ferment that pizza dough!
Always use your refrigerator. The best NY style doughs “ferment” or “cure” in the refrigerator for at least 24 hours and up to 48 72 hours. This is called a “cold rise” (vs warm rise on your kitchen counter).
The refrigerator is used to retard (or slow) the dough’s fermentation, allowing that distinctive flavor to come through (ever wonder why some pizza crust tastes different than others, despite the fact that they are both made from just about the same exact ingredients? – this is a big reason why!)
When your dough rises too quickly, the flavor will not develop optimally. Slow rise = MUCH better flavor.
Tip 5: Weigh those ingredients!
Use a scale to weigh the flour instead of using a measuring cup – it is much more accurate and will yield superior results. I’ll admit, I resisted doing this for a loooong time. Just do it. You’ll be glad you did and your dough will be more consistent and much improved.
Tip 6: Add oil last
Mix the oil in as the last step, after the flour has all been incorporated. This is important to allow the flour to hydrate properly.
Tip 7: Flour your dough balls
Before tossing or opening your dough balls, flour them *very* well on each side (if you are a beginner) to ensure they do not stick to your counter or pizza peel. I sometimes use a bit more flour after I begin spreading them.
Tip 8: Keeping those rims a bit puffy
Take care not to “degas” the rim of your pizza as you are spreading your dough! Do NOT ever use a rolling pin! There are many different methods to spread/open your dough ball. I hope to add a few pictures someday of this process.
Tip 9: Baking pizza in a home oven
Ensure that your oven is preheated for a sufficient amount of time (about 1 hour) and bake the pizza within 6 to 8 inches of the top of your oven (ie, your broiler) so that the tops browns sufficiently in conjunction with the bottom of the pizza.
Do not place the stone near the bottom of your oven. I made this mistake for too many years.
After your stone has been preheated sufficiently, the heat from the stone will cook the pizza from the bottom and you can switch the broiler on if you find you need more browning on the top (I now use the broiler to bake my pizzas…more on this sometime in the future).
If you find that your cheese is browning well before your rim attains sufficient color, use partially frozen cheese (ie, place shredded cheese in the freezer while the oven is heating up) and cold sauce or you can drizzle just a bit of olive oil on top of cheese.
Tip 10: Use a pizza stone or steel
Use a pizza stone if you have one. The stone with draw moisture out of the dough and produce a beautifully crisp crust. I use a pizza steel because my stones kept breaking.
Tip 11: Use just the right amount of sauce
Do not use too much pizza sauce – it will make your pizza soggy
Tip 12: Find the right kind of cheese
Do not use low fat cheese to top your pizza or pre-shredded cheese (the former will not melt sufficiently and the latter contains additives that prevent the cheese from sticking together and therefore does not melt very well). The best is low-moisture, whole milk mozzarella.
If you must use pre-shredded cheese, I’ve found that adding the sauce on top of the cheese helps with the melting. Also, do not use too much cheese; apply it sparingly so that you can achieve that mottled NY pizza appearance.
Tip 13: Flour your pizza peel
Use semolina or flour on the bottom of your pizza peel to prevent the pizza dough from sticking but be careful not to overdo it because it will burn.
Tip 14: Learn to launch that pizza
Give the pizza peel a few very small quick jerks to make sure the pizza will easily slide off your pizza peel before attempting to transfer pizza to the oven, and more importantly, rub flour into the peel before placing the dough on top.
Stretching the Pizza Dough
A nice video (from The GoodFellas Pizza School of NY), showing how to stretch the dough:
Freezing the Dough
- After mixing dough and dividing into balls, place dough in refrigerator for at least 24 hours.
- Place dough balls on baking sheet lined with plastic wrap or parchment paper, cover loosely with plastic wrap and freeze until firm (~ 2 to 3 hours or up to overnight).
- Wrap frozen dough balls individually in plastic and store in zipper-lock bags for up to 4 weeks.
- When ready to bake, transfer unwrapped dough into the refrigerator for 12 to 24 hours before making pizza.
- Bring dough to room temperature for 20 to 60 minutes before baking (less time for hot kitchen/summer and more time for cool kitchen)
Pizza Dough Calculator
Need more dough? Less dough? Try out our new Pizza Dough Calculator to calculate the weights to get it just right!
More questions? Please see my NY Pizza FAQ
🍕 Equipment Recommended
These are the tools that I regularly use for this recipe.
Baking Steel– the original steel that delivers intense heat for crisp, restaurant-style pizza at home.
Digital Scale – essential for consistent dough every time.
Pizza Dough Proofing Boxes – Use small (500 ml) containers for dough balls weighing 180–250 g (6.3–8.8 oz) for 8–10-inch pizzas, and the large (1000 ml) container for dough balls weighing 260–400 g (9.2–14.1 oz) for 12–16-inch pizzas and longer fermentations.
Steel Peels and Wooden Peels – for easy launches (wood) and retrieving (steel) (look for sizes that are similar to your Baking Steel).
Optional: Pizza Oven – not necessary for this recipe, but a GREAT option if you also bake other pizza styles like Neapolitan, Detroit, or Grandma. I like the electric ovens because they don’t require fuel and can be moved indoors or outdoors and heat up quickly! Great to make multiple small pizzas in succession.
♥️ Loved this recipe? I’d be thrilled if you’d rate it ⭐️ and share your experience in the comments below! Your ratings and comments help other readers discover this recipe and keep this blog going. Did you add any special tweaks? Our community of home cooks would love to hear about it! ♥️
The Recipe
📖 Recipe

The Best New York Style Pizza Dough
Click the heart icon ♡ above to save a recipe. To find your saved recipes later, click the heart icon on the right side of the screen near the search icon and select My Favorites.
Equipment
- Baking Steel for baking
- Digital kitchen scale highly recommended instead of volume measures
- Dough proofing boxes optional, or use what you have
- pizza oven optional, but great if you are making personal pizzas, especially in succession.
Ingredients
Original Recipe for Four 14-Inch Pizzas; want to make more or less? Use the pizza dough calculator
- 6.5 cups (796 g) all purpose flour or bread flour (weighing is most accurate!)
- 2 1/4 cups (493 g) water barely cold water (17.4 oz per 2 1/4 cups)
- 1 teaspoon (3.5 g) instant dry yeast
- 2.5 teaspoons (15.6 g) salt
- 2 teaspoons (7.8 g) sugar
- 1 tablespoon (11.8 g) olive oil
1 Pound of Dough (~454 grams) (use the pizza dough calculator to make more or less dough)
- 2 1/4 cups (274.5 g) all purpose flour or bread flour
- 3/4 cup (170.2 g) water
- 1/2 teaspoon instant dry yeast
- 1 teaspoon salt
- 3/4 teaspoon sugar
- 1 teaspoon olive oil
Instructions
Mixing the Dough
- Place water in mixing bowl.
- In a separate bowl, mix salt and yeast (and sugar if using) into flour
- Combine flour/salt/yeast mixture into water and mix until all the flour has been incorporated.
- After flour has been totally incorporated, add oil and knead for about 4 to 5 minutes (see note)
- Test final dough temperature, which should ideally be between high 70s to low 80s (optional)
Dividing and Rising
- Divide dough into 4 equal pieces (using a digital scale if possible; each ball should weigh 11.5 oz [~326 grams]), shape into a ball, and place in greased, sealed quart-sized container or oiled/greased freezer bag and refrigerate overnight or up to 72 hours (After much experimenting, I have concluded that I like 3 days best but day 2 is good too).
Assembly and Baking
- The following day, remove your dough balls within 1 hour or less of baking and allow the dough to come to room temperature. (the dough will tend to blister more if the dough has not been allowed to come to room temperature however, I often bake coldish dough without problems, just some bubbling)
- In the meantime, place your pizza stone in oven and preheat at 550 degrees (depending on thickness of your stone and your oven’s power) for at least 1 hour
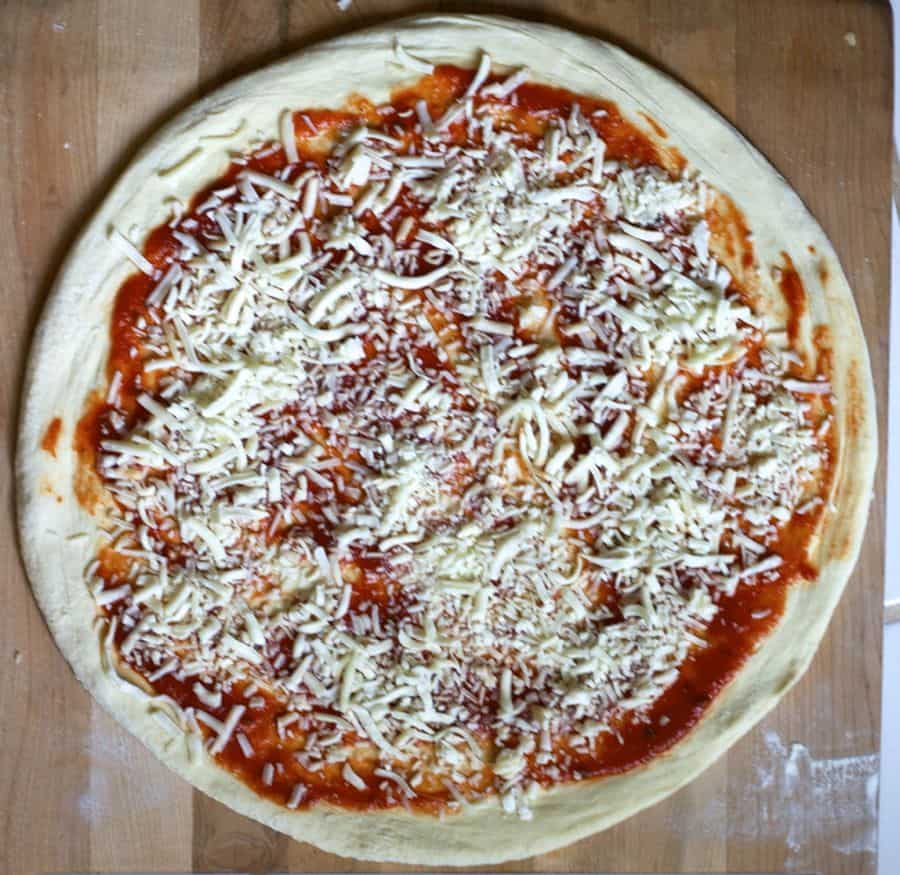
- Open each dough ball using care not to degas, transfer to a pre-floured pizza peel (or on parchment paper), and top with your favorite sauce, cheese, or other toppings.
- Transfer pizza from peel to oven or slide parchment paper onto preheated pizza pan/stone and bake for 4 to 6 minutes each until browned on top and cheese has melted but not burned.
- Enjoy!
Notes
- Use of weight based measurements is highly recommended instead of US Customary. You will need a kitchen scale.
- METRIC amounts DO NOT correspond exactly to the US Customary amounts because, for example, 796 grams equals 6.4 cups (and most can’t measure 0.4 cups or 0.22 cups). Recipe was based on grams.
- Use the Pizza Dough Calculator
- If you want to use the dough the next day, knead a little more (slow speed for about 8 to 10 minutes)
- If you have time to let the dough rest for 3 days, knead for 4 to 5 minutes, low speed or hand knead.
- After mixing dough and dividing into balls, place dough in refrigerator for at least 24 hours.
- Then, place on baking sheet lined with plastic wrap or parchment paper, cover loosely with plastic wrap and freeze until firm (~ 2 to 3 hours or up to overnight).
- Wrap frozen dough balls individually in plastic and store in zipper-lock bags to store for up to 4 weeks (longer may work, but results might vary).
- Before using, transfer unwrapped dough into the refrigerator for 12 to 24 hours before making pizza.
- Bring dough to room temperature for 20 to 60 minutes before baking (less time for hot kitchen/summer and more time for cool kitchen).
- calculate your own using baker’s percentages: 62% hydration, 0.4% yeast, 2% salt, 1.5% oil, and 1% sugar or use my pizza dough calculator.
Hey! Thank you so much for this recipe! I’m so excited to try it! I’m just wondering, as far as freezing the dough goes, do I need to let the dough rise before freezing it? Thank you so much!
I usually do only because I freeze leftovers but I’d maybe leave it 1 day in fridge first. I’ve been meaning to do a test of going straight To the freezer
Cool, thank you!
Good pizza Dough 🥰👏👏
Love this recipe….Going to use some of it for a Sicillain pie today……I’m sure it will come out fine…..going to par-bake it a few minutes….then add thin layer of sauce…..3 min…..a little bit more sauce….grated Parm Regianno…..then mozz and pepperoni…..I have been reading of a “poolish” which appears to be some sort of a “starter”…..Have you ever experimented using this WITH your recipe?…..If so can you recommend a “poolish” recipe you’ve tried…..ALSO…..finally researching the purchase of a scale…..any recommendations?
Thanks
I like the OXO digital kitchen scale with pull out display -it’s a little pricey but I do like it a lot!
My wife and I have made this now several times, and every time we get better at it. Two things we did this last time…
1) we divided the final dough into 3 dough balls rather than 4, and it made it so much easier to stretch into the size of pizza we wanted.
2) I folded the dough balls a few times before putting them into the fridge, I saw that on another video somewhere.
Two questions:
1) I’ve always been putting these into larger tubs for rising in the fridge, usually two per tub but spaced out. Is that ok or will I gain anything by using actual quart sized tubs instead?
2) the pizza we made last night was just about perfect, except that we keep ending up really thin in the middle of the pie. We want it thin obviously, but not quite as thin as we end up with every time we make it. Any suggestions?
Re-balling the dough is great -gives it even more crisp:) and to answer your questions, Nothing to be gained by giving each dough ball a separate container provided that the way you were doing it now provides the dough balls with enough space so they can rise without touching each other (in which case it might make it difficult to separate them). To answer your second question, I think stretching the dough is the hardest part of all of this. There is a link I believe in the post that shows how to stretch and then I would just maybe go on YouTube and see how other people do it and find what works best for you. Sorry I don’t have a better suggestion here. I sometimes struggle with that still…
Hello,
I made this dough last weekend and it turned out great, but I only used two of the four dough balls and saved two for later. That was last Friday.
I didn’t freeze the remaining two, just left them sealed in bags in the fridge. So they’ve sat for 7 days.
Will these still be good to use? They look like they’ve flattened out a bit and there are little dimples on the dough.
Should they be pitched or do I trial by fire these bad boys?
Thanks!
-Steve
You can try using them…worse thing would be that you end up with more of a flatbread pizza
I’ve made a lot of Neopilitan and tried this but after a day in the fridge my dough had completely popped out of the top of my tubs.
Normally use ADY in my Neopilitan dough and ends up usually being a tiny 0. Something of a gram.
Used the percentage of IDY stated in the recipe but seems to be too much.
Any ideas?
Did you put the dough straight into fridge after mixing? Is it possible you didn’t measure correctly? Maybe the water was too warm? Was your fridge consistently cold? This is a low percentage of yeast…0.4% and many people don’t notice much of a rise Especially because it’s cold fermented so I’m perplexed. It could be many things. I’d reball the dough and go from there…
Hell Marie! I’m from Brazil and I got very excited with your recipe!
I made the dough last night.
But as a brazilian I have a limited English knowloedge, and I don’t know what “Luke cold water means”. I ended up making it with cool/cold water. Is that right? Thank you so much for sharing this recipe. When I will make my pizzas, I will leave my thoughts (since I made a lot of pizzas, but always different from your recipe, and I didn’t like it that much.
Thanks again!
Yes cool water is correct!
Sorry! I wanted to say: Hello Marie, and not Hell Marie hahaha
Lol, I knew what you meant 🙂
Love your recipe, been using it for several years. I just tried using 00 flour for the first time, and it was the crowning touch. I had been too busy for a while to make it, but now that I have I can’t stop! Thank you!
The yeast to flour ratio in this recipe seems much lower compare to other recipe. Most recipes call for 3 cups of flour to 2 tsp of yeast. This is saying 1 tsp of yeast to 6 cups of flour. Is this correct or a typo?
It’s correct and it’s what makes this recipe so good. It’s a “slow rise” bread which gives you a long fermentation. Think of a slow rise bread like wine (long fermentation).
This recipe works great – try it once, then consider scaling up or down depending on the size of your pizza stone and how thick or think you like your crust. Highly recommend using the Goodfellas pizza school stretching method – works perfectly! I was always really bad at stretching out my dough, but their method is great. I don’t even make it as far as lifting it up and flipping in the air – my stone isn’t that big. But just using the first few steps I still get a great crust. And yes, I know good pizza – we’re New York-area born and bred, total pizza snobs. This is legit.
perfect new york pizza dough!
I have a question. separating the dough in to 4 balls, is that making 4 pizza crusts or do you combine them when you bake the pizza?
Hi Holly, yes it makes four pizzas about 12 inches in size if you like them super thin otherwise maybe 10 inches. Feel free to make half of the recipe or you can make it all and freeze half if for doughballs/pizzas are too much
I know I saw it somewhere but I ended up by freezing half the Dell after it was in the fridge and now I have it defrosted in the fridge I cannot find the information as far as how I take care of it after it’s been in the refrigerator for a few days from the freezer?
The night before or morning of pizza baking day, remove dough from freezer and place in refrigerator (still wrapped). About an hour or hour and a half before you want to bake, remove dough from refrigerator, unwrap, and place dough on countertop making sure to flour each side of the dough balls very well (dough will be extra sticky from freezing). Proceed as normal with stretching, topping, and baking – enjoy!
Hi Marie
Made this dough, and thought it was very easy to make, handle, and liked the flavor. It was a bit chewier than i was expecting. Perhaps undercooked? Or maybe I need to try bread flour. Or is this way it is meant to be?? It didn’t crisp up as much as I would have like and heated stone at 550 for an hr. Any tips would be great. Thanks! Great recipe/ easy to follow!
Hi Michelle, hard to say but yes baking longer should crisp it more. You can also try re-balling the dough after 8 to 12 hours in the fridge – hope one or both of these helps.
Great dough! Have you made breadsticks with this dough?
I’ve made garlic knots which are very similar…
It’s a good recipe, and the technique is on point, however, your metric assignments are off. A fluid ounce is, by definition, the quantity of what that, at standard temperature (68°F) and pressure (sea level or 14.7 psi), weighs 1 ounce (avdp). Therefore 2¼ oz water, MUST weigh 18 oz, not 17.4, and thus 510 gm (or ml), not 493 gm.
Also, although it’s less glaring, your metric congestion of the flour is off by 2 gm. It should be 794, not 796.
You measurement for the weight of the salt is up for dispute, because in your volumetric measurement you neglected to say if you’re using table salt, Morton kosher, or Diamond kosher, which all differ greatly.
My criticisms may seem pedantic, but if you are so precise to measure sugar, salt, and yeah to tenths of a gram, you obviously understand the necessity for precise measurements in dough making.
Our world will be a better place when ALL Americans join the rest of the world, and throw out our measuring cups and teaspoons, along with our ounces and pounds. The Brits & Aussies use 10 oz cups, and that makes for even more confusion.
For the price of a set of cheap plastic measuring cups & spoons (ten bucks), you can but a decent, and accurate digital gram scale. All we need is an app to convert all of our grandmother’s recipes to weight, preferably metric.
The plethora of “volume to weight conversion charts” out their that give wildly differing “standards,” only exacerbates the problem.
It’s not just dip & sweep vs. room & sweep, even sites that age on the same technique, disagree on the conversion result. An example would be two very trusted sites (America’s Test Kitchen & King Arthur flour) that can’t agree on how many grams a cup of flour weighs.
Sorry, there are a few typos in my comment. I am visually impaired, and missed them before posting. I don’t see a method to edit, so the reader will have to forgive me.
Hi Neil, I’ve used a tool from pizzaMaking.com for conversions. And volume measurements were rounded because it wouldn’t make sense to tell someone to use 3.453 teaspoons, for example. The recipe works and I agree that we should all use metric to bake but many people don’t but in my opinion it shouldn’t stop them from making a good homemade pizza dough. Thanks for your comment and hope you enjoyed!
I used active dry yeast and my dough is 28 hours into cold proofing, but it doesn’t seem to have changed in size. It should rise and increase in size right?
It doesn’t change too much is size…but you typically would show some bubbling at the bottom.
what if there is no bubbling after 24 hours? also i put them in quart size bags is that ok? is the dough suppose to feel soft or little hard in the fridge?
There might not be much after 1 day. And yes it can feel a bit harder cause it’s cold.
I don’t know if it’s only me but the weight doesn’t match with the cups. I weighed the floor and it was about 3 cups. I have big family and could not risk having not enough dough. So I used the cups instead of weight.
different flours have different weights – cups should be fine.