
Homemade Hoagie Rolls (Philly-Style Sub Rolls)
This post may contain affiliate links. For more information, please see our disclosure policy.
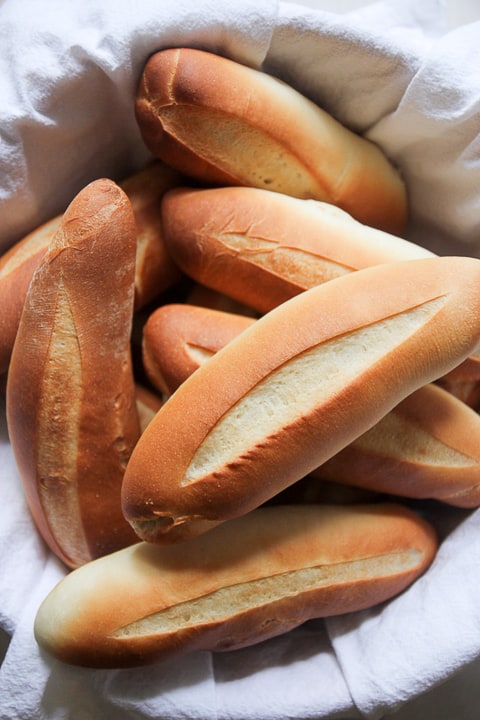
Ask anyone from Philadelphia what makes a hoagie, and they’ll tell you about the roll (bread) before they name a single thing that goes in it.
Growing up, there was a bakery in every neighborhood. A few classics are still going in Philadelphia and South Jersey, and the bread is as good as it ever was — but it’s bread you can’t find once you leave. That’s what this recipe is for. It’s also for anyone who bakes and wants to see how close you can get at home.
Call them sandwich rolls, hoagie rolls, or sub rolls. Two things set these apart from most homemade sub roll recipes: a long mix and real steam. The dough goes nineteen minutes in the stand mixer, not five — you’re looking for a windowpane, and that’s where the chew comes from. The rolls then bake at 440°F with ice cubes thrown onto the oven floor, and that steam is what keeps the crust thin and tender instead of letting it set up thick and tough. You can hold the dough overnight in the fridge, and the baked rolls freeze well.
These are what I make for Philadelphia Italian hoagies, but they’d also work great for any sandwich, including Italian meatballs or Italian beef.
Note: The recipe below makes 6 small (6-inch) or 3 large (12-inch) rolls. The step-by-step photos in this post show a double batch (12 rolls) – perfect if you’re feeding a crowd or want to stock your freezer!
Why Make This
- A thin crust, not a thick one — not a baguette that shatters, not a soft bun that goes to paste
- Real chew, from a nineteen-minute mix instead of the usual five
- Seeded or plain, the way the bakeries do it
Ingredient Notes
The full list of ingredients with measurements is in the recipe card. A few notes to know:
Bread flour. Worth using a good one — the protein is what lets the dough take a nineteen-minute mix and come out chewy instead of slack. All-purpose will make a roll, just a softer, less structured one.
Water at 62%. This ran at 57% until 2021, when I raised it. The extra water makes the rolls lighter and softer without changing the crumb — it stays fine and even, which is what you want in a sandwich roll. An open, holey crumb would let oil and vinegar run straight through. If you want a heavier, denser roll, take it back to 57%.
Olive oil at 5%. Softens the crumb and keeps the rolls good a little longer — it’s what separates these from a lean French-style dough.
How to Make (step by step)
Add everything to the bowl of a stand mixer: flour, water, salt, sugar, olive oil, yeast. Weigh it if you can. Weighing is the single easiest way to improve your bread baking, and a scale costs less than a good sheet pan — I use an OXO Good Grips with the pull-out display.
The recipe makes six 6-inch rolls or three 12-inch. The photos below show a double batch, which is what I do when I’m stocking the freezer.
Mixing the dough
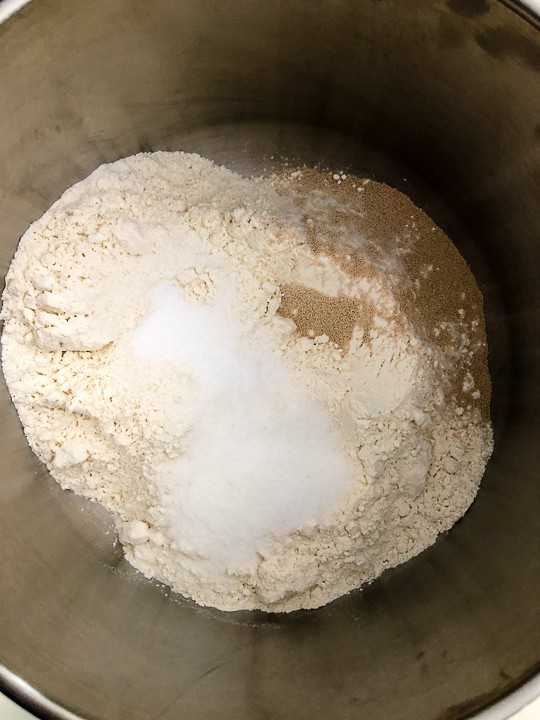
Low speed for 4 minutes so the flour hydrates, then medium for 15 more. You’re mixing to a windowpane, and that long mix is doing two things: building the chew and giving you a fine, even crumb instead of an open one. An open crumb is the goal in a lot of bread. Not here — holes let oil and vinegar run straight through the sandwich.
Here’s what the dough should look like about halfway through the mix: 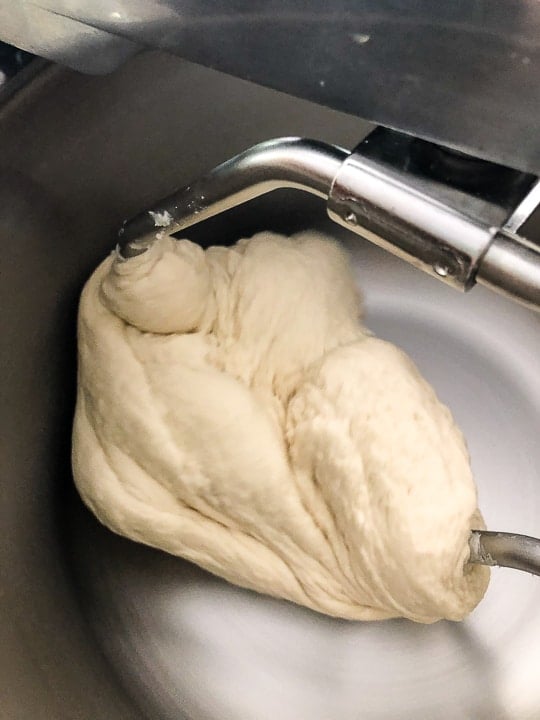
The dough after about a 20-minute mix (it will develop more during shaping and rising).
Initial Shaping
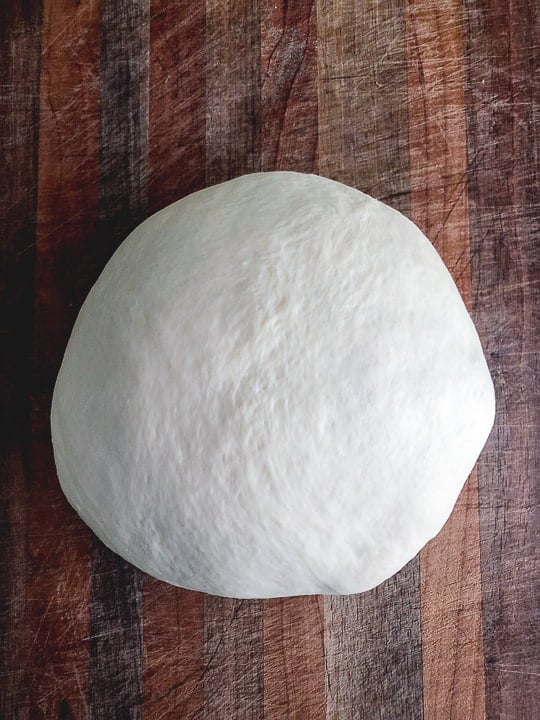
On a lightly floured surface, roll the dough out to a 12 x 16 rectangle. Cut into 6 pieces for small hoagie rolls (6-inch) or 3 pieces for large hoagie rolls (12-inch). Cover with a damp towel or oiled plastic wrap and let rest for about 20 to 30 minutes.
Final Shaping
Roll each piece out using a rolling pin (you want them relatively thin), and then roll up each piece jelly roll style. Let these rest for another 20 minutes – this pre-shaping step is important for developing the right texture. Note that these photos showed rolls that were shaped more like “torpedo” rolls, which are tapered at the end.
After this rest, you’ll do the final shaping. Roll them back and forth on the counter until you have either 6-inch lengths (for small rolls) or 12-inch lengths (for large rolls). Apply more pressure to the ends and pull the dough over to seal them if needed.
Rising and Baking Prep
Line your baking sheet with parchment paper, dust with cornmeal if using, and place the rolls allowing for about 2 inches of space between them. Cover with plastic wrap (pro tip: spray the top of your rolls with cooking spray so the plastic wrap won’t stick).
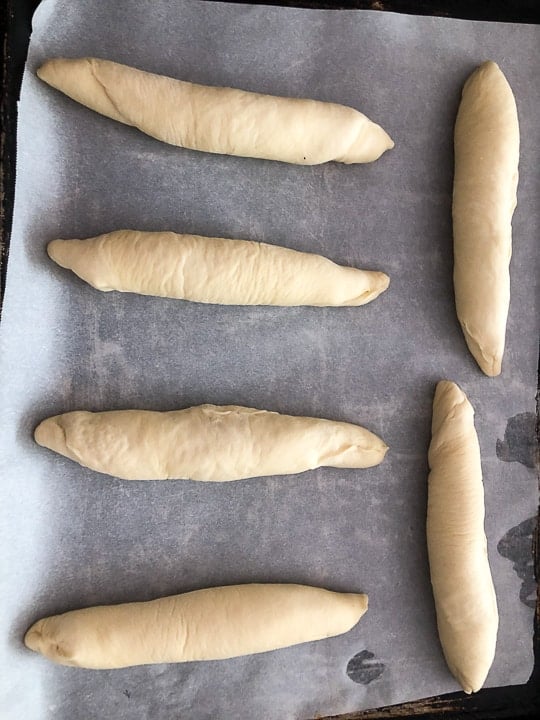
Let the rolls rise for about 60 to 90 minutes at room temperature. If your kitchen is cold, you can place them in an oven with just the light on (make sure the oven isn’t actually heating!). Alternatively, you can place the rolls in the refrigerator for an overnight rise.
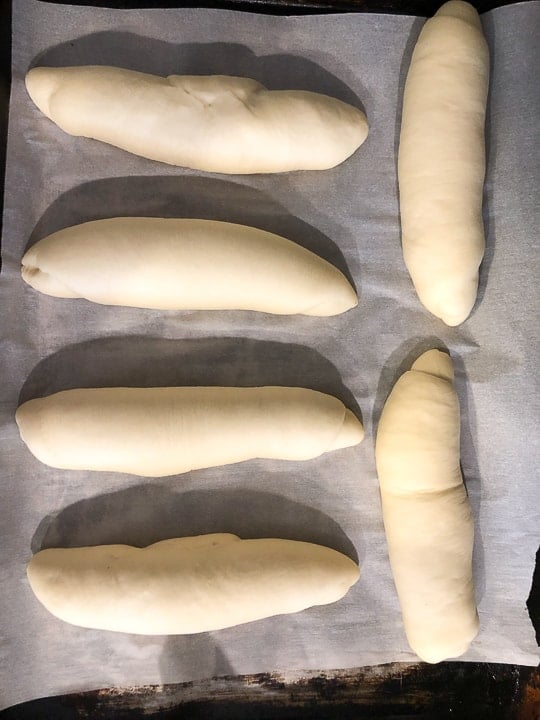
Here’s a pro tip: Use a “spy” – place a small piece of dough in a shot glass with a rubber band marking its initial height. When this piece doubles, your rolls are ready to bake!
Baking
Preheat your oven to 440°F (not on convection setting). Just before baking, slash each roll with a clean razor or sharp knife and mist with water. Load them into the oven and quickly create steam by either misting the oven several times or throwing a few ice cubes onto the oven floor.
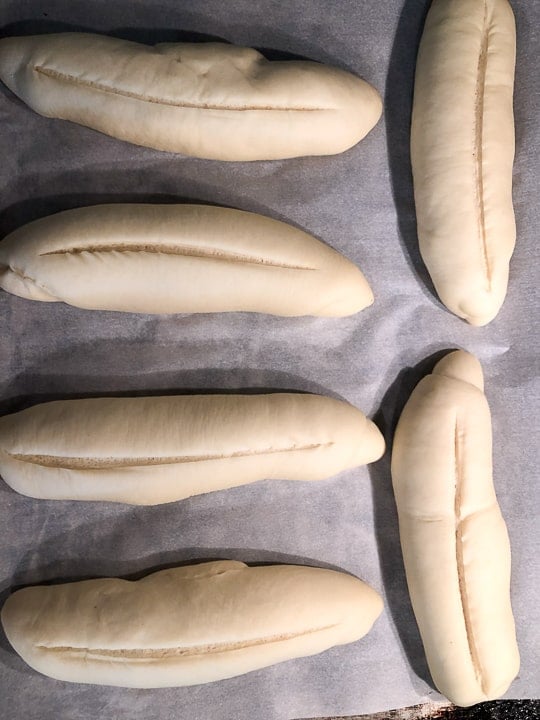
After about 5 minutes, reduce the temperature to 400°F and bake another 10 to 15 minutes — 15 to 20 minutes total from when the rolls went in. Look for a golden crust. If you’re making multiple batches, keep the waiting tray in the refrigerator until it’s time to bake.
For a glossy finish, brush the finished rolls with pasteurized egg whites thinned with water or with melted butter after baking.
Tips for Success
- Weigh each piece after portioning. Same-size rolls bake evenly; eyeballed ones don’t.
- Target 80°F dough temperature after mixing. A nineteen-minute mix generates real friction heat — a Thermapen or any instant-read tells you whether to start with cooler water next time.
- Look for 30–50% larger, not doubled. These go into the oven underproofed compared to most bread. Fully doubled rolls will spread instead of rising.
- Bake on the center rack. Too low and the bottoms darken before the tops set.
- Cold kitchen? Put a pot of hot water next to the rising tray. Or use the oven with just the light on — but make sure it’s off.
How to Store
Best on day one. They’re fine the day after, just not the same — after that, slice and freeze. A paper bag holds the crust; plastic holds the crumb soft; pick one.
♥️ Loved this recipe? I’d be thrilled if you’d rate it ⭐️ and share your experience in the comments below! Your ratings and comments help other readers discover this recipe and keep this blog going. Did you add any special tweaks? Our community of home cooks would love to hear about it! ♥️
📖 Recipe

Homemade Hoagie Rolls
Click the heart icon ♡ above to save a recipe. To find your saved recipes later, click the heart icon on the right side of the screen near the search icon and select My Favorites.
Ingredients
- 6 cups (742 g) bread flour (see notes for baker's percentages)
- 1 3/4 cups (423 g) water (room temp/about 70 degrees F)
- 2.5 tsp (15 g) salt
- 2 tbsp (22 g) sugar
- 3 tbsp (37 g) olive oil
- 2 1/4 tsp (8 g) instant dry yeast
- Note that grams are exact but volume measurements are rounded
Instructions
- Add all ingredients to the bowl of a standing mixer (see blog post for step by step pictures)
- Mix on low speed for 4 minutes (it's important for the flour to "hydrate" and absorb the water before you start using higher speed)
- Increase speed to medium and continue mixing for 15 additional minutes (you want the dough to "windowpane"- this is crucial!) (see notes)
- On a lightly floured surface, roll the dough out to a 12 x 16 rectangle and cut into 6 pieces for small hoagie rolls (6-inch) or 3 pieces for large hoagie rolls (12-inch). Cover with damp towel or oiled plastic wrap and let rest for about 20 to 30 minutes
- Roll each piece out using a rolling pin and after rolling out, roll up each piece jelly roll style and let rest for 20 minutes (this is preshaping – we will do a final shape in the next step).
- After the rolls have rested you will do a final shape. To do so, roll them back and forth on the counter until you have a length of 6-inches for small hoagie rolls or 12 inches for large hoagie rolls. Apply more pressure to ends and pull the dough over to seal the ends if needed.
- Line 2 baking sheets with parchment paper, dust with cornmeal (if using) and place the rolls allowing for about 2 inches of space between. Cover with plastic wrap (I spray the top of my rolls with cooking spray so the plastic wrap won't stick.
- Let the rolls rise for about 60 to 90 minutes at room temperature. (if it's winter and/or chilly, you can place in oven with oven light on; just make sure the oven is not heating/turned on). Alternatively, you can also place the rolls in the refrigerator so they could rise overnight.
- Consider using a "spy" – if you have a small shot glass, add a piece of dough and place a rubber band to mark the top of the dough. When the dough has doubled, it will be easier to see. This "spy" should be subject to the same temperature/location as the rolls that are rising.
To Bake
- About 30 minute before the rolls are finished rising, preheat your oven to 440. Update: do not use convection setting as the fan will dry out the crust and also push out the steam we will create in an upcoming step.
- Just before baking, slash each roll swiftly with a clean razor or knife and then mist with clean water just before loading into oven.
- Mist the oven several times with water or throw a few cups of ice on over floor just after loading bread and quickly close oven door. Try to trap that steam by doing this quickly.
- After about 5 minutes, reduce the oven to 400°F and bake another 10 to 15 minutes — 15 to 20 minutes total from when the rolls went in. Look for a golden color on the crust. You may place the remaining tray in the refrigerator until the first tray is finished baking; don't mist with water until ready to bake.
- If you'd like a glossy look, brush rolls with pasteurized egg whites thinned with a little water or with butter after they are finished baking.
- Hoagie rolls are best eaten the same day; they freeze well. I like to slice and freeze.
Notes
- To get more accurate cups measurement for bread flour, refer to your flour’s nutrition label which will give you grams/cup of flour.
- Use high quality, bread flour – this is the main ingredient in your recipe so make sure it’s a good brand
- Use a kitchen scale if you have one. Weighing ingredients is one of the easiest ways to improve your bread baking
- Ensure you are mixing the dough enough initially. This recipe calls for a ~20-minute initial mix
- I also recommend weighing out each dough ball after you portion the dough so that each roll is about the same size
- Make sure the rolls rise enough before baking. The rolls should be at least 30 to 50% larger than when they were first shaped
- If you kitchen is cold, place a pot of water on the stove with the tray of rolls next to it to heat things up
- Using a thermometer such as a Thermapen is very helpful to make sure your dough is not too hot or too cold (target dough temp about 80 degrees after mixing)
- Make sure your oven is hot enough – I found the best place to bake these rolls was right in the center rack of the oven
- Don’t forget to mist the rolls with water as well as the oven so you get a bit of oven spring (oven spring is the sudden increase in volume of bread during the first several minutes of baking)
Hi Marie! I grew up in Lower Bucks, but been a Seattleite since 1990.
I’d like to try this recipe but don’t have a mixer. Any suggestions for using my food processor? From what I read elsewhere, it takes under a minute with the steel blade to mix/knead dough. FYI I’ve successfully made your pizza dough in my FP on several occasions (it’s now my go-to).
Thanks!
I haven’t tried but I wouldn’t hesitate to do so. From what I recall you just have to be careful not to run it too long. If you are finding the dough needs more strength you can always adjust times during final shaping and proofing. Glad to hear you like the pizza dough!
Fool-proof, well done. Having moved out of the tri-state area I suffered from not having access to hero bread. Needless to say the suffering has ended !
I have been trying for a long time to find a hoagie roll recipe that is good. Each and everyone I have tried never quite did it for me, this recipe does. I agree 100% with make sure you knead it enough. I do the 4 minute mix and then I go 20 minutes in the KitcheAid! I am getting ready to proof my 2nd batch, and am doing 12 inch this time. If you follow directions, use a scale and don’t skip steps, I think you will be as pleased as I am! Meatball subs for dinner!
Was looking for a hoagie roll recipe, and this was perfect! Had a hoagie last night and then a roll with roasted peppers this afternoon. Thank you for a great recipe! One question, it seems the rest times/shaping are slightly different between the blog section and the recipe section at the end. Which should I follow? I used the recipe section and they were great, just curious if they can be even better 🙂
Hi Lisa, thanks so much for this! The recipe card was the most up-to-date version, and I have updated the post to follow along now. I’m so glad you liked them – they are a favorite of mine as well 🙂
I was looking for a same day hoagie recipe and this turned out great! I measured everything out by weight. I have a steam oven so I followed up until step 6, I proofed the dough in the oven for 45 mins and used steam convect at 400 for 15-20 minutes to bake.
A steam oven sounds so fun!
Cannot wait to try this recipe for hoagie rolls. Born and raised in Tacony section of Philly and trying to recreate a taste of home.
I’ve tried this recipe twice and honestly it’s not working for me. I used all purpose flour and I also use bread flour and it’s just a big chunk of flour that looks like Play-Doh
It’s hard to help without being there but that sounds like -from Play-Doh comment -the dough might be too heavy? I am trying to slowly go through and add video to the more popular recipes hoping that might help but in the meantime, feel free to add a few tablespoons of water to lighten up the dough. Heavy or low hydration doughs are definitely harder to work with. Also, investing in a kitchen scale is a huge game changer for when baking breads and pizzas
Sorry. I meant underbake
When you freeze these do you undertake or bake through and how do you reheat
You could parbake them, but I haven’t tested that to give you recommended times. I’d bake them, completely cool them, then wrap and freeze in airtight bag. To defrost, heat the roll(s) wrapped in aluminum foil on a baking sheet in an the oven set at 325 for about 15 minutes or so – check them at 10 minutes. Will depend on size and thickness of the roll.
Glad to have come across your blog. I have one question about your instructions. You say to brush with pasteurized egg whites AFTER they bake. I have never seen the egg wash after baking. I get they will be safe due to pasteurization, but wanted to make sure that part is correct before I make these.
Thanks for sharing this. These authentic hoagie roll recipes seem to be well-guarded secrets. 🙂
Hi Ed, yes most do apply the glazes before and I think that’s perfectly fine too – here is an interesting article on bread glazes. Maybe try doing some before and some after?
Hey there! I searched “homemade hoagie rolls grams” and ran into your blog! : ) I do have a couple of questions if you don’t mind.
I’m an amateur baker but have committed to weighing ingredients in metric. Are the weights stated in the recipe your own actual measurments?
To force me into more homemade baking (lol), I got an Ankarsrum and I think that’s what you’re using? Which number do you use for “medium” speed?
Also, I really appreciate all the step-by-step pics and instructions. It really makes the project/recipe more accessible by making me feel more confident about jumping into it!
Thank you so much! I look forward to making these hoagies! <3
Oops! I missed it! Now I see that you *clearly* stated your gram measurements are exact! Apologies! ooxoo
Hi Laurel, I don’t feel like I’ve mastered the Ankarsrum to be honest. I usually play around with the attachments and then loosen and tighten the grip on the attachments and play around with the position of the attachment. Sometimes the dough climbs up the attachment. It’s a solid machine though with a great motor.
Thanks for the recipe. I’ve been wanting to make my own rolls for my cheese steaks and this looks like it will work. Just out of curiosity, is there a reason you are using instant yeast? Is it convenience? Instant yeast is hard to find right now, but I have plenty of active yeast. Can I substitute that assuming I activate it in warm water first? The same question goes for your NY pizza dough, which has been great. I did activate the yeast in that recipe and it worked out fine, but I’m still curious. Thanks again!!
Yes I use instant for convenience and normally store a big bag in my freezer. I would hesitate to substitute active yeast – I often do
Can I use AP flour? I have been out of bread flour and the stores haven’t had any.
If it’s a higher quality flour I’d say yes (it should have at least 4 grams protein per serving – check the nutrition label)…and I’d cut back the water a bit (maybe by 2 to 3 tablespoons or so)
Best hoagie rolls I ever made! Followed your directions to a T and they got perfect!
great recipe, crispy and awesome thanks u i bake them for 12 mins in my convection super super awesome