How to Make Vanilla Fudge
This post may contain affiliate links. For more information, please see our disclosure policy.
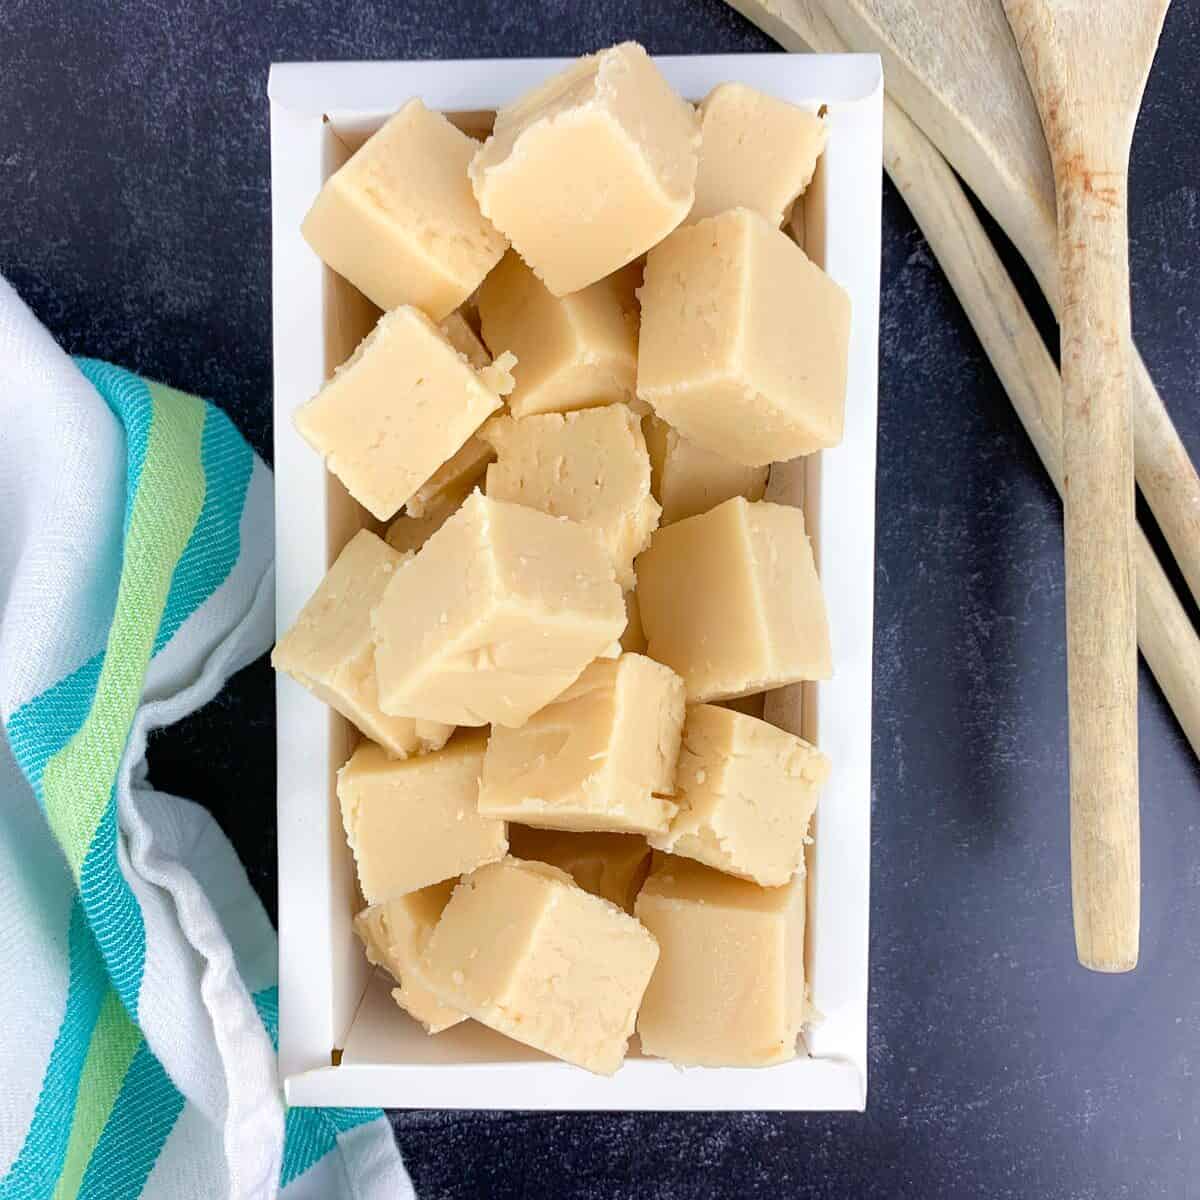
Want to know how to make the best fudge? This traditional, old fashioned vanilla fudge is easy enough to make with your kids and a treat the whole family is sure to enjoy!
You only need six pantry staple ingredients, 15 minutes of cooking time, and some patience to make this classic confection at home!
In This Post
Homemade Old Fashioned Vanilla Fudge
Learning how to make classic old fashioned fudge can be a bit tricky, but it’s so much easier when you know what to expect and what to avoid.
Fudge immediately transports me to the Ocean City, New Jersey, boardwalk where I first tried ate old fashioned, classic vanilla fudge. It is always a must-have and must-eat tradition of visiting the boardwalk. This fudge — aka “real fudge,” so no microwaving — is gourmet quality and well worth the effort!
I learned that the trick to making smooth, creamy, perfectly dense fudge is to stir it at just the right time and temperature. We’ll discuss how to do that below.
This is NOT microwave fudge! It’s the real deal, using old-fashioned, classic techniques. Hope you enjoy making this (and eating it) as much as we do!
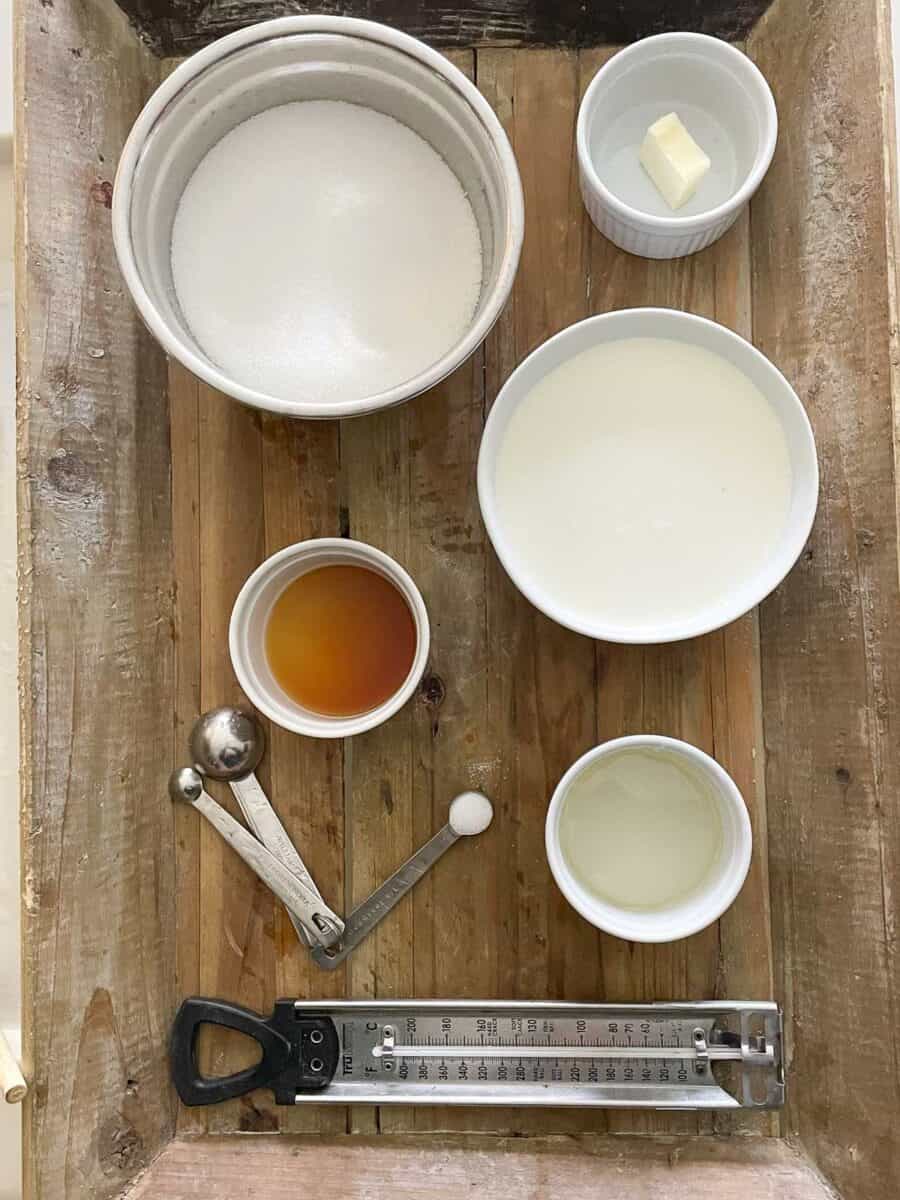
Key Ingredients
- Butter: As always with baking and candy making, opt for high-quality, grass-fed unsalted butter. Room temp is best, but not necesssary.
- Sugar: Fudge is candy, after all, so you will need a lot of sugar — 3 cups total!
- Heavy Cream: This will help us achieve a rich, thick, creamy vanilla fudge.
- Vanilla: Per usual, opt for pure vanilla extract over the imitation stuff.
- Corn Syrup: This not only helps further sweeten the fudge, but gets it to the consistency we’re looking for — velvety smooth.
- Salt: Something this sweet benefits from a little salt. 1/4 teaspoon does the trick!
Using Corn Syrup in Candy Making
According to Harold McGee, of “On Food and Cooking”, corn syrup is an especially effective agent used to prevent crystallization of your candy (this is when end up with grainy fudge). Your goal is to get super fine crystals and that’s why there is a precise process to follow. Corn syrup also provides body and chewiness according to McGee.
Some people may hesitate to use corn syrup because they confuse it with high fructose corn syrup, which is completely different. According to the Kitchn.com, “Both products are made from corn starch, but regular corn syrup is 100 percent glucose, while high-fructose corn syrup has had some of its glucose converted to fructose enzymatically.”
What Equipment You’ll Need To Make Traditional Vanilla Fudge
- Large sauce pan with heavy bottom that is triple of the size of the fudge mixture (the mixture will bubble up a lot when cooking)
- Digital thermometer (or candy thermometer) or a glass with cold water and a spoon for evaluating soft ball stage
- Wooden spoon for beating fudge
- Rimmed baking dish or pan lined with parchment paper and butter to hold finished fudge
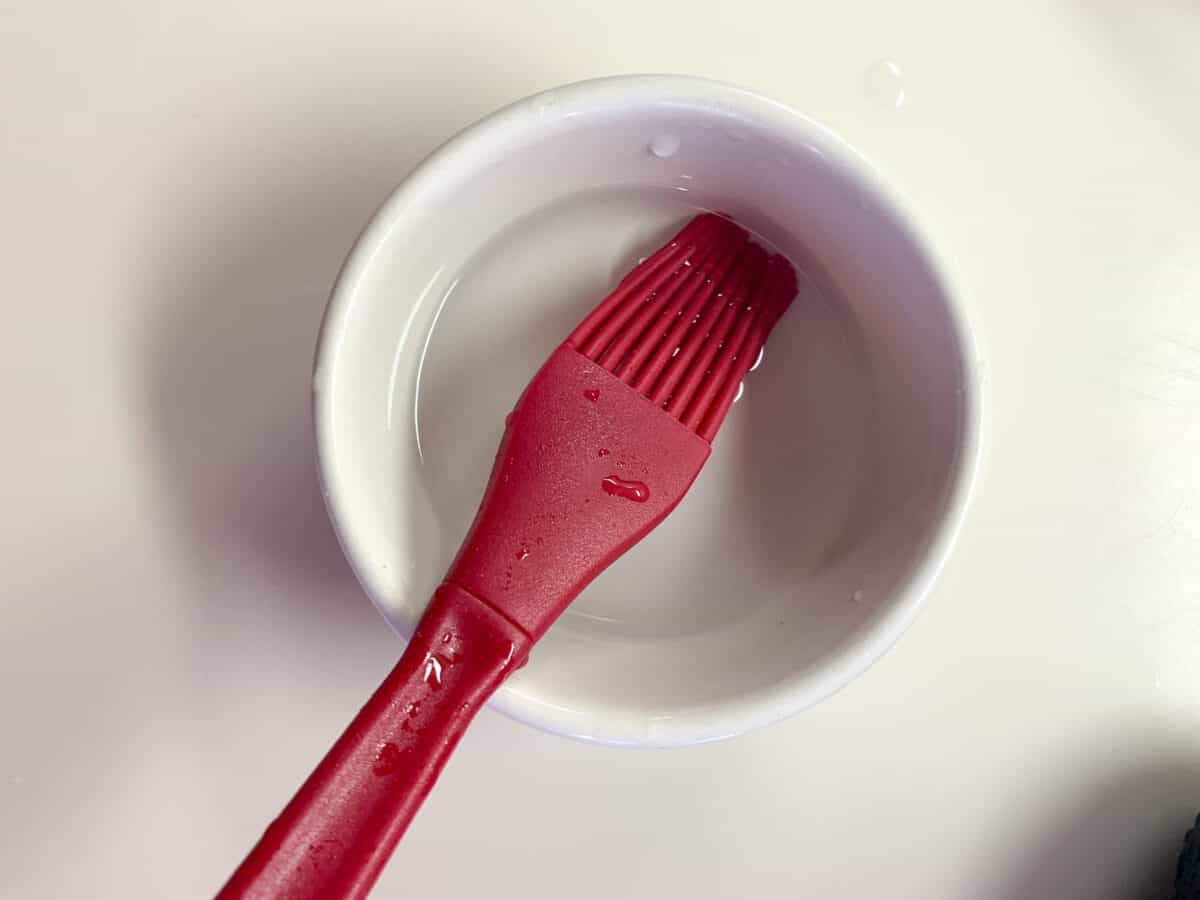
- Pastry brush with small saucer of water (or you can oil/butter the sides of the saucepan, which may be easier)
- Sharp knife for cutting cooled fudge
Prep Your Work Station
It’s worth taking the extra few minutes to prepare your counter or work station so that you can work quickly and efficiently while making the fudge.
Time and temperature are key for this recipe, so anything you can do to free up your hands is crucial! Here’s what you’ll need to set up before making the vanilla fudge:
- A bowl with pastry brush and water to wash down sides of pot (OR you can butter or oil the sides of the pan instead of using the brush/water technique)
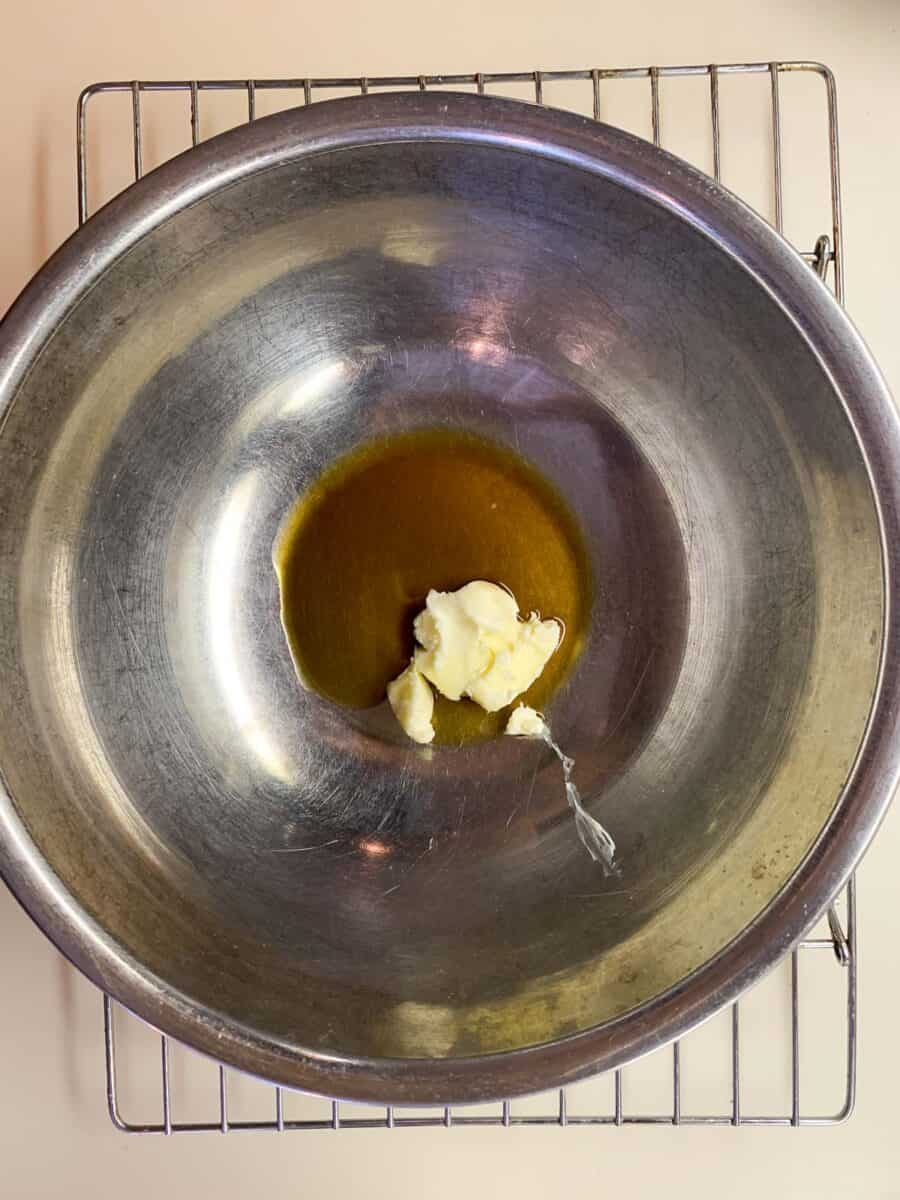
- A bowl on cooling rack with vanilla and butter (cooling rack helps it to cool down faster, instead you can opt to place the bowl in another bowl of iced water, just make sure the iced water doesn’t get into your fudge mixture!)
- A prepared pan to pour cooked fudge, which we will use to let the fudge set before cutting.
How To Make Traditional Homemade Fudge
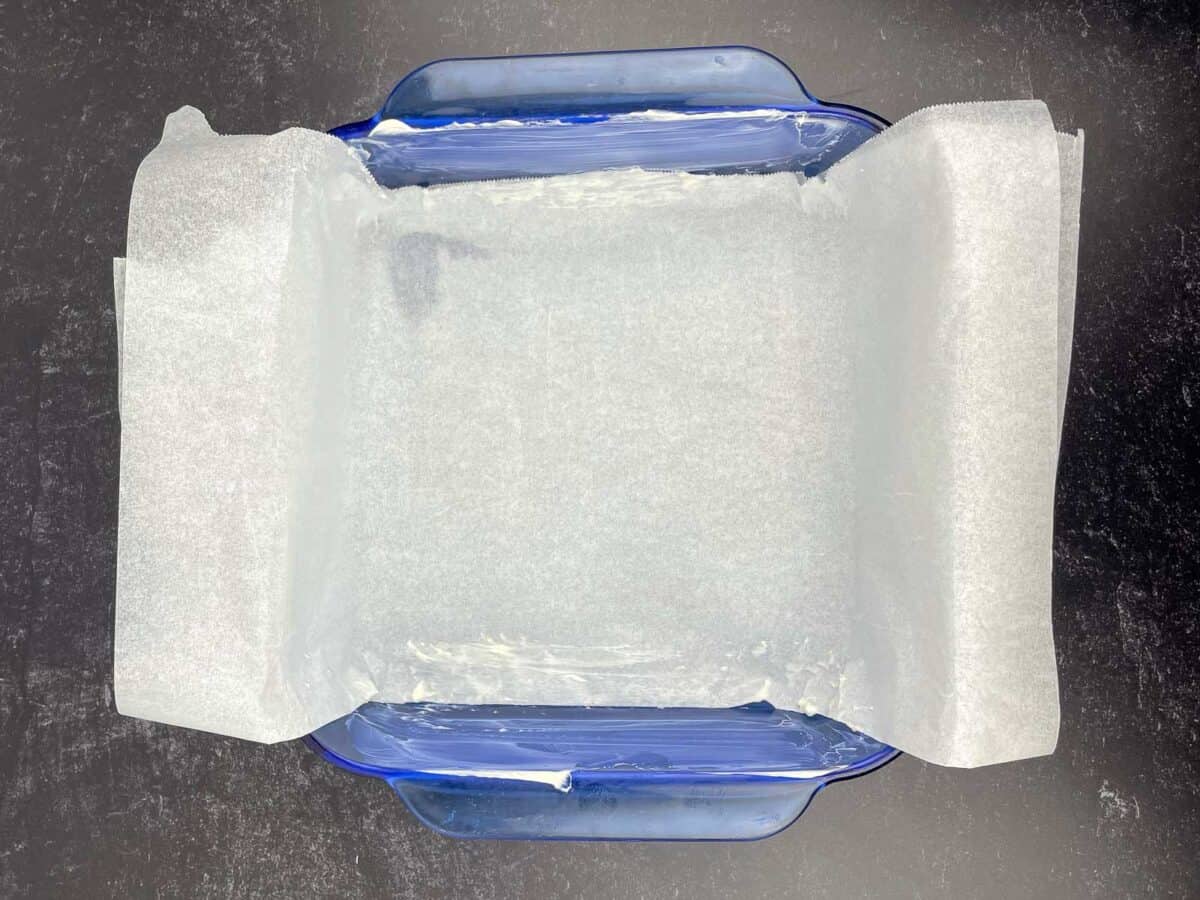
- Line an 8×8 pan with foil or parchment paper, then grease sides without foil or paper with butter and set aside.
- Add 1 tbsp of butter and 1 tbsp vanilla extract to a medium-sized, heatproof bowl over a wire rack. Set aside.
- After greasing the sides of a medium-sized, heavy-bottom pot, add sugar, heavy cream, corn syrup, and salt. Heat over medium-low heat, and stir to combine until the sugar has melted (about 10 to 15 minutes)
- Slowly raise heat until the mixture reaches a very gentle simmer, and insert a candy thermometer or digital thermometer. Continue to heat without stirring until the mixture reaches 238F, aka the soft ball stage.
- Some people like to wash down the sides of the pot while the mixture is cooking, to prevent crystallization (buttering sides of pot should prevent this).
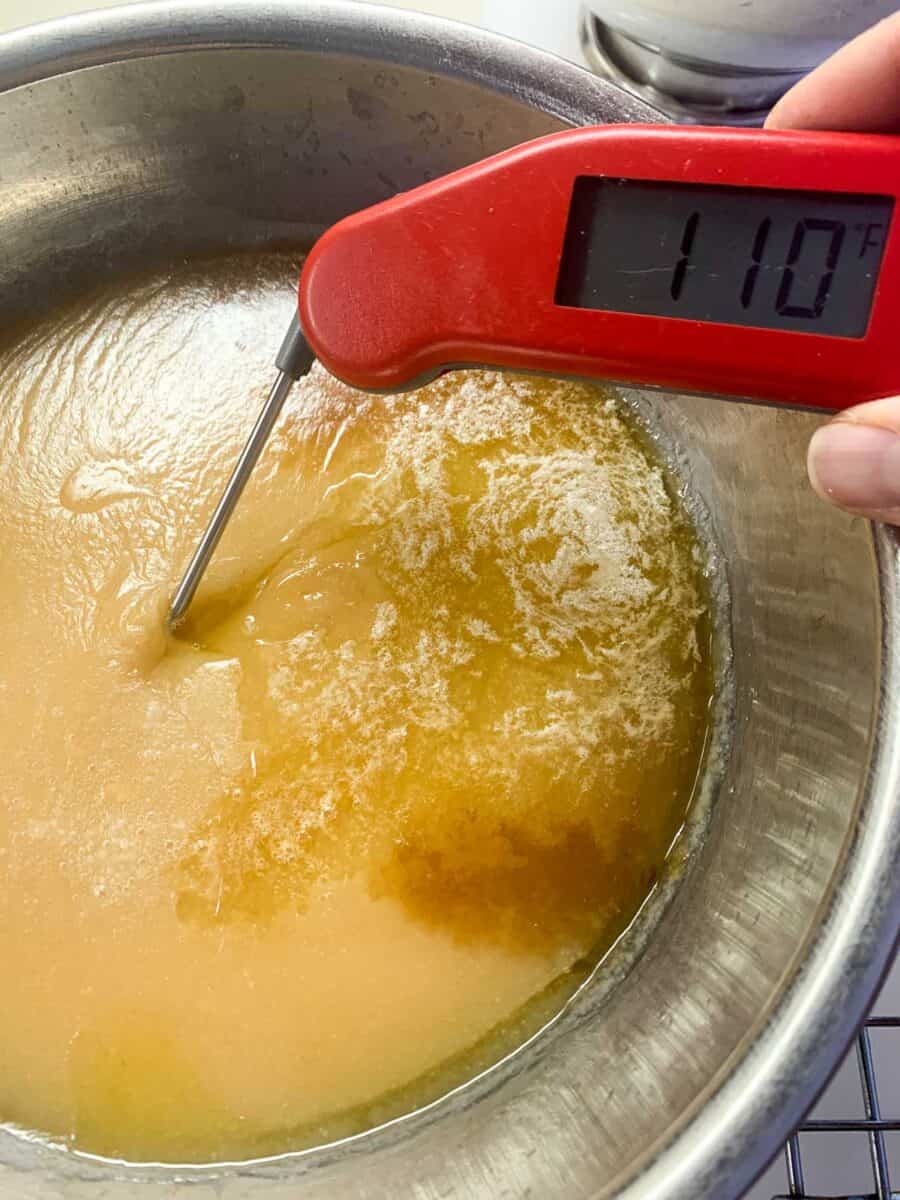
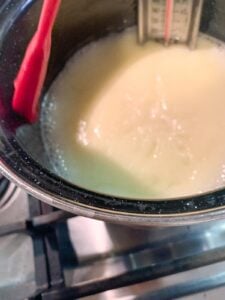
- When the mixture reaches the target temperature, immediately transfer the contents to the heatproof bowl containing the butter and vanilla. Do not scrape sides or bottom of pot. Allow the mixture to cool undisturbed until it reaches ~110F – do NOT stir.
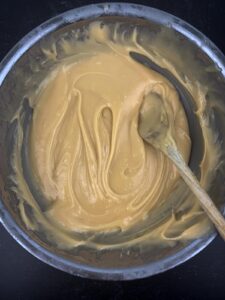
- After the mixtures has cooled, begin stirring with a wooden spoon until it thickens and loses its gloss (10 to 15 minutes)
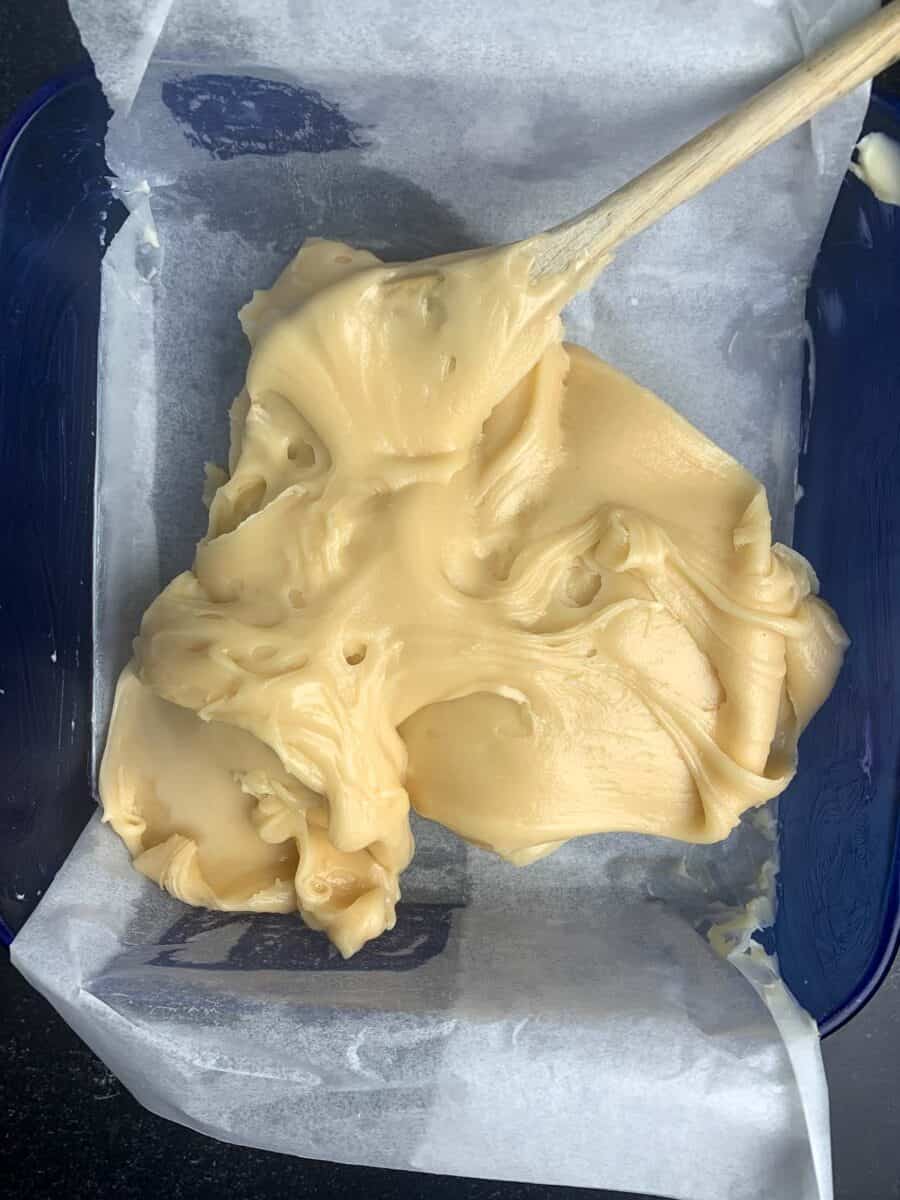
- Immediately transfer to prepared pan, smooth top with spatula or back of a spoon, and let it rest on the counter for at least another hour before refrigerating.
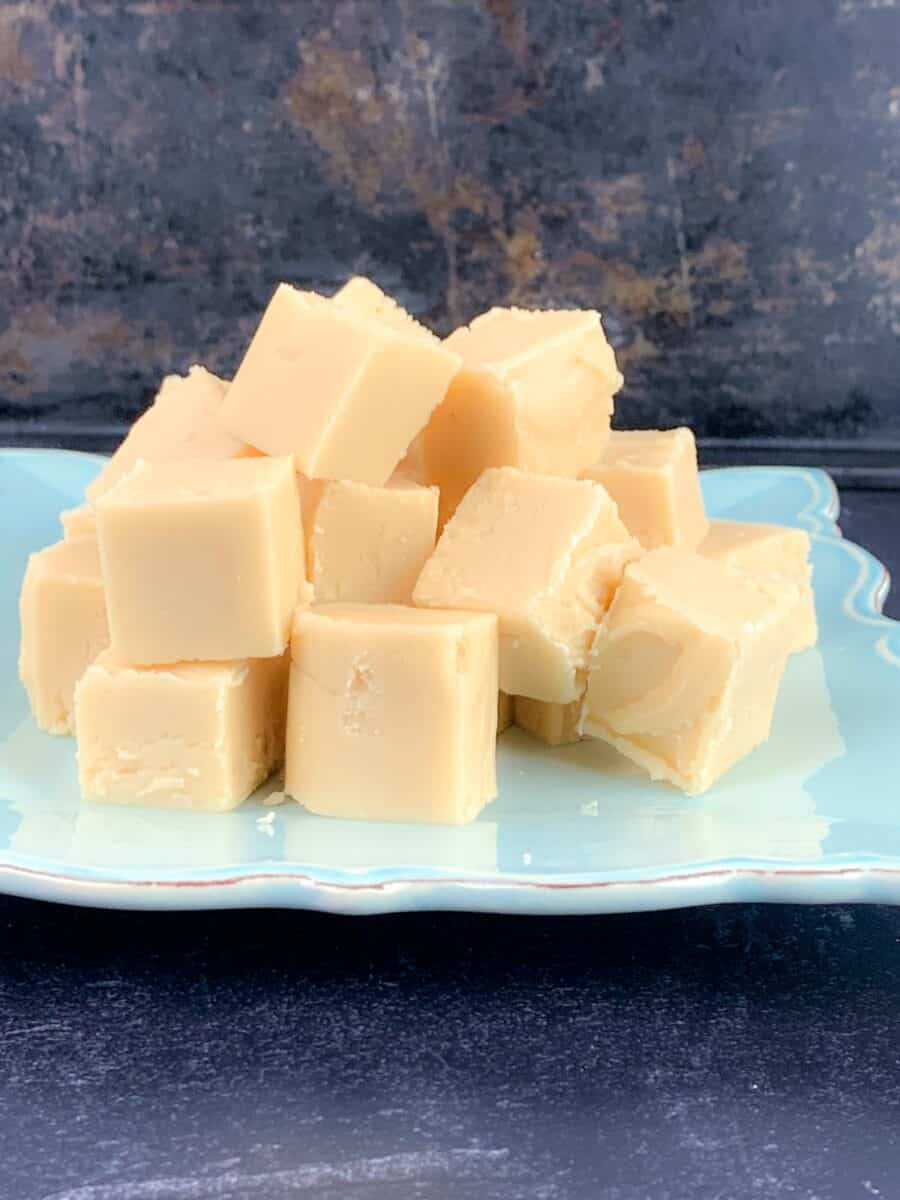
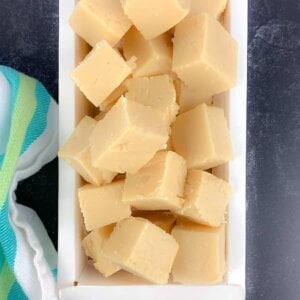
- Refrigerate for at least 8 hours or until set, remove paper or foil, and cut into 64 square pieces. Serve, and enjoy!
Making at High Altitude
If you are making candy at high altitudes, you will have to adjust for the temperatures for the soft ball stage and for testing you candy thermometer.
Water boils at lower temperatures at higher altitudes and so you will be cooking your candy for a shorter duration.
The best method to adjust for the differences in temperature is to conduct a Water Boil test.
To do this test, boil water and test the temperature using a candy thermometer after 5 minutes of boiling.
At sea level, water boils at 212F. The difference between your calculated boiling water temperature and the standard temperature of 212F (ie, sea level temperature of boiling water) will be your adjustment factor.
You can also estimate the difference by subtracting 1 degree for every 500 feet above sea level and 2 degrees F for every 1000 feet about sea level.
Read more about high altitude adjustments for candy making at the Spruce Eats.
What Does Fudge Look Like While It Cooks?
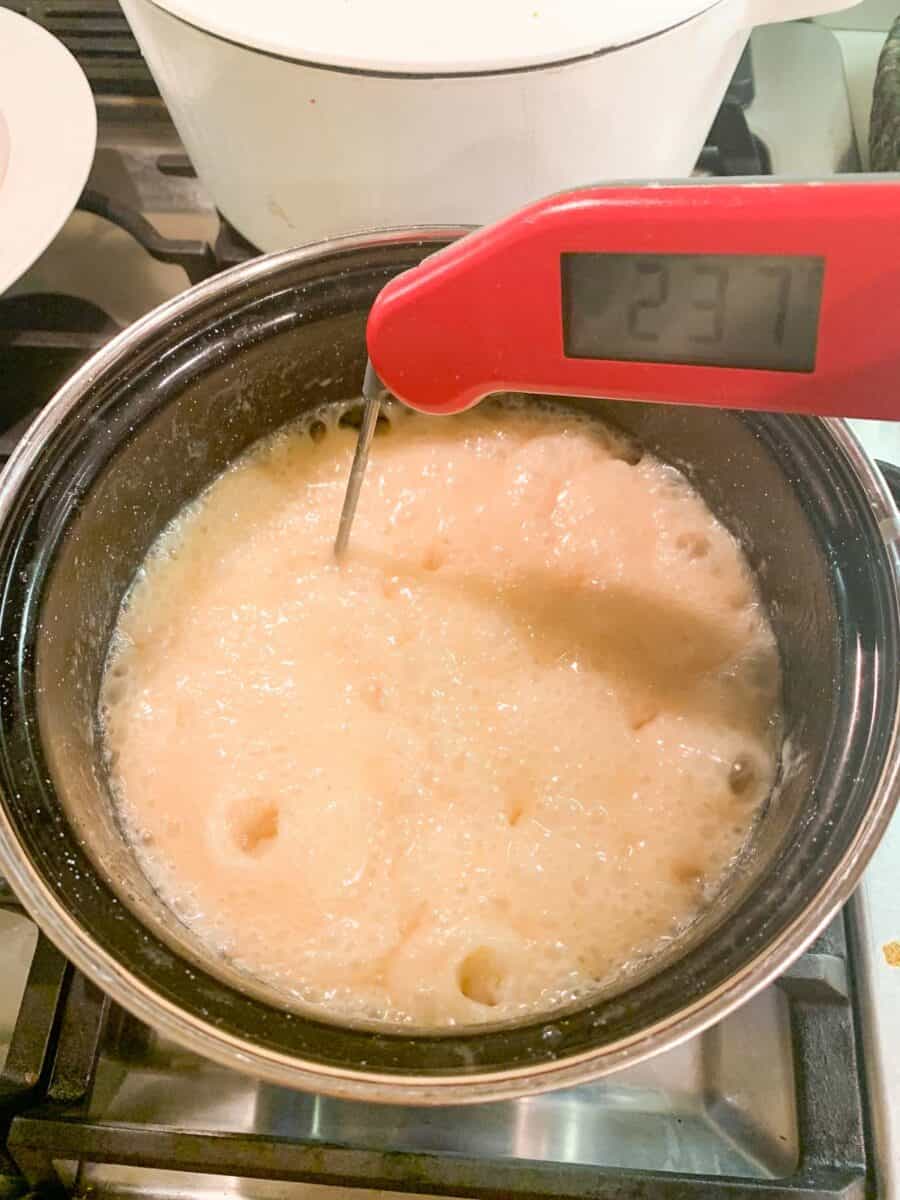
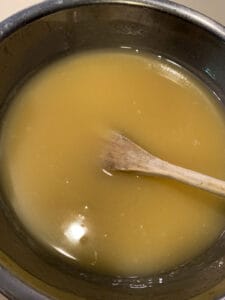
My biggest question when I began learning how to make old fashioned fudge was what will it look like as it reaches the completed cooking temperature? As you can see below, the fudge will lighten in color and resemble lava, producing big bubbles.

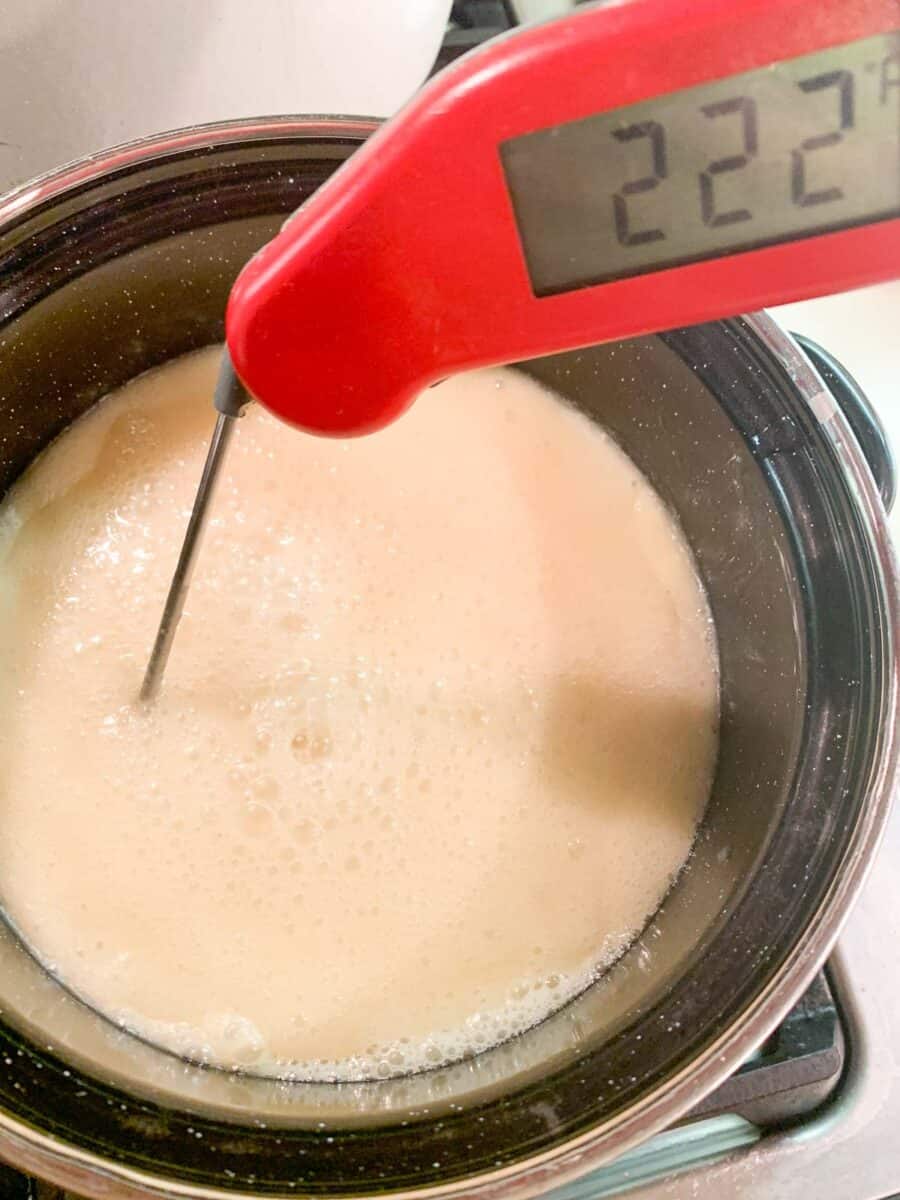
You can toggle the heat on your stove so that it doesn’t boil too aggressively, but it needs to be high enough that the temperature increases slowly.
My fudge finished cooking after 15 minutes on my stove when my thermometer reached 238 degrees. (not shown in photo), but you can cook it until it reaches 242 degrees if you want to cut down on the stirring/beating required in the final stage (not recommended for novice fudge makers).
I absolutely love my Thermapen digital thermometer. I did use a candy thermometer, but it was not accurate, and I had a batch of fudge that failed as a result. If you do use a candy thermometer, be sure to test it beforehand.
After making fudge a few times, I can now say that I feel confident in my confectionary abilities! For me, the key was finding a temperature “sweet spot” where the fudge simmered gently so to avoid burning.
It also helped to find a recipe that includes corn syrup because using corn syrup helps to prevent crystallization of the sugar, giving you a nice and smooth fudge.
Using the Cold Water Method to Test Fudge
You should aim to cook fudge until you reach the Soft Ball stage (235°F – 240°F / 118°C – 120°C). See above section for high altitude temperatures.
If you don’t have an accurate digital food thermometer, you can use the cold water test to see if fudge is finished. To do this, grab a bowl of very cold water (or ice water), and pour one teaspoon of cooked fudge into cold water.
It will form slightly thick threads and when remove the threads from the cold water you will be able to form them into a small ball by rolling between your thumb and forefinger. The ball will be soft and can be easily flattened.
How to Test a Candy Thermometer
You should test your thermometer at least once yearly. To do this, boil water, and insert your thermometer, making certain that the bulb of the thermometer is sufficiently in the water (not just in the bubbles) and not touching the bottom or sides of the pan. Note what the reading is after 5 minutes in the boiling water.
The temperature of boiling water should read 212F – if it does not, make sure to note the difference to compensate for your final desired cooking temperature when making the fudge. See above for high altitude temperatures.
To ensure an accurate reading make sure you are viewing the temperature reading from eye level and not from too far above as angles can screw the reading.
Why You Need To Beat the Cooled Fudge
When fudge cools down to 110 degrees, get ready to stir, stir, stir!
You may be wondering why you need to stir cooled fudge. The simple act of stirring forms long crystals of sugar and prevents small, granular crystals, which ultimately leads to grainy, sandy fudge. The longer and more plentiful the stirring, but finer the grain or crystals of your fudge.
The first photo shows what it’ll look like before stirring (and after it has cooled enough to start beating), and the center photo shows what it should look like after it “loses its shine” and when it’s ready to pour into your dish.
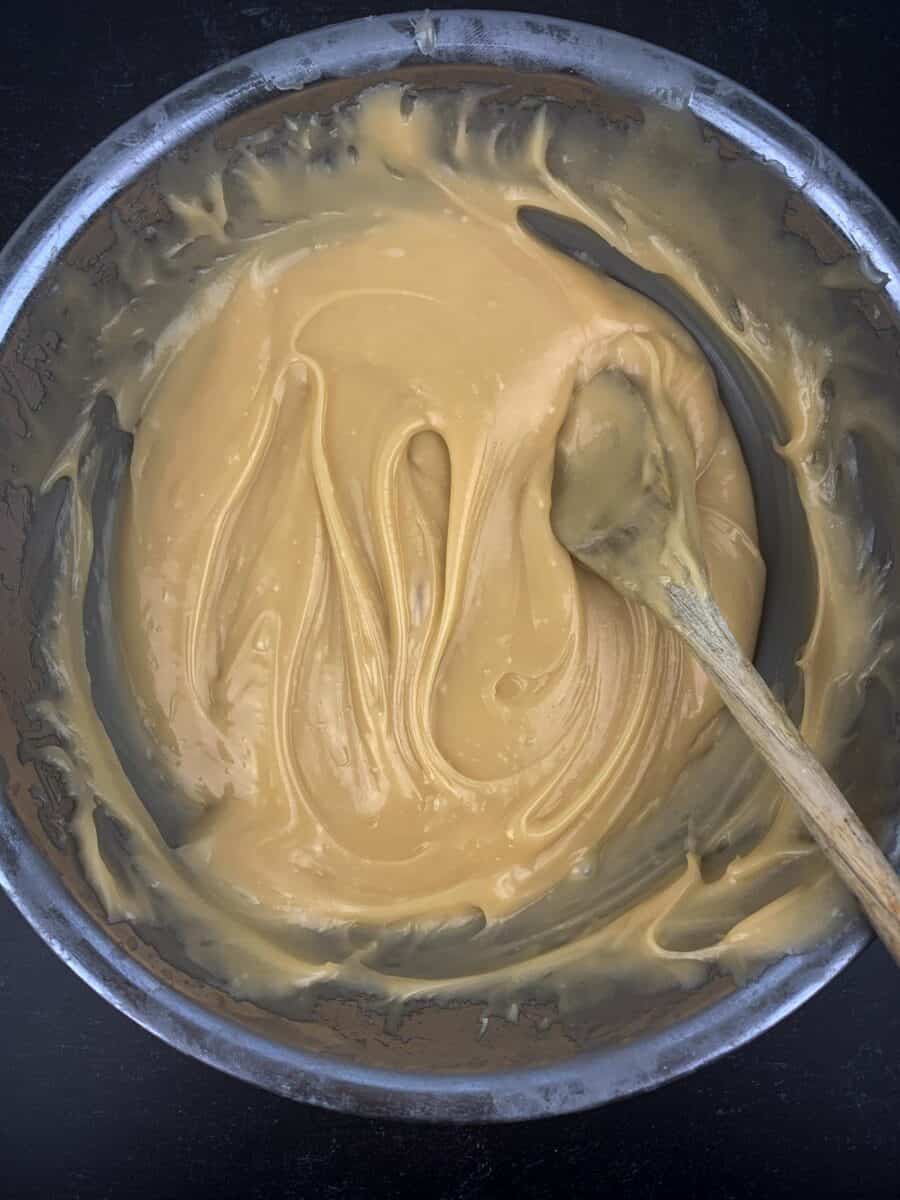

Pro Tip: You can opt to press down the swirls to flatten out the mixture, if you’d prefer. Pressing down the fudge will also remove any potential air bubbles.
How To Avoid Sugar Crystallization
After the fudge mixture is cooked, just one sugar crystal in your pot will ruin the candy. There are a few ways you can avoid this from happening:
- Wipe down sides of pot after the mixture comes to a boil to remove undissolved sugar (you can use a wet paper towel or a pastry brush with water)
- Instead of washing down sides of pot, some prefer to simply butter the sides of the pot to prevent sugar crystallization.
- Do not stir or place a spoon into the mixture after it comes to a boil (it might have sugar crystals on it)
- Do not stir or move the fudge after it is cooked (do not stir the butter or vanilla into it) until it is cooled to at last 115 degrees.
More Tips for How to Make the Best Homemade Fudge
- A digital thermometer is recommended for this recipe. A very common problem is the use of a candy thermometer that is not accurate.
- If you don’t have a thermometer, use a bowl or glass of ice water to test for “soft ball” stage. This occurs when you place a very small amount of fudge into the ice water, it should immediately form a semi-solid mass, like a tootsie roll that is super soft.
- If you are a beginner fudge maker, don’t make fudge when it’s humid or raining outside. It will affect the texture of your candy.
- Do NOT stir the mixture after the initial stage where you heat the mixture to incorporate the sugar, or you risk crystallization of the sugar.
- Use very sharp knife to cut to get clean edges
- Aside from heating the fudge to the correct temperature, the next hardest part is probably beating the fudge. For this reason, it is recommended to only make one batch of this recipe at a time. Beating the fudge should take about 10 minutes.
- Don’t scrape the pan when you are transferring the cooked fudge to the baking pan. otherwise, you risk the formation of sugar crystals (that will inevitably cause grainy, sandy fudge).
- Use a large enough pot so fudge won’t boil over (It grows to about 3 times the volume at some points during boiling) and heavy enough so the fudge won’t burn. The last thing you want is for this fudge to make a mess on your stove!
- Make sure the fudge is boiling and not merely simmering or else it will not reach the target temperature.
Common Questions for Making Homemade Fudge
- Why is my fudge grainy? Because you didn’t stir it enough at the correct temperature (115 degrees), so the sugar crystalized in small, short granules instead of long strands.
- Why didn’t my fudge set? You probably got impatient and didn’t let it cool long enough in the fridge, or you made it when it was humid outside. Patience is a virtue!
- Why do I have to wash down the sides of my pan when making fudge? This prevents sugar crystallization, aka sandy fudge. As mentioned earlier, you can butter the sides of your pot instead.
- How to make fudge without a candy thermometer? You can use a bowl or glass of ice water to test for “soft ball” stage. When you place a very small amount of fudge into the ice water, it should immediately form a semi-solid, super soft mass.
How to Store and Freeze Homemade Fudge
- Store cooked fudge in an airtight container in the refrigerator up to 3 weeks.
- Freeze cooked and cooled fudge in an airtight, freezer-safe container for up to 3 months. Thaw frozen fudge by placing it overnight in the refrigerator.
- Cut the fudge into pieces before storing, and separate any layers with waxed paper or plastic wrap.
Recipe
📖 Recipe
Classic Old Fashioned Vanilla Fudge
Click the heart icon ♡ above to save a recipe. To find your saved recipes later, click the heart icon on the right side of the screen near the search icon and select My Favorites.
Video
Equipment
- Candy Thermometer or Digital Thermometer (digital preferred; recommend testing in boiling water should register 212F)
Ingredients
- 3 cups (600 g) granulated sugar
- 1.5 cups (357 g) heavy cream also called "heavy whipping cream"
- 1/4 cup (85.25 g) light corn syrup
- 1/4 teaspoon salt
For the Mixing Bowl
- 1 tablespoon (14.79 g) butter plus more for greasing pan and for greasing pot
- 1 tablespoon vanilla
Optional Add-Ins (Total of 1 Cup)
- Nuts (almonds, walnuts, pecans, etc)
- Mini marshmallows
- Chopped candies
- Coconut
- Chopped maraschino cherries make sure to dry out as much as possible.
Instructions
- Line an 8×8 pan with foil or parchment paper, then grease sides that are not covered by the paper or foil, and set aside (you can also grease the entire pan which helps the parchment paper stick)
- Set a medium sized heatproof bowl over a wire rack, and add 1 tablespoon of butter and vanilla extract. Set aside
- Set medium sized heavy-bottom pot over the stove and add sugar, heavy cream, corn syrup, and salt.

- Insert a candy or digital thermometer to monitor the temperature (see NOTE 1 below).
- Heat mixture over medium-low heat, and stir to combine until the sugar has melted. During the first 5 minutes or so, wash down the sides of the pot with a damp pastry brush to prevent sugar crystals from forming.
- You can opt to grease the sides of the pot instead of using the pastry brush to wash the sides.
- Once the mixture is homogenous and the sugar has melted, stop stirring and remove the spoon from the mixture! Otherwise, you can end up with grainy fudge.
- Raise heat until the mixture reaches a very gentle simmer.
- Continue to heat without stirring (no spoon!) until the mixture reaches 238F, aka the soft ball stage.
- For high altitude, subtract 2 degrees F for every 1000 feet about sea level (or 1 degree for every 500 feet about sea level) to determine the soft ball stage temperature.
- If you don't have a thermometer, use a bowl of ice cold water and once your fudge looks like bubbling lava, drop a teaspoon full into the cold water. Remove the fudge from the water, and squeeze it between your fingers – If it balls up into a soft ball, your fudge is ready.
- When the mixture reaches the target temperature, immediately transfer the contents to the heatproof bowl containing the butter and vanilla. Do not use a spoon to transfer and do not scrape sides or bottom of pot.
- Allow the mixture to cool undisturbed until it reaches 110F – do NOT stir while it is cooling down.
- After the mixtures has cooled (about 1.5 hours), begin stirring with a wooden spoon until it thickens and loses its gloss (10 to 15 minutes). The more continuous and plentiful the stirring, the more fine grained and smooth your fudge will be (yes, I take a few breaks!)
- Immediately transfer to prepared pan using a wooden spoon or spatula, smooth top, and let it rest on the counter for at least another hour before refrigerating.
- Refrigerate for at least 8 hours or until set, remove paper or foil, and cut into 64 square pieces.


To Store
- Store cooked fudge in an airtight container in the refrigerator up to 3 weeks. Freeze cooked and cooled fudge in an airtight, freezer-safe container for up to 3 months. Thaw frozen fudge by placing it overnight in the refrigerator.Cut the fudge into pieces before storing, and separate any layers with waxed paper or plastic wrap.
Notes
- A digital thermometer is recommended for this recipe. A very common problem is the use of a candy thermometer that is not accurate.
- If you don’t have a thermometer, use a bowl or glass of ice water to test for “soft ball” stage. This occurs when you place a very small amount of fudge into the ice water, it should immediately form a semi-solid mass, like a tootsie roll that is super soft.
- If you are a beginner fudge maker, don’t make fudge when it’s humid or raining outside. It will affect the texture of your candy.
- Do NOT stir the mixture after the initial stage where you heat the mixture to incorporate the sugar, or you risk crystallization of the sugar.
- Use very sharp knife to cut to get clean edges
- Aside from heating the fudge to the correct temperature, the next hardest part is probably beating the fudge. For this reason, it is recommended to only make one batch of this recipe at a time. Beating the fudge should take about 10 minutes.
- Don’t scrape the pan when you are transferring the cooked fudge to the baking pan. otherwise, you risk the formation of sugar crystals (that will inevitably cause grainy, sandy fudge).
- Use a large enough pot so fudge won’t boil over (It grows to about 3 times the volume at some points during boiling) and heavy enough so the fudge won’t burn. The last thing you want is for this fudge to make a mess on your stove!
- Make sure the fudge is boiling and not merely simmering or else it will not reach the target temperature.
Taste just like Laura’s fudge from the shore
Wow what a bunch of jerks on here. First off She didn’t take anyone’s recipe. This recipe is older than all of us put together. Martha Stewart is great but she takes a lot of old recipes and renews them. So JC, Charles, Mike and anyone else on here who has bashing to do, get lost because we really don’t want you on here. The lady was nice enough to post this and correctly at that. Every recipe comes from long long ago. Just like music. You just recreate it.
I’ve made this many times and have had great success. Looking to see if anyone has tried to add chocolate?
I followed the recipe exactly and my fudge never hardened. I am so disappointed! Did anyone else have this problem? I stirred for a good 15 min after it cooled to 110 degrees and it thickened a bit but I figured it would harden more after it sat and then was in the fridge. But it was still so soft I couldn’t even cut it. Tasted yummy, but couldn’t use it.
so the most common reason for not hardening is the fudge was cooked to the target temperature. There are ways to save it if it’s not too late?
Unfortunately I already threw it away! I used some of it for icing because it was so soft, but the rest I didn’t think was savable. Please tell me how I could have saved it for future reference! Thank you!
Oh bummer! next time (hopefully wont happen again), you can try this
I’m curious why you don’t scrape the sides or bottom of pan when you transfer to the butter/vanilla bowl?
Because there is too high a chance that you’ll incorporate sugar crystal which will result in grainy fudge…a very detailed explanation here
Followed instructions to a “T” and I’m 99% sure it carmelized. Very low simmer and it started to darken long before soft ball stage. It’s cooling now.
This is Martha Stewart’s recipe. You should credit her.
Yup, agreed – she’s been credited. Maybe you missed it?
You stole Martha Stewart recipe…changed only one thing
#marthastewart
Well, thanks for your note Charles…yes, I did provide a link to the original recipe as you may have noticed. I do try to update things a bit, provide my insight, or/and explain things a bit better whenever needed, which I believe was the case here. Hope that helps to clarify!
Don’t let the Negative Nellies (or Nelsons) bother you. I’ve seen the same or very similar recipes in books as old or maybe even older than MS. I’m reasonably certain SHE got her recipe from somewhere or someone who had made it long before she did.
🙂 One of my “Grandmas” used to make this long before anyone had ever heard of Martha Stewart! I have her recipe, given to me some 40 years ago as a young soon-to-be-married. Her list of ingredients is pretty much identical; her directions however are far less precise. 🙂
Thanks! That was my intention as I think sometimes recipes can be improved with additional direction 🙂
Your directions, tips and troubleshooting are priceless. Thank you for going into such great detail! I’ve learned so much.
I haven’t tried making fudge yet but my mother in-law and I are very excited to try it. I just have one question. What do you mean by “wash down the side of the pot” wile it is on the stove?
Sorry for late reply – I mean make sure you don’t let the mixture sit on sides of pot undisturbed – clarification: use a brush dipped in warm water to gently wash sides of pan
Isn’t that stirring?
Hi Mike, I will clarify this is the directions, I know if was vague as written. You should dip a pastry brush in warm water and wash down the sides of the pot to clean the sides
The texture was fine, however I and everyone who tried it found it painfully sweet.
Hmmm, I’ve never had fudge that wasn’t painfully sweet. As I understand it, the sugar to milk ratio is important to the success of the recipe. Perhaps adding nuts or chocolate flavor would cut down on the sweetness?
Hello! I made your delicious fudge. However it did turn out very grainy. Is that because I didn’t let it cool to 110 before stirring vigorously? It was at about 140. Also I was too afraid to not stir when I was waiting for it to get to 238. Could this have caused the graininess? Just wanting to learn from my mistakes.
Hi Chelsey – can I think stirring could have caused crystallization leading to graininess. It seems like a lot of things can lead to that but the addition of corn syrup is supposed to help. Read the answer on this link and maybe that will help too.
Yes, that was a very helpful post. Thank you so much! I would definitely say it was my stirring when I was bringing it to a boil. Wish me luck! By the way, despite the graininess, it’s delicious!
Yes, that was a very helpful post. Thank you so much! I would definitely say it was my stirring when I was bringing it to a boil. Wish me luck! By the way, despite the graininess, it’s delicious! So much better than the ones that use white chocolate or condensed milk
Can this recipe left out at room temperature, or stored in the refrigerator? How long does it keep?
Hi Jake – it should be refrigerated (can be for held for up to one week) and then brought to room temperature before serving.
Thanks, looking for a good fudge base that can be left in an air tight container at room temp. With a long shelf life, Know where I can look?
Hi Jake – here is more information on storing more long term but unfortunately not at room temp:
http://whatscookingamerica.net/Q-A/FudgeFreezing.htm
I’m not a fudge expert but rather just wanted to share the recipe that finally worked for me. I believe longer term storage at room temperature would involve the use of some kind of preservatives, which I tend to stay away from. There was a member only site that I came across, which required subscription, but seemed like it would provide this kind of information. If you are interested, I can pass along the site URL.
Yes, that would be great. Thank you
Sure I believe it is geared for those who wish to sell fudge: http://www.calicocottage.com/ask-calico
It will grow mold if left at room temp. I learned the hard way.
My while family loved this fudge. It tastes as good as boardwalk candy store fudge. Thanks so much for sharing!
Fantastic recipe! This was my first time making fudge and I had people asking for the recipe all night. Thanks Marie!
It’s a great recipe for the holidays! Glad you liked it:)
Once I learned to make homemade fudge I was hooked, never buy the store packed stuff … it just doesn’t compare. Using corn syrup is a great tip to prevent sugar crystals and make a creamy fudge. I have seen some recipes use sweetened condensed milk which works too but it changes the flavor and seems less authentic to me.
Interesting! Thanks for sharing your tip on condensed milk. My daughter wanted to try a recipe with condensed milk (maybe that was try number 2?) and I think the heat was too high. Burned mess! LOL. I now know better – patience is key with candy making!
Can i sub half n half for the heavy cream? My cream has expired
I would sub it but have not personally tried it. If you do, let us know how it works.
I love fudge and I love making fudge in the winter. I don’t do it very often because then I’d eat it all. My pants are tight enough. 🙂
These photos make me want to buy new (larger) pants!
Oh, I agree – same here, Maureen!