Cast Iron Pizza (Crispy, Chewy, and Foolproof)
This post may contain affiliate links. For more information, please see our disclosure policy.
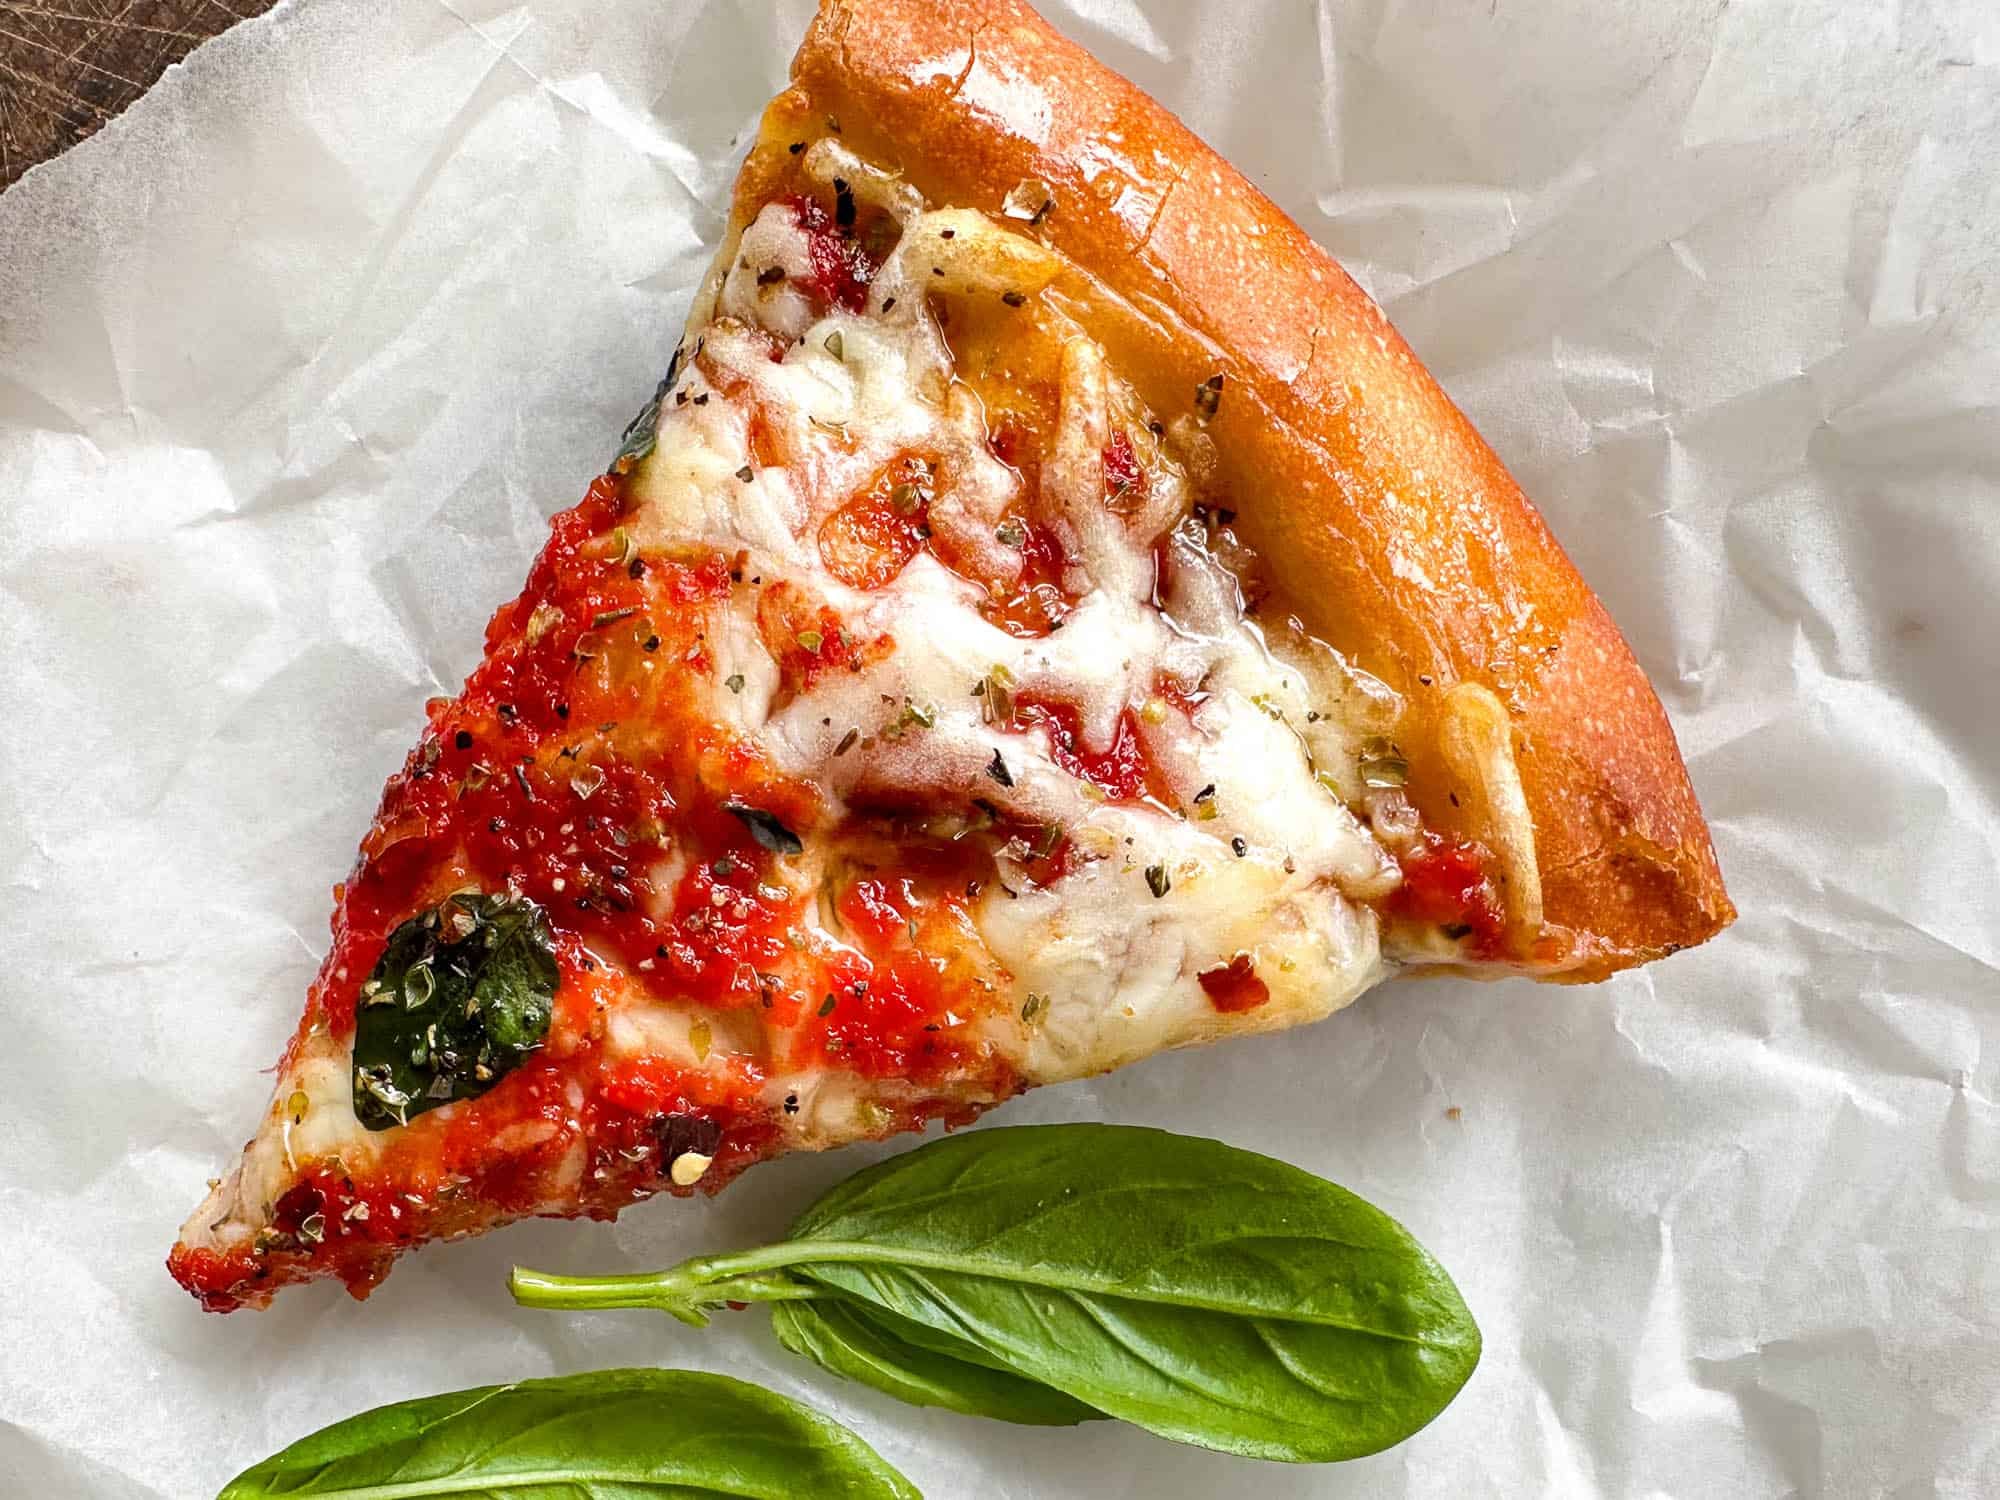
This cast-iron pan pizza bakes up with a deeply golden, crackly bottom and a super light, airy interior with just the right amount of chew. The edges turn crisp and slightly caramelized from the olive oil, while layers of melty mozzarella and optional Parm create rich, savory depth. Finished with a drizzle of olive oil, it’s crispy, flavorful, and delicious!
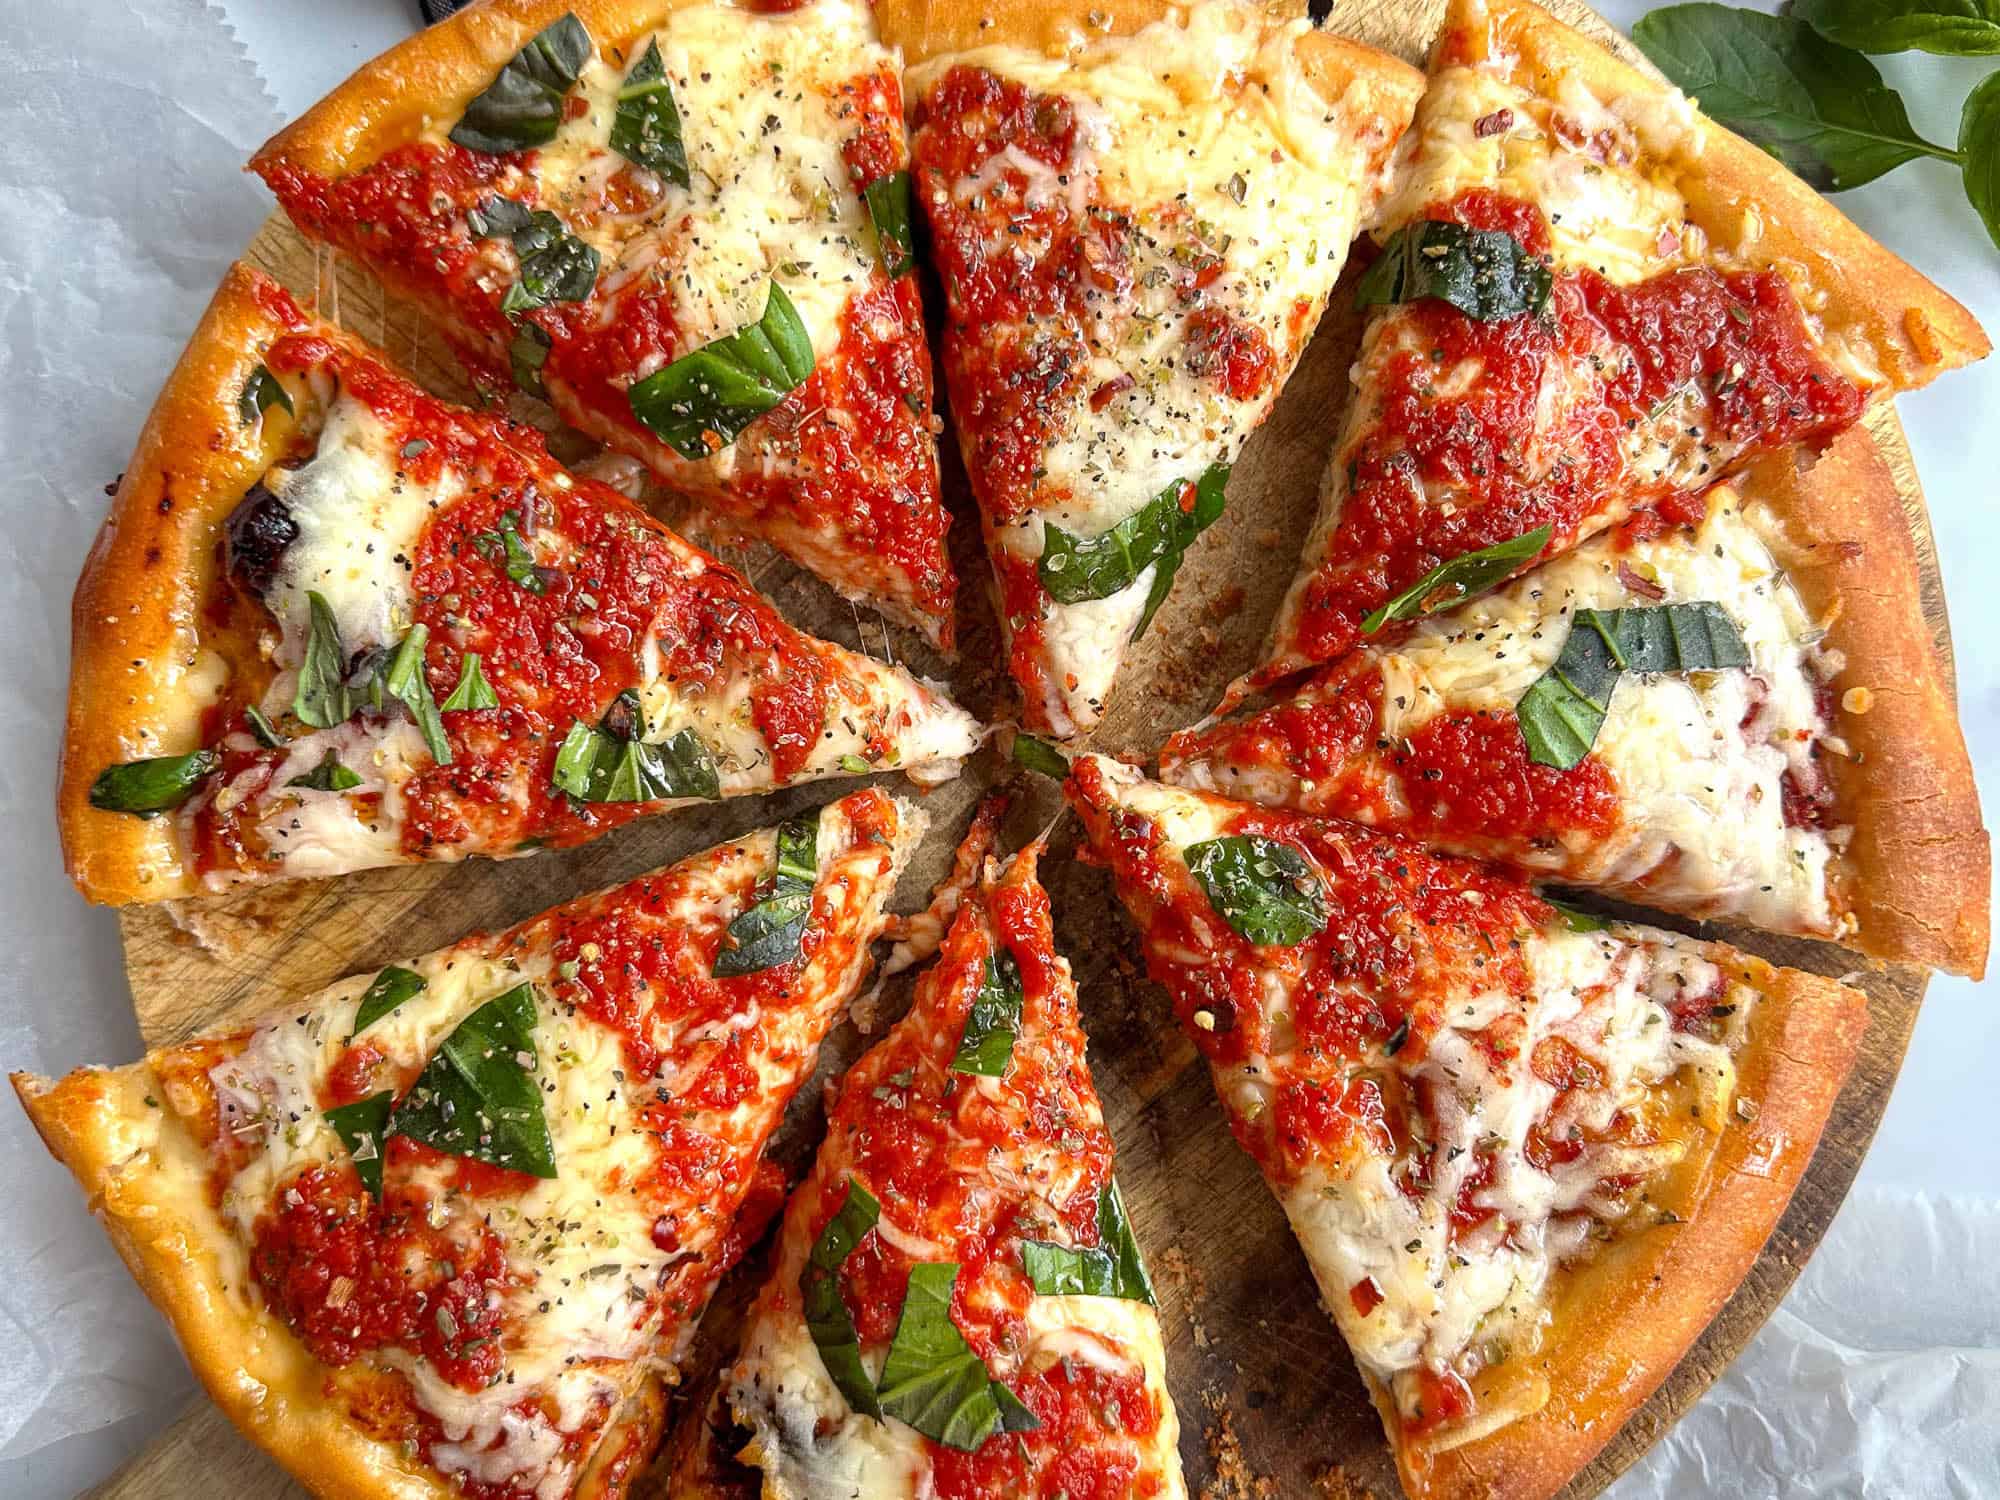
This is an exceptional homemade pizza that might make you rethink takeout!
What This Cast Iron Pizza Works
- Baking in the lower part of the oven helps create a deeply golden, crispy bottom crust.
- Bread flour and multiple folds strengthen the dough while keeping the interior light and airy.
- Layering the cheese beneath the sauce helps prevent a soggy crust.
- Starting with a cold cast-iron pan simplifies the process without sacrificing texture or flavor.
Ingredient Notes
- Bread Flour: Bread flour gives this pizza a better structure and chew. All-purpose will work, but the crust will be slightly softer and less structured.
- Cheese Blend: Low-moisture mozzarella melts beautifully, while Parmigiano Reggiano adds depth and a sharper flavor. Fresh mozzarella contains too much water for this style and may make the crust soggy.
- Yeast: Both instant and active dry work equally well here – just check that it’s not expired.
- Water Temperature: “Lukewarm” means around 100°F (38°C) – it should feel barely warm to the touch, like baby bath water. Too hot will kill the yeast, too cold will slow fermentation.
- Olive Oil: Use regular olive oil for the pan if possible (higher smoke point) and save your extra virgin olive oil for finishing after baking.
- Pizza Sauce: Too much sauce will make the crust soggy. I often use my Best Pizza Sauce recipe for this pizza.
- Salt: Table salt is specified because it dissolves easily.
Methods Overview
This cast-iron pan pizza keeps things simple but very flavorful. A short knead, brief room-temperature rest with folds, then into the fridge to build strength and depth. The next day, after coming to room temperature, the dough is stretched on the counter, transferred to the pan, given a final 2-hour rise, topped, and baked. This same cold-fermentation approach is also used in my Best New York Style Pizza Dough recipe.
The result is a chewy, airy crumb with a deeply crisp, golden bottom. Finished with a blend of mozzarella and Parm, it bakes up bubbly, crispy, and caramelized. A new favorite! I have topped mine with pepperoni in the past, but you can use whatever you’d like or keep it plain.
Pro Tips
- Cold ferment your dough for better flavor and texture.
- Let the dough rise in the oiled pan for 2+ hours before baking.
- Place cheese before sauce to prevent a soggy crust.
- Start on the bottom rack at high heat (475°F) until the bottom is dark golden and crispy.
- Check the pizza after 10 to 12 minutes and cover it if the cheese is browning too quickly.
- Don’t judge doneness by the cheese alone! The pizza is ready when the bottom is deeply golden brown and crisp.
- Remove the pizza from the pan right after baking to keep the crust crispy.
- Use a well-seasoned cast-iron pan for the best release and browning.
♥️ Loved this recipe? I’d be thrilled if you’d rate it ⭐️ and share your experience in the comments below! Your ratings and comments help other readers discover this recipe and keep this blog going. Did you add any special tweaks? Our community of home cooks would love to hear about it! ♥️
📖 Recipe
Crispy Cheesy Cast Iron Pizza
Click the heart icon ♡ above to save a recipe. To find your saved recipes later, click the heart icon on the right side of the screen near the search icon and select My Favorites.
Equipment
- cast iron pan 10 inches (may substitute a cake pan); a 9-inch will make it a little thicker, and a 12-inch will make it a little thinner
- heavy oven mitts to remove the cast iron pan from the oven
Ingredients
For the Dough
- 240 g (2 cups) bread flour
- 170 g (3/4 cup) water
- 5.3 g (1 tsp) fine sea salt
- 1 g (1/4 tsp) instant yeast
- 10 g (2 tsp) olive oil
- 5 g (1 tsp) sugar
For the Toppings
- 227 g (2 cups) low-moisture whole milk mozzarella grated
- 150 g (3/4 cup) thick pizza sauce may make homemade pizza sauce
To Finish (All Optional)
- Finely grated Parmigiano Reggiano
- Extra virgin olive oil drizzle
- Dried oregano or fresh basil
- Flaky salt
Instructions
To Make the Dough
- In a medium bowl (may use mixer or do by hand), combine the bread flour, salt, yeast, and sugar (if using). Add the water and olive oil and mix until a shaggy dough forms and no dry flour remains. Knead until the dough comes together, and then for another 2 or 3 minutes.
- Perform a series of stretch-and-folds by pulling each side of the dough up and folding it over the center. Once all four sides have been folded, turn the dough over and gently shape it into a tight ball by tucking the edges underneath as you rotate it. Rest the dough for 20 minutes and then repeat the stretch/folds and balling twice.
- Place the dough in an airtight bag or covered bowl, and transfer the dough to the refrigerator. Let it ferment for at least 6 hours and up to 24 hours.
To Shape the Pizza
- On bake day, remove the dough from the refrigerator about 3 to 4 hours before baking. Keep it covered and allow it to come to room temperature for about 1 hour.
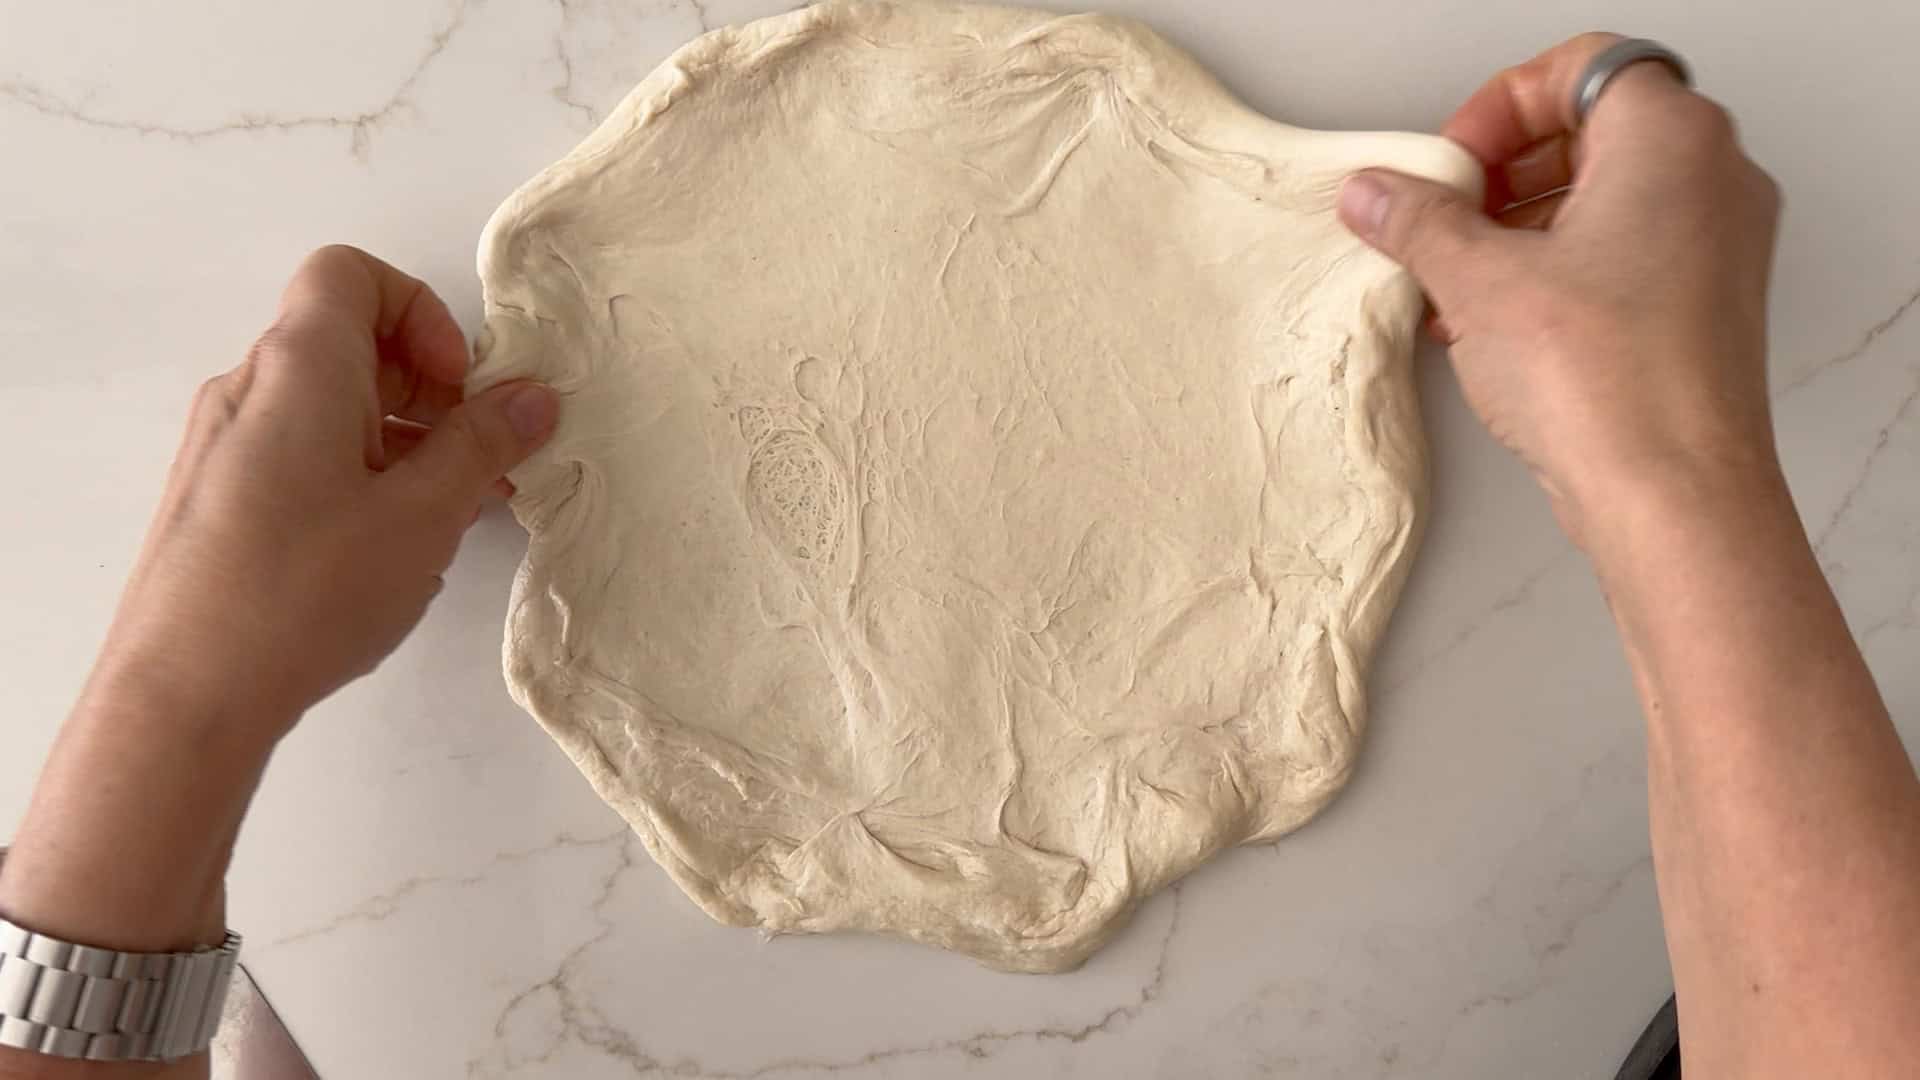
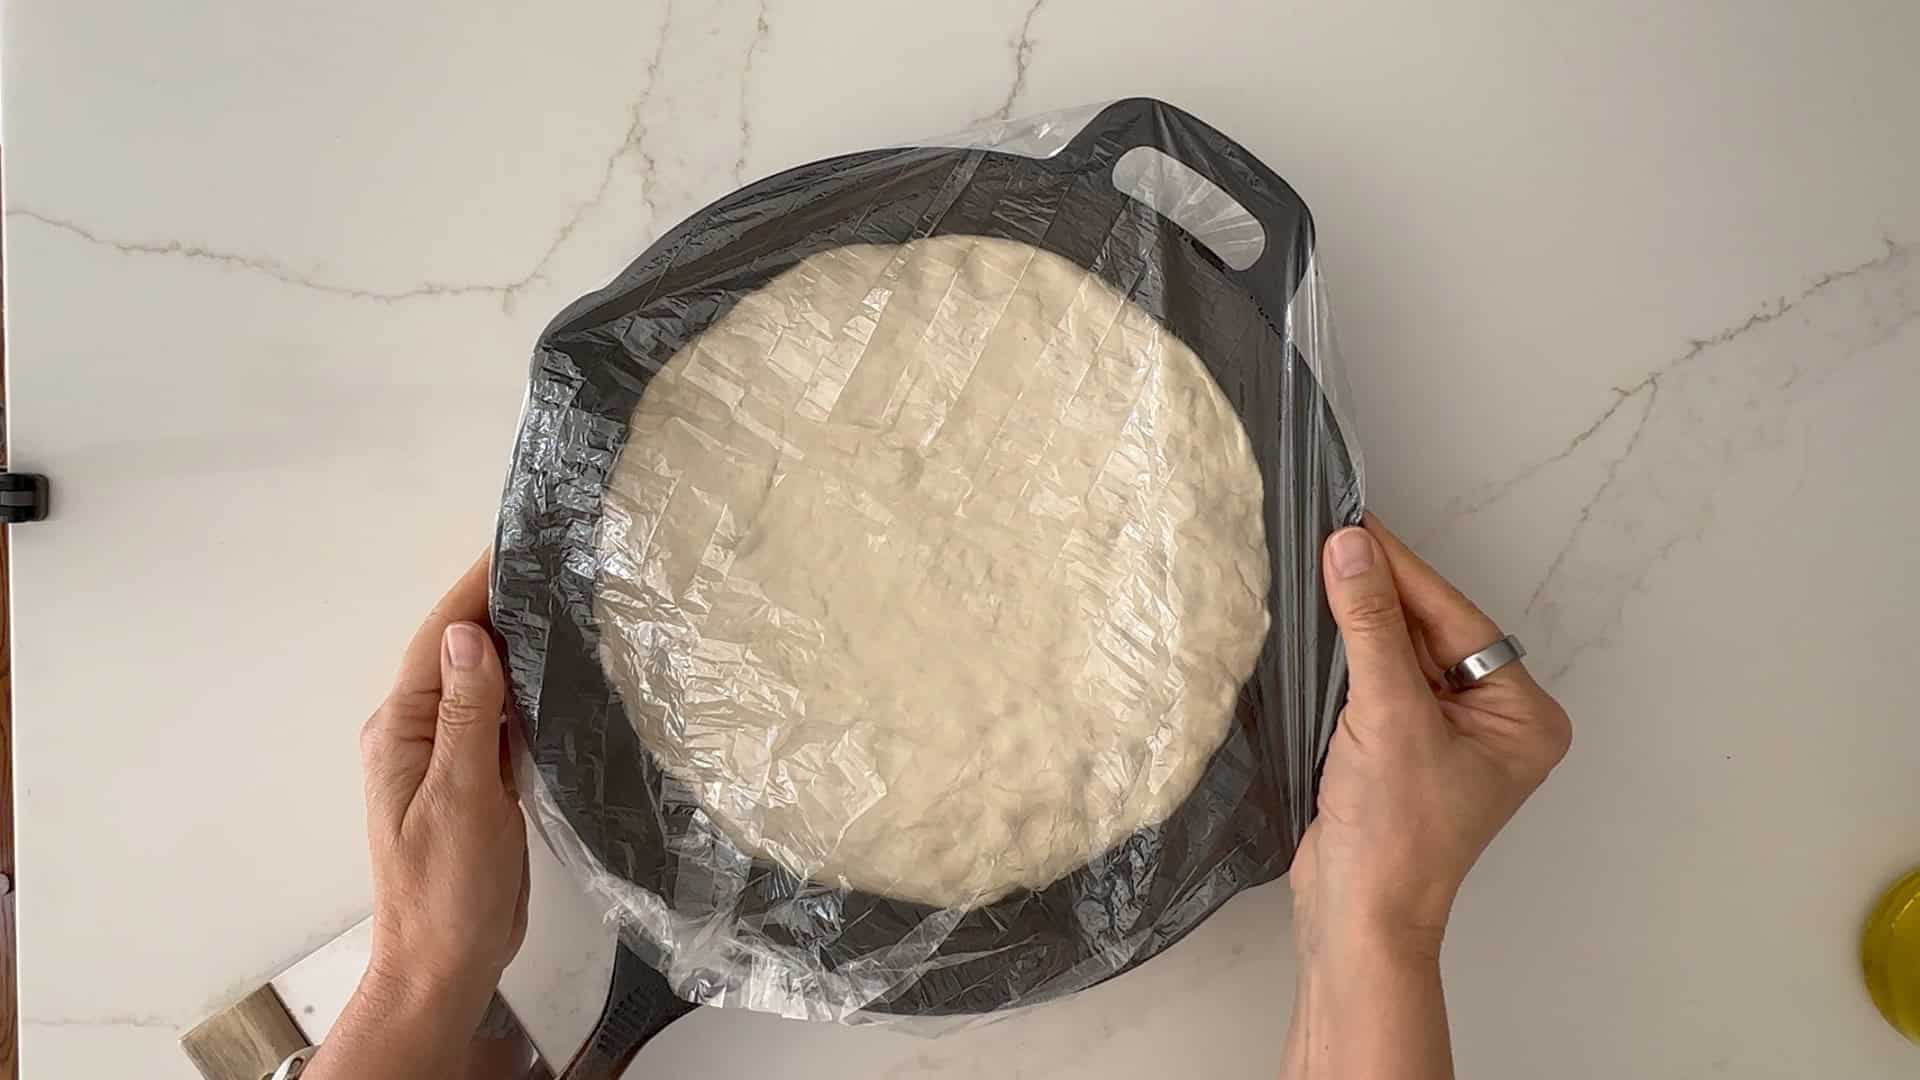
- Pour ~1½ tablespoons of olive oil into a 10-inch cast-iron skillet and coat the bottom and sides. Place the dough onto the counter first and stretch it to the size of the pan, then place it in the pan, and gently press and dimple it toward the edges.
- If it resists or shrinks back, let it rest for 10 to 15 minutes and continue pressing until it reaches the edges. Cover and let rise at room temperature for about 2 hours, until slightly puffy.
To Bake the Pizza
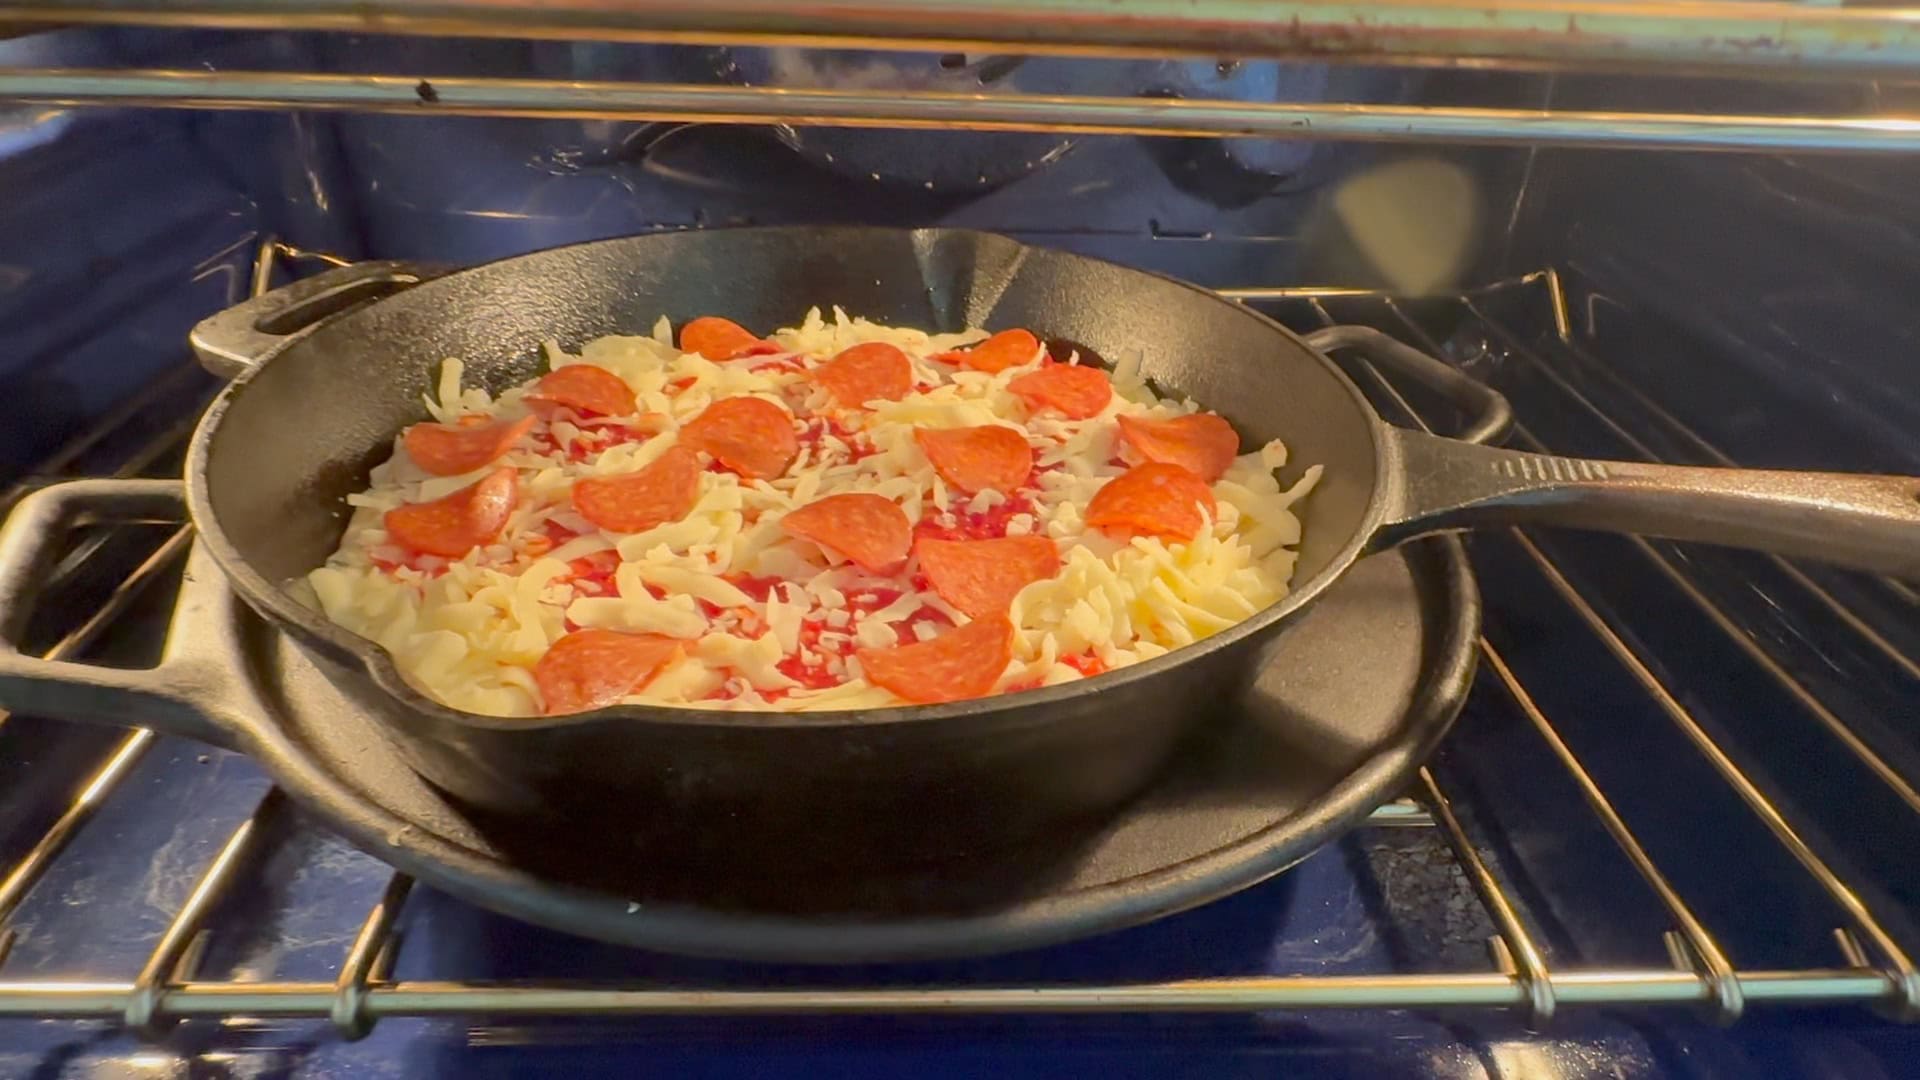
- About 30 minutes before baking, preheat the oven to 475°F with one rack closest to the oven floor and one rack in the center of the oven.
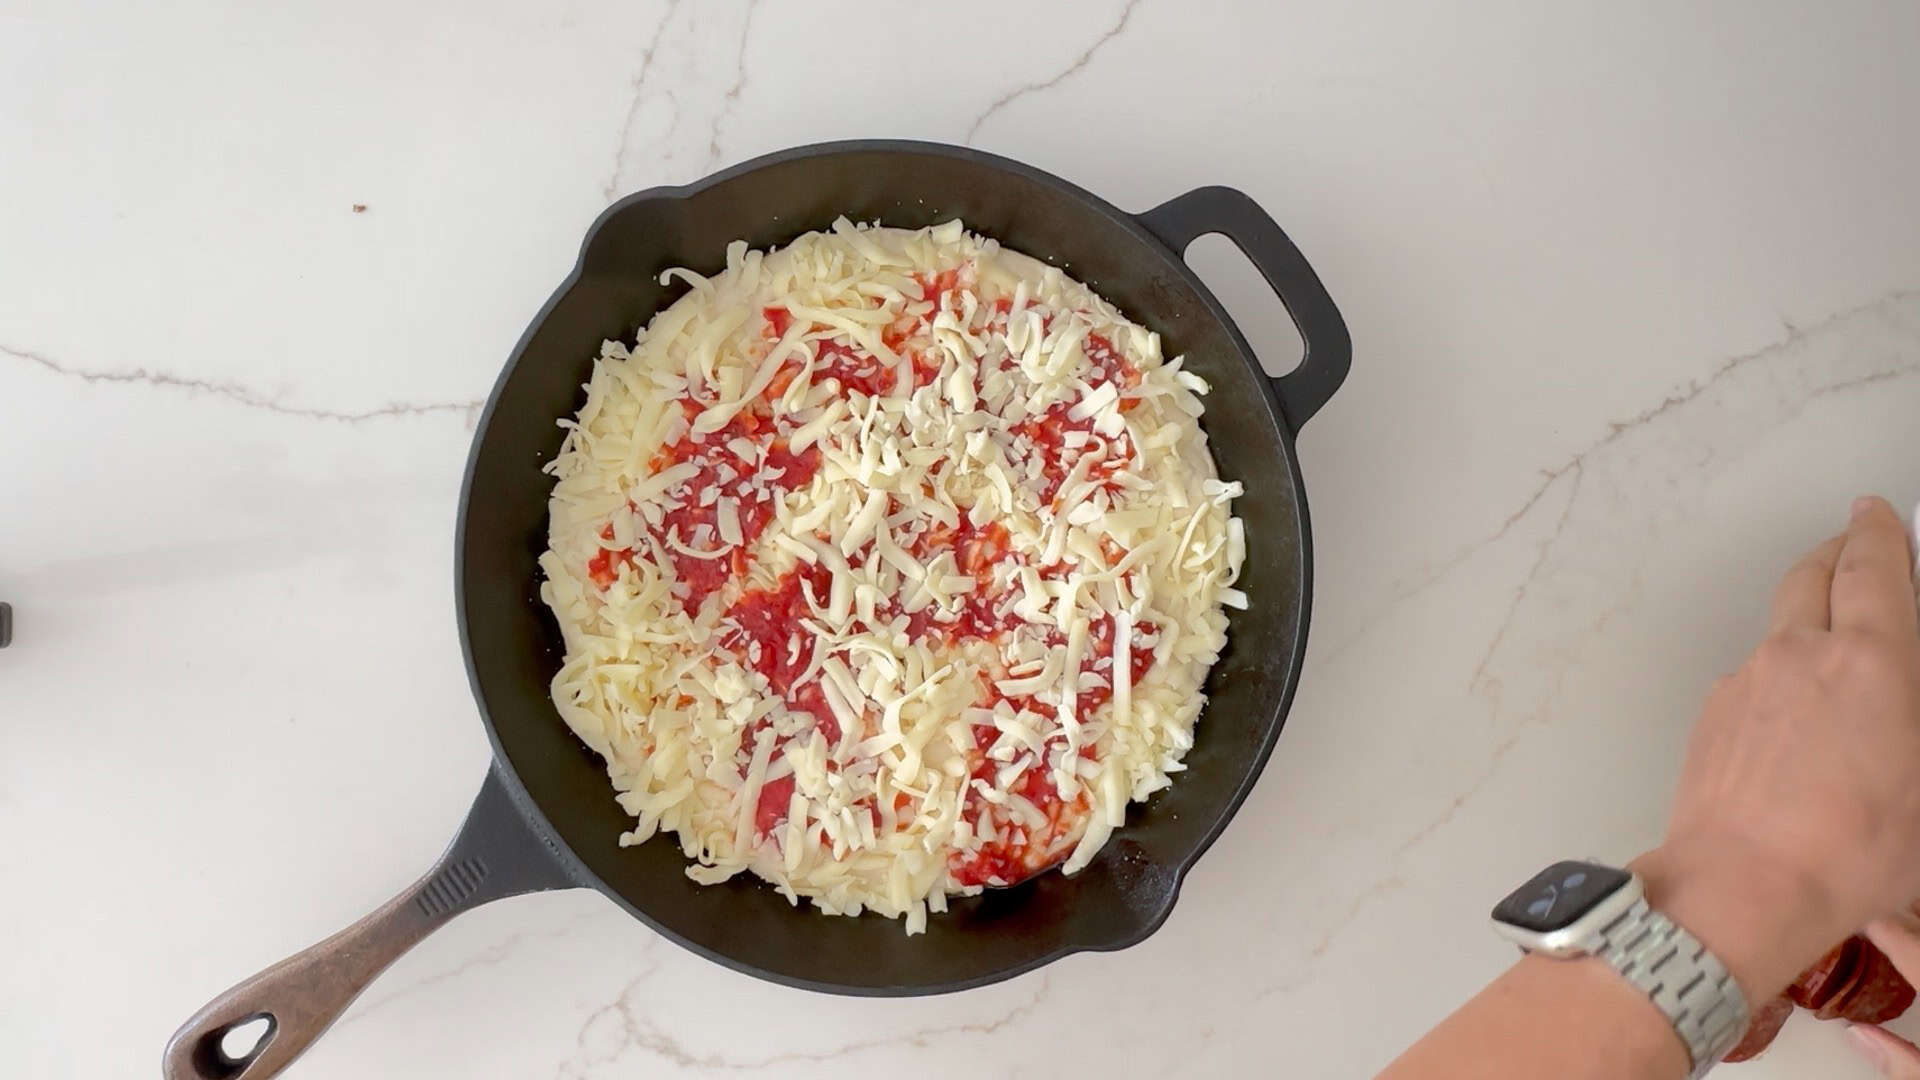
- Just before baking, scatter most of the mozzarella evenly over the dough, spreading it close to the edges if you’d like crisp, caramelized sides. Spoon the sauce in a loose spiral over the cheese, leaving some areas exposed, then finish with the remaining cheese.
- Bake on the lower rack for 12 to 15 minutes, or until the bottom is deeply golden and crisp and the cheese is bubbling and lightly browned.
- Check the top of the pizza after 10 to 12 minutes. If you’d like additional color on top, move the skillet to the center rack for the final 1 to 2 minutes. If it's browning too quickly, keep the pan in the bottom of the oven, but carefully place a piece of aluminum foil loosely over the top of the pan.
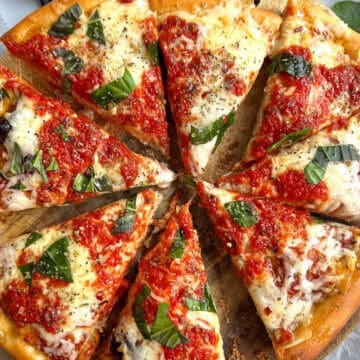
- Remove from the oven and immediately run a knife around the edges to loosen. Carefully lift the pizza out of the pan and transfer to a cooling rack for a few minutes to keep the bottom crisp.
- If you like, add fresh basil, oregano, a very light drizzle of olive oil, and some grated parmesan to the top of the pizza. Slice and serve warm!
Notes
Baker’s percentages:
- Flour: 100%
- Water: 70.8%
- Salt: 2.2%
- Yeast: 0.4%
- Olive oil: 4.2%
- Sugar: 2.1%
Nutrition
🍕 Cast Iron Pan Pizza FAQ
Do I need to preheat the skillet?
No. For this recipe, start with a cold, well-oiled skillet. As the pan heats in the oven, the oil gently fries the bottom of the dough, creating that signature crisp crust without burning the edges during shaping.
How do I get a crispy bottom?
Use a generous coating of oil on the bottom and sides of the pan, bake on the lower rack, and let the pizza finish until the bottom is deeply golden. If needed, lift it with a spatula to check — it should look browned and feel firm, not pale or soft.
Why did my dough shrink when I pressed it into the pan?
The dough just needs more time to relax. Let it rest for 10–15 minutes, then press again. Cold or under-rested dough will resist stretching. Also, I find shaping it on the counter helps (sometimes the oil in the pan makes it harder to stretch).
What size skillet should I use?
A 10-inch skillet makes a thicker, more substantial pizza (serves 2–3). A 12-inch skillet creates a slightly thinner, crisper version. Both work well — it just depends on how thick you like your crust.
Can I use store-bought dough?
Yes. Let it sit at room temperature until soft and stretchy before pressing into the pan. Cold dough won’t spread easily and can bake up dense.
Does this work with sourdough?
Does this work with sourdough? Absolutely. Use a strong, well-fermented sourdough dough that isn’t overly wet. My Crisp and Fluffy Sourdough Focaccia uses many of the same fermentation principles and is a great place to start if you’re interested in baking with sourdough.
Can I make the dough the same day?
Yes. While an overnight cold fermentation produces the best flavor and texture, you can make the dough the same day. Allow the dough to rise until doubled, perform the folds as directed, and continue with shaping and the final rise. The crust may be slightly less flavorful but will still be delicious.
Can I add toppings like pepperoni, sausage, or vegetables?
Absolutely. Pepperoni works especially well because it crisps as the pizza bakes. If using sausage, mushrooms, peppers, onions, or other vegetables, I recommend cooking them first to remove excess moisture and prevent a soggy pizza.
Comment Policy
I’d love to hear from you! Questions, tips, and respectful feedback are always welcome! Comments that are abusive, disrespectful, or intended to provoke may not be approved. (Updated 6/25/2026)